User Guide
1. Streamline Client
2.Streamline Server
3. Starting Up
4. Connecting data
5. Demand and Sales Forecasting
6. Inventory Planning
7. Reference
1. Streamline Client
2.Streamline Server
3. Starting Up
4. Connecting data
5. Demand and Sales Forecasting
6. Inventory Planning
7. Reference
 Add this page to your book
  Remove this page from your book
 In this article we describe:
The key entities that Business Central handles are items and warehouses. Business Central items have the same meaning as items in Streamline; Business Central warehouses are locations in Streamline.
Data imported into Streamline is described in the Inventory Management Systems article.
Streamline uses an API extension for Business Central to import and export data. It should be downloaded, unzipped and installed before using this connection.
The mentioned above extension uses Business Central OData Services and API Services. If you use the Cloud version, these services are typically enabled. In the case of the On-Premises version, they might be disabled. Thus, check if they are enabled, and if they are not, enable them, using the following steps:
1. Open Business Central Administration tool (see figure below).
2. Expand the root node and select your Business Central instance ('BC170' in our example).
3. Expand the OData Services section on the right and check out if Enable API Services and Enable OData Services settings have checkmarks (see figure below).
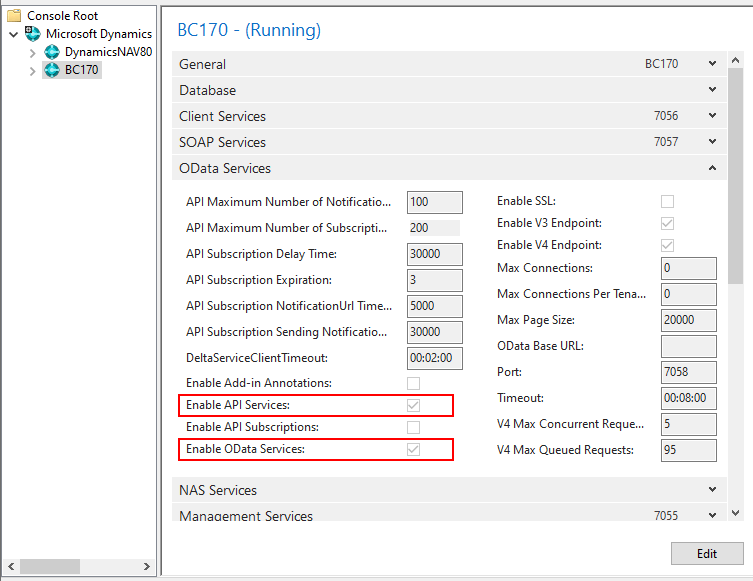
If they are not enabled, enable them using the steps below.
4. Click the Edit button at the bottom of the page, set the checkboxes, and then click the Save button.
5. After that, select the root node in the tree, right-click on the Business Central instance, and select the Restart command from the context menu (see figure below).

To install an extension in the Cloud version, do the following:
1. Log in to your Business Central.
2. Click on the Setup & Extensions in the top menu.
3. Then, click on the Extensions in the popup menu (see figure below).

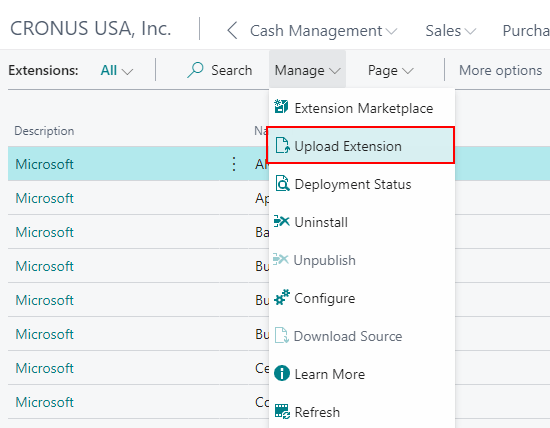
4. Click Manage in the second-line menu, then select the Upload Extension command (see figure below).
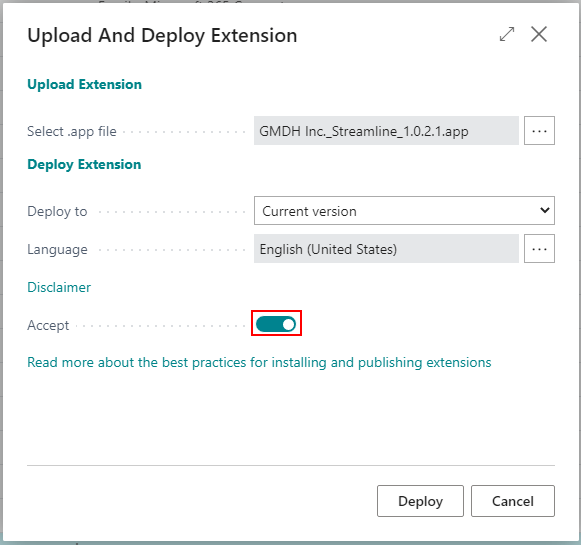
5. Click on the bar icon next to the Select .app file setting in the Upload And Deploy Extension window appeared (see figure below).
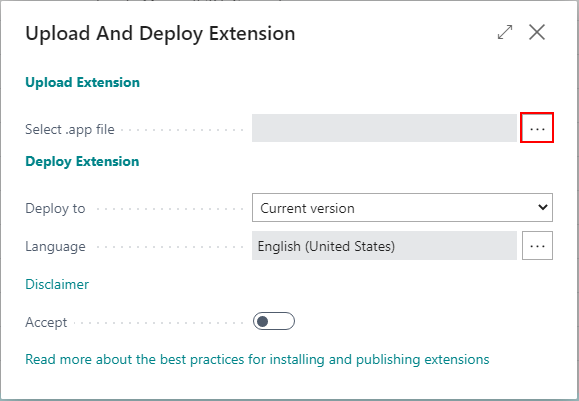
6. In the appeared dialog click the Choose… button and select the extension file.
7. Set the option Accept enabled and click the Deploy button (see figure below).
7. Deploying of an extension typically takes several minutes. You can track the deployment status of the extension by going to the menu Manage > Deployment status of the extensions page. The Extension Deployment Status window appears. If the Status is Completed for the extension, you can start using this connection (see figure below).

To install an extention for On-Premises version, do the following:
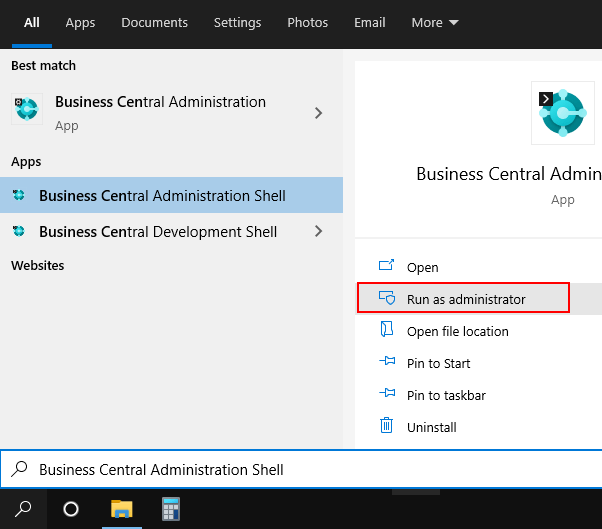
1. Start the Business Central Administration Shell as administrator (see figure below).
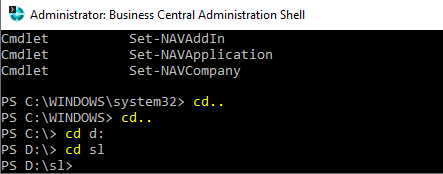
2. Go to the folder with the unzipped extension using the command line. In our example, the extension file is on disk drive D, in the sl folder (see figure below)
3. Publish the extension by running the following command:
Publish-NAVApp -ServerInstance YourDynamicsNAVServer -Path “.\MyExtension.app”
where:
YourDynamicsNAVServer is the name of the Business Central instance.MyExtension.app is the file name of the extension.In or example, the command would be:
Publish-NAVApp -ServerInstance BC170 -SkipVerification -Path “.\GMDH_Inc._Streamline_1.0.2.1.app”
4. Synchronize the schema of the database to the extension by running the following command:
Sync-NavApp -ServerInstance YourDynamicsNAVServer -Name ExtensionName -Version x.x.x.x
where:
YourDynamicsNAVServer is the name of the Business Central instance.ExtensionName is the extension name, which in our case is 'Streamline'.x.x.x.x is the extension version, which is given at the end of the extension file name. In our example, it is 1.0.2.1.In or example, the command would be:
Sync-NavApp -ServerInstance BC170 -Name Streamline -Version 1.0.2.1
5. Install the extension using the command:
Install-NAVApp -ServerInstance YourDynamicsNAVServer -Name “My Extension”
where:
YourDynamicsNAVServer is the name of the Business Central instance.My Extension is the extension name, which in our case is 'Streamline'.In or example, the command would be:
Install-NAVApp -ServerInstance BC170 -Name “Streamline” -Version 1.0.2.1
See the result of the executed commands in the figure below.

To create a new Streamline project based on Business Central data:
1. Go to the menu File > New > Dynamics BC. The Dynamics 365 Business Central dialog appears (see figure below).
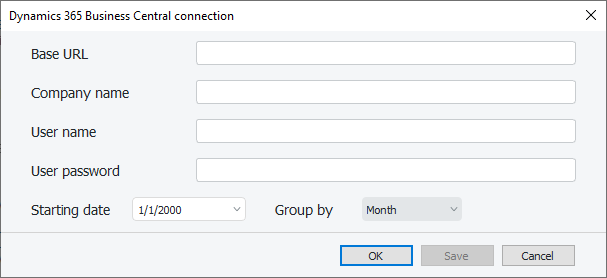
2. Enter the base URL of the Business Central API services into the Base URL field.
If Business Central is installed on-premises, the base URL looks like:
http(s)://<host>:<port>/<server_instance>
where:
<host> is the LAN name or IP address of the machine running the Business Central instance.<port> is the OData port specified during the installation of Business Central.<server_instance> is the name of the Business Central instance.If Streamline is opened on the same machine where Business Central is installed having the default OData port, no SSL enabled, and its instance name is 'BC170', the base URL will look like:
http://localhost:7048/BC170
If you use the Cloud version of Business Central, the base URL looks like:
https://api.businesscentral.dynamics.com/v2.0/<tenant_id>/Production
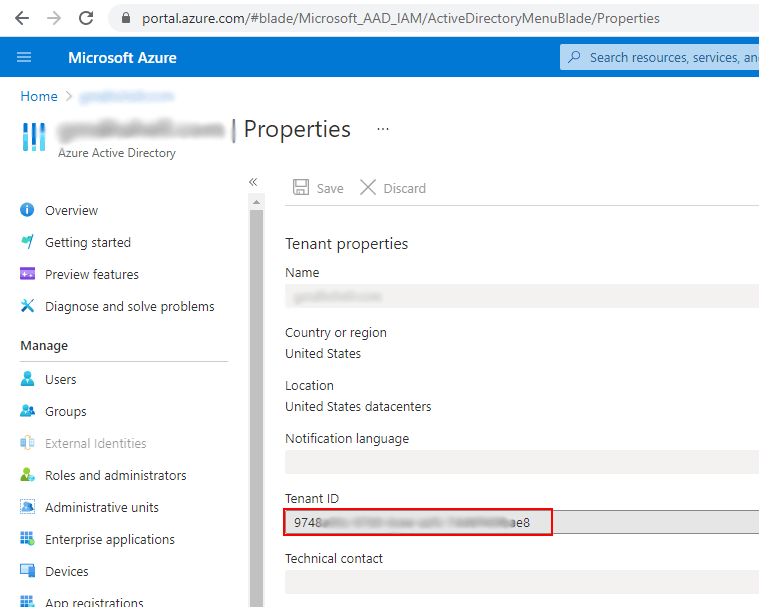
where <tenant_id> is an identifier of the Business Central instance in the cloud. To figure out your tenant ID, do the following:
2.1. Log in into your Azure portal.
2.2. Click the View within the Manage Azure Active Directory section.
2.3. Click on the Properites in the left-side bar.
2.4. Tenant ID field shows your tenant ID (see figure below).
3. Enter the name of your company into the Company name field.
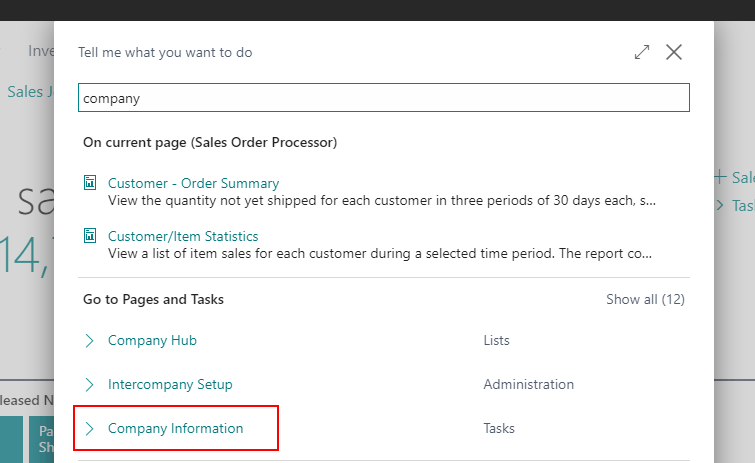
To find out the company name, do the following:
3.1. Log in to your Business Central.
3.2. Click on the search icon in the right-top corner and type 'company' in the search bar. Then, select the Company information option from the search results (see figure below).
3.3. Your company name is shown in the field Name of the General section (see figure below).

4. Enter the credentials of a Business Central user into User name and User password fields.
If Business Central installed on-premises, these credentials depend on the credential type used to access Business Central. The credential type is set up using the Credential Type setting on the General section of the Business Central Server instance using the Business Central Server Administration tool. With the default installation of Business Central, the Windows credential type is used, which means that you can use the credentials of your windows account (however, the account must have a password) to access Business Central.
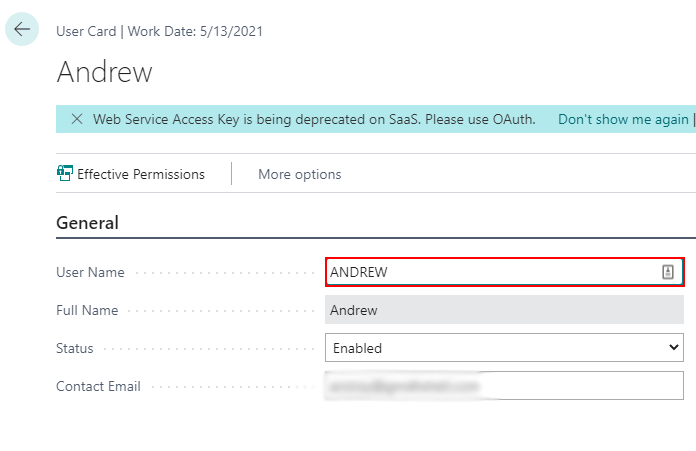
If you use the Cloud version of Business Central, a Web Access Key is used as the password. To generate such a key for a user, do the following:
4.1. Open User Card of the user you want to grant access to the Web Services. The value of the User Name field is the one you need to provide in the connection dialog (see figure below).
4.2. Click on the bar icon with dots next to the Web Services Access Key field (see figure below).
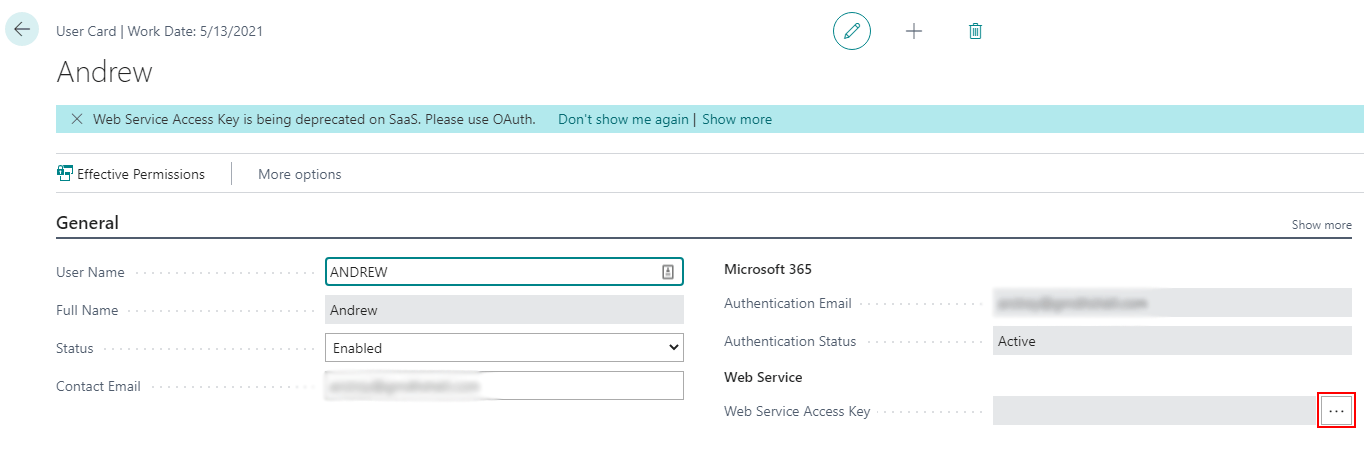
4.3. Set the option Key never Expires and click OK in the appeared dialog.
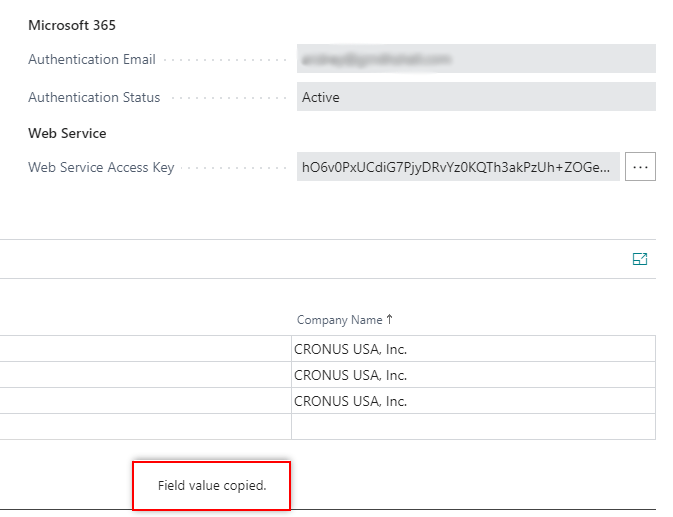
4.4. Then, a key will be generated in the Web Service Access Key. To copy it, click on the field and press Ctrl+C. After that, a popup, indicating that the copy operation was successful, arises (see figure below).
5. Enter or choose the date to start the import from in the Starting date control.
6. Choose the data aggregation period in the Group by control. Streamline automatically aggregates your data in the given periods (days, weeks, or months). For example, if you want to see the forecasts, replenishment plans, and other reports in months, group the data by month.
7. Click OK to start the import.
 Manage book (
 Help
Help