User Guide
1. Streamline Client
2.Streamline Server
3. Starting Up
4. Connecting data
5. Demand and Sales Forecasting
6. Inventory Planning
7. Reference
1. Streamline Client
2.Streamline Server
3. Starting Up
4. Connecting data
5. Demand and Sales Forecasting
6. Inventory Planning
7. Reference
Streamline's Database connection is designed to create a new project through a direct connection to the ERP's database. The connection requires entering login information such as user name and password. In this guide, we show how to create a database login with read-only permissions if your ERP runs Microsoft SQL Server.
To create the login, do the following:
1. Open Microsoft Management Studio.
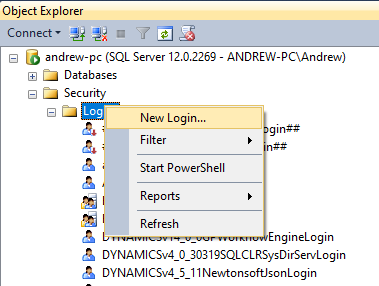
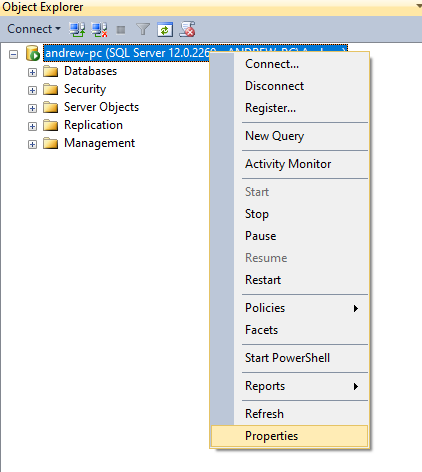
2. In the Object Explorer window expand the Root element (your server) > Security > Logins. Then, right-click at the Logins node and select the New Login… command from the context menu (see figure below).
3. Set up the new login (see figure below).
3.1. Enter a name for the new login into the Login name field.
3.2. Choose the SQL Server authentication option.
3.3. Enter a password and confirm it.
3.4. Uncheck the Enforce password policy option.

4. Add a new user to the database based on the newly created login. In our example, we are creating a new user for the Microsoft Dynamics NAV database.
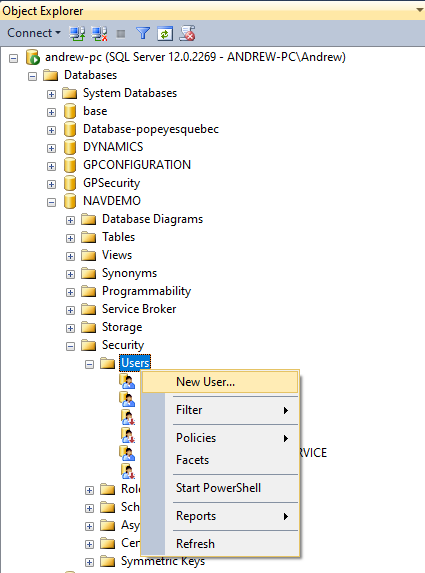
4.1. Go to the Object Explorer. Expand Databases > <Your database name> > Security > Users.
4.2. Right-click at the Users node and select the New user… command from the context menu (see figure below).
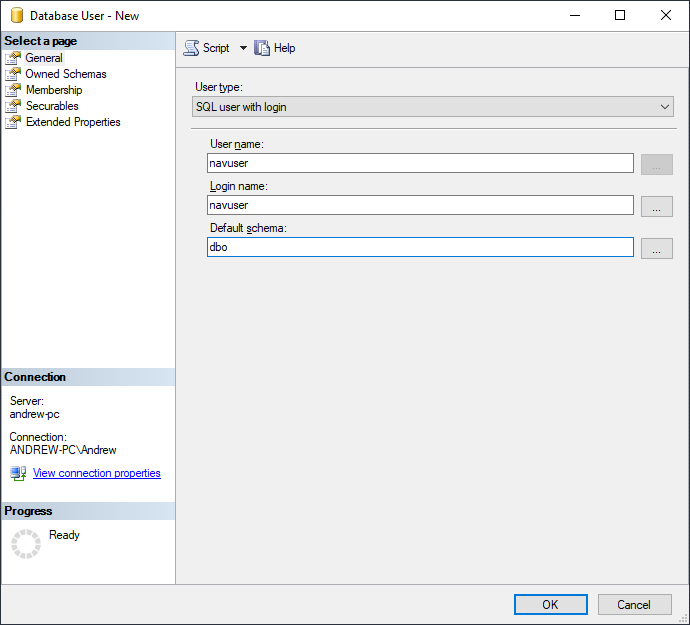
4.3. Select the User type as SQL user with login.
4.4. Enter a name for the new user into the User name field. In our example, it coincides with the login name.
4.5. Enter the login name that we have created previously into the Login name field.
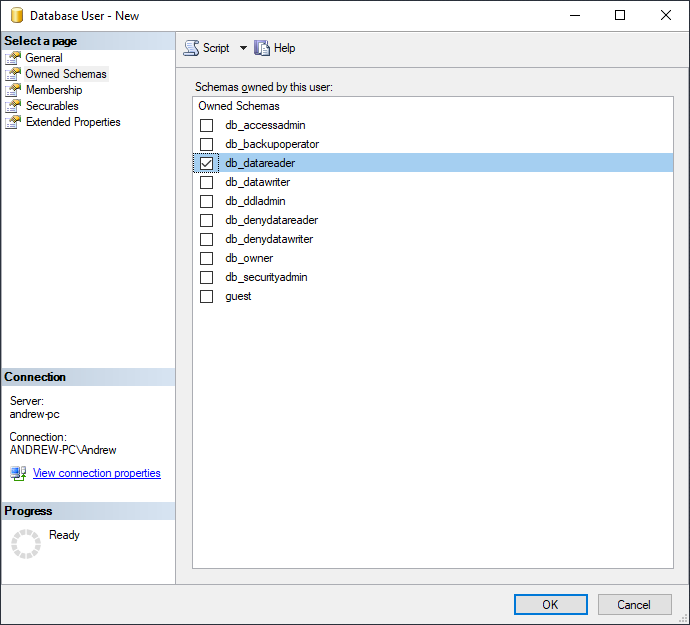
4.6. Go to the Owned Schemas page and select the db_datareader option (see figure below).
4.7. Go to the Membership page and select the db_datareader option (see figure below).

5. Enable the SQL Server authentication mode.
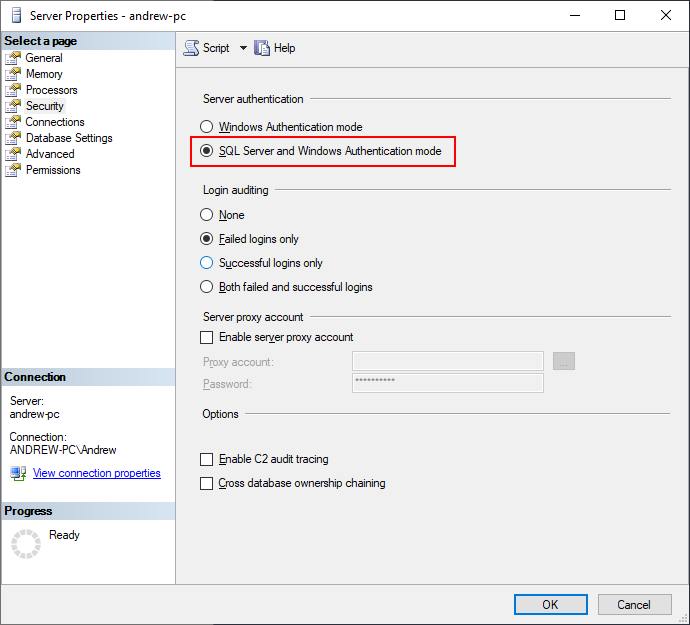
5.1. Open Server properties (see figure below).
5.2. Go to the Security page and select the SQL Server and Windows Authentication mode (see figure below).
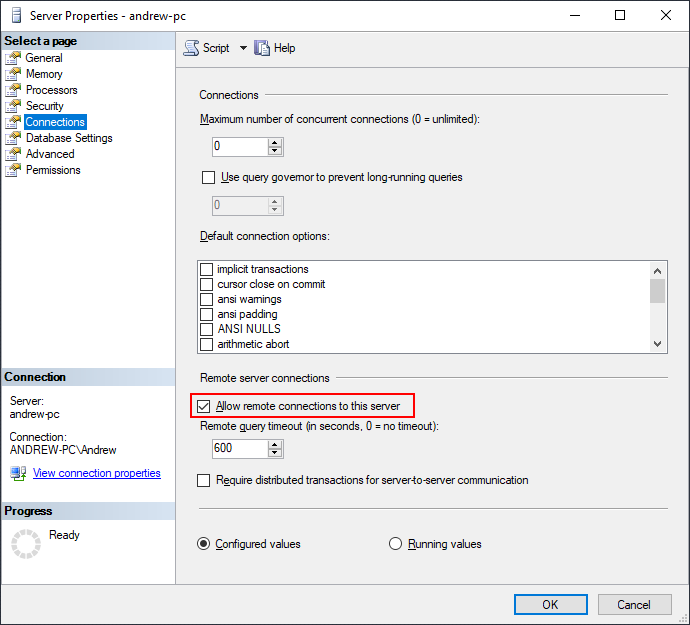
5.3. Go to the Connections page and check the Allow remote connections to this server option (see figure below).
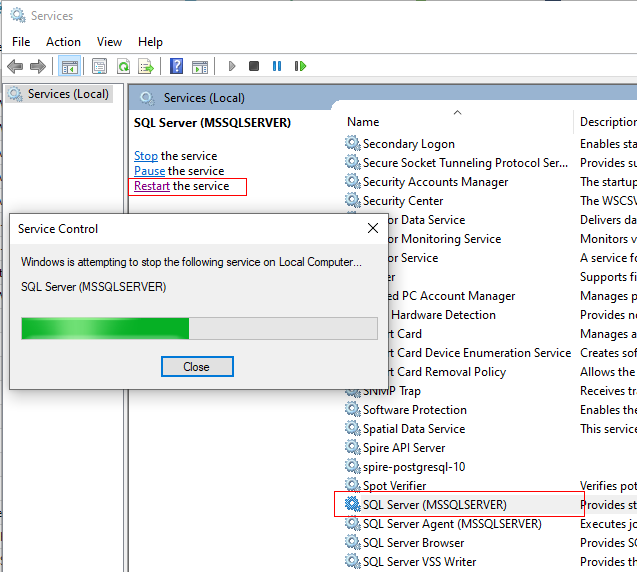
6. Restart your SQL Server.
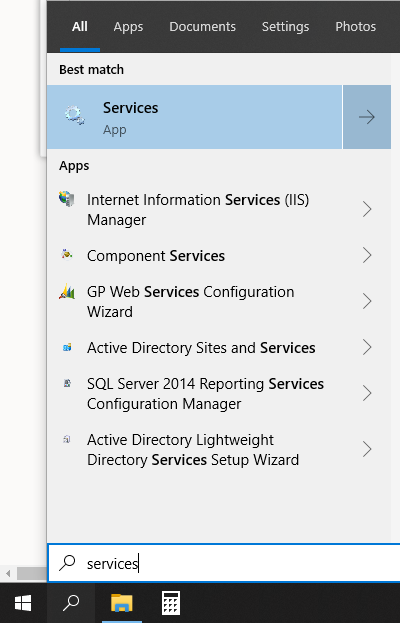
6.1. Go to the Windows Taskbar, click the Search icon, type in 'Services', and press Enter (see figure below)
6.2. Find the SQL Server service and click the Restart link found in the left-top corner of the window (see figure below).