User Guide
1. Streamline Client
2.Streamline Server
3. Starting Up
4. Connecting data
5. Demand and Sales Forecasting
6. Inventory Planning
7. Reference
1. Streamline Client
2.Streamline Server
3. Starting Up
4. Connecting data
5. Demand and Sales Forecasting
6. Inventory Planning
7. Reference
 Add this page to your book
  Remove this page from your book
 In this article we describe:
Key entities that Fishbowl handles are parts and location groups. There are several part types in Fishbowl. Streamline treats parts of the Inventory type as items and location groups as locations.
Data imported into Streamline is described in the Inventory Management Systems article.
To create a new Streamline project based on Fishbowl data:
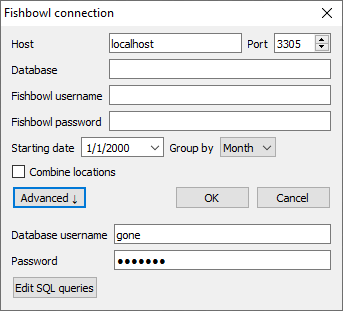
1. Go to the menu File > New > Fishbowl connection. The Fishbowl connection dialog appears (see figure below).
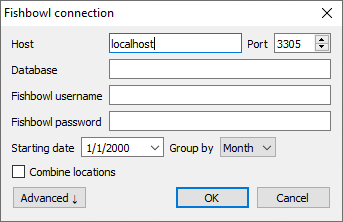
2. Enter the machine LAN name (or IP) running the Fishbowl Server into the Host field. The localhost option is set by default meaning that the Fishbowl Server is installed on the same computer where we open Streamline.
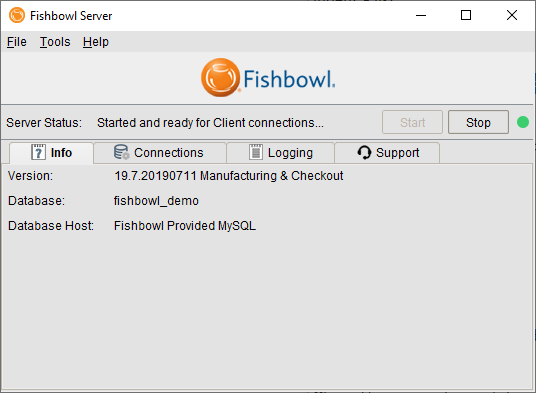
3. Specify the port for the MySQL database connection in the Port field. Streamline uses the default Fishbowl port 3305. If it doesn't work, to find the proper port, complete the following steps:
3.1. Click the Fishbowl server icon in the system tray. The Fishbowl Server window opens (see figure below).
3.2. Go to the menu Tools > Options. The Fishbowl Server Administration window appears (see figure below).
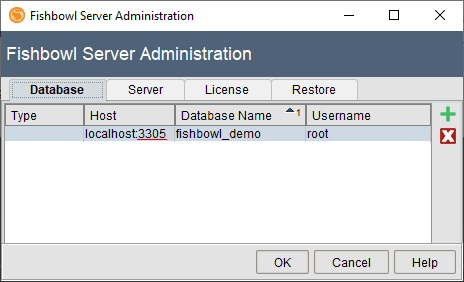
The port is specified after colon in the Host column (see figure above).
4. Enter the name of the Fishbowl database you are connecting to into the Database field. This one can be found in the Database name column of the Fishbowl Server Administration window.
5. Enter the credentials (username and password) of the Fishbowl account that has read permissions into the Fishbowl username and Fishbowl password fields.
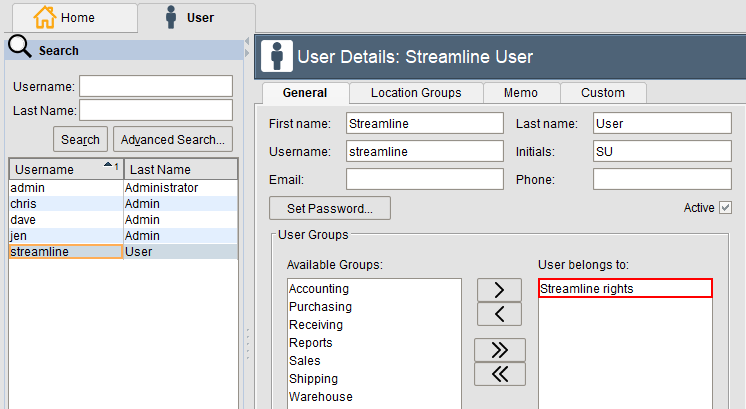
As an example, we created a new user group in Fishbowl called Streamline rights and assigned it View Only right across all of the Fishbowl modules (see figure below).
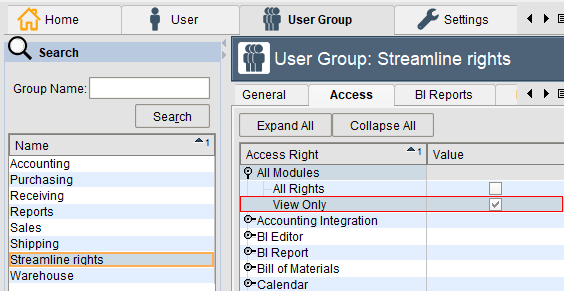
Then, we created a new user called streamline and added it to the Streamline rights group (see figure below)
6. Enter or choose the date to start the import from in the Starting date control.
7. Choose the data aggregation period in the Group by control. Streamline automatically aggregates your data in the given periods (days, weeks, or months). For example, if you want to see the forecasts, replenishment plans, and other reports in months, group the data by month.
8. Click OK to start the import.
The Advanced button shows additional settings used to import the data (see figure below). These settings should only be re-configured if defaults don't work.
The Combine locations option allows you to merge all your locations into a single one. This is useful when your warehouses are located next to each other, so they can be planned as a single aggregated warehouse.
When you first export planned orders into Fishbowl using the Create button of the Planned orders preview dialog, Streamline shows the message in the figure below.
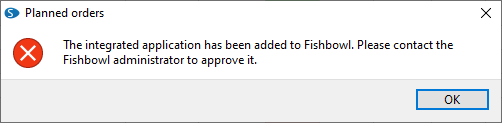
Streamline is saying that it was added to the list of Fishbowl integrated applications and now is waiting for the administrator to approve it. This should be done only once. This also means that previously selected orders were not exported, and you will need to repeat the export again (explained below).
To approve Streamline:
1. Log in to Fishbowl under administrator.
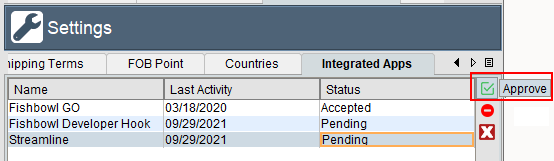
2. Go to the Setup > Settings > Integrated apps.
3. Select the line with Streamline in the list and click the approve button (see figure below).
4. Repeat your export by clicking the Update data in Streamline and exporting your orders through the Planned orders preview dialog.
 Manage book (
 Help
Help