User Guide
1. Streamline Client
2.Streamline Server
3. Starting Up
4. Connecting data
5. Demand and Sales Forecasting
6. Inventory Planning
7. Reference
1. Streamline Client
2.Streamline Server
3. Starting Up
4. Connecting data
5. Demand and Sales Forecasting
6. Inventory Planning
7. Reference
 Add this page to your book
  Remove this page from your book
 In this article we describe:
The key entities in Streamline are items, locations, and channels. QBO is a much simpler application with respect to these terms; there is no ability to manage inventory by location and track sales by different channels. Therefore, SKU in QuickBooks Online can be referred to planning item in Streamline.
There are two integration limitations between Streamline and QBO due to the API limitations of the latter. These are:
Data imported into Streamline is described in the Inventory Management Systems article.
To create a new Streamline project from QuickBooks Online data, do the following:
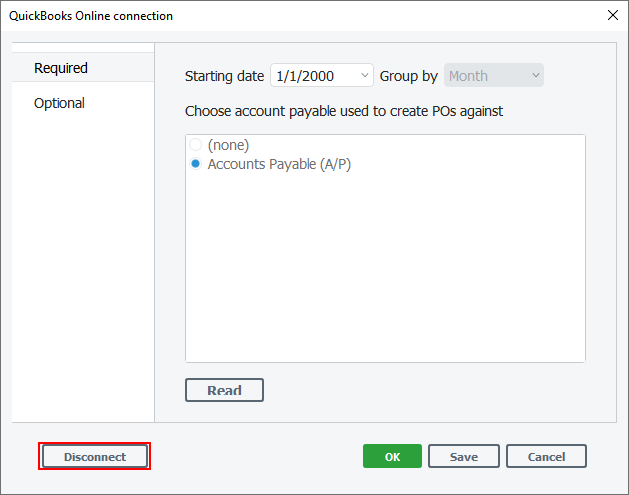
1. Go to the File > New > QuickBooks Online connection. The QuickBooks Online connection dialog appears (see figure below).
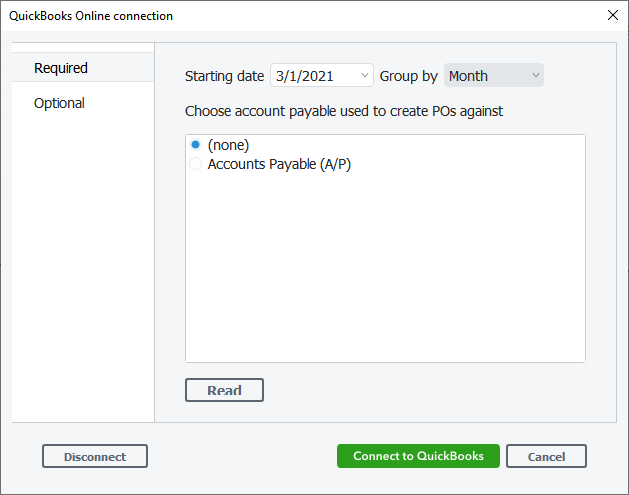
2. Enter or choose the date to start the import from in the Starting date control.
3. Choose the data aggregation period in the Group by control. Streamline automatically aggregates your data in the given periods (days, weeks, or months). For example, if you want to see the forecasts, replenishment plans, and other reports in months, group the data by month.
4. The next step is to set up the account payable that will be used by Streamline to create POs based on calculated recommendations. Click the Read button to get a list of your accounts payable in QBO. If you connect to QBO for the first time, this typically starts the authorization process. After the authorization, select the according accounts payable from the list.
5. Click the Connect to QuickBooks button to import data.
The authorization process starts if you:
a) have not granted Streamline access to your company's data yet, and you click the Connect to QuickBooks button or Read button in the QuickBooks Online connection dialog.
b) you had disconnected Streamline from your QBO company, and click the OK or Read button in the QuickBooks Online connection dialog, or the Update data button in Streamline.
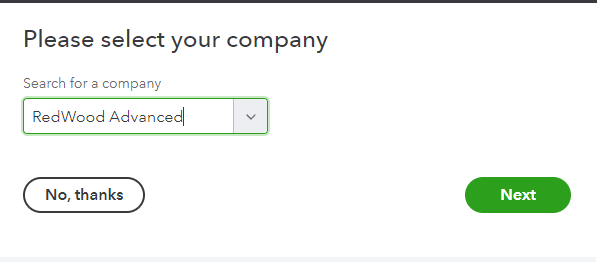
To complete the authorization process successfully, do the following:
1. If you have several companies in your QBO account, select the one you want to get data from and click the Next button (see figure below).
2. The next screen asks you to provide Streamline access to your company's data. Click the Connect button to give access (see figure below).

3. If everything goes well, a screen with successful authorization is displayed (see figure below).
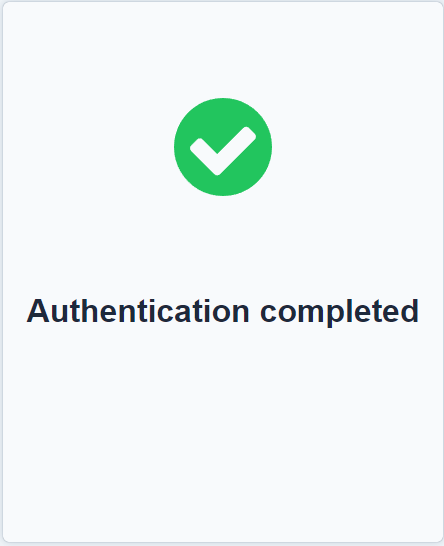
4. Now, you may close this page and return to Streamline.
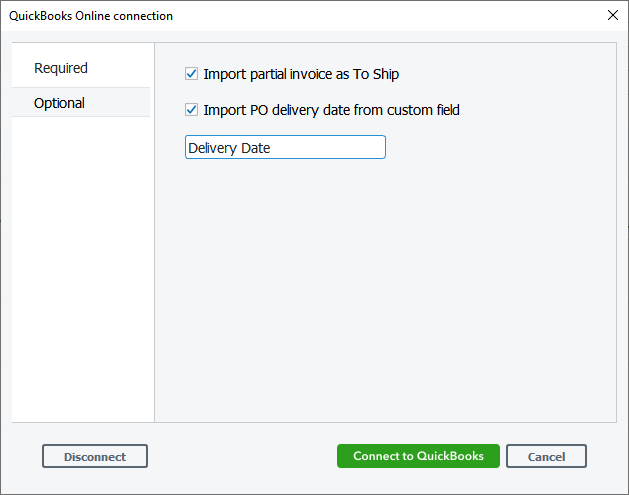
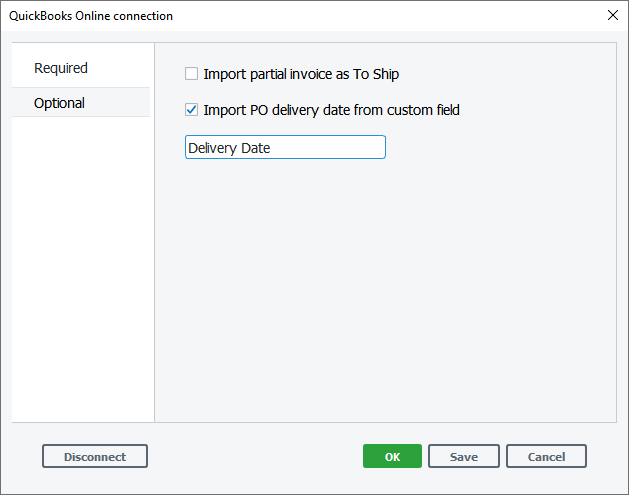
Select the Optional tab of the dialog to view the available import options (see figure below).
1. Go to your QBO company.
2. Click on the gear icon at the right-top corner and select Account and settings under the Your company section (see figure below).

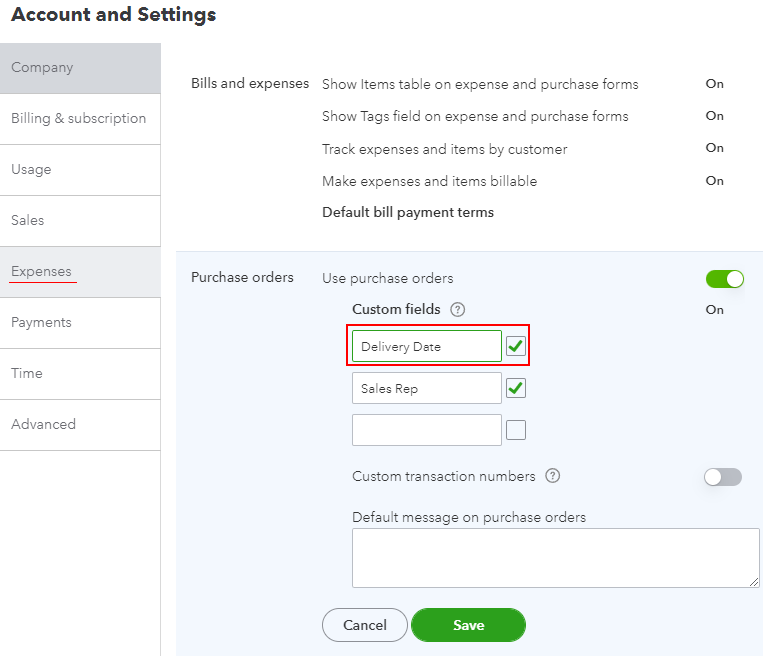
3. Select the Expenses section and click on the Purchase orders area to roll it down. Then, define a custom field by entering its name, for example, Delivery Date. Set the checkmark near it (see figure below).
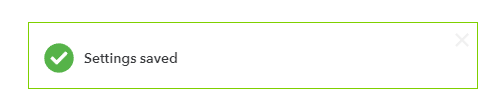
4. Ensure that the Use purchase orders option is checked and save your work by clicking on the Save button. Then click the Done button at the right-bottom corner. After that, you should see a pop-up message saying that the settings were saved (see figure below).
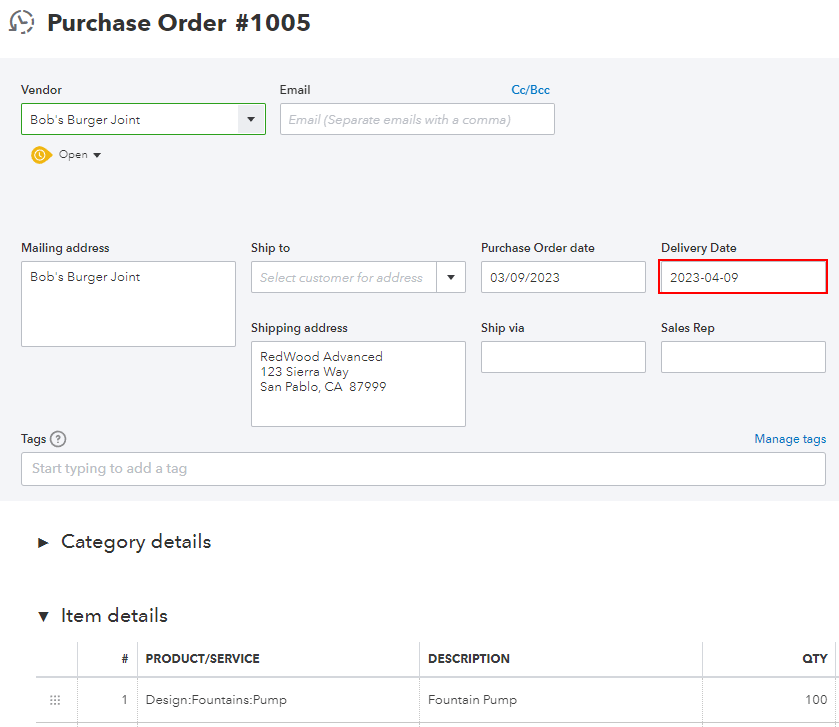
5. Go to one of your open POs and fill in the Delivery Date field that we just set up (see figure below).
6. Save your order by clicking the Save button at the right-bottom corner.
7. Go back to Streamline. Go to the File > Edit connection settings. The QuickBooks Online connection dialog opens. Go to the Optional tab. Select the option Import PO delivery date from custom field and enter the name of the field exactly as you had it in the QBO on the step 3 (see figure below).
8. Click the Save button in the dialog, to save the settings. Click the Save button on the main window toolbar, to save settings to the project.
7. Click the Update data button, to import the last changes in the project.
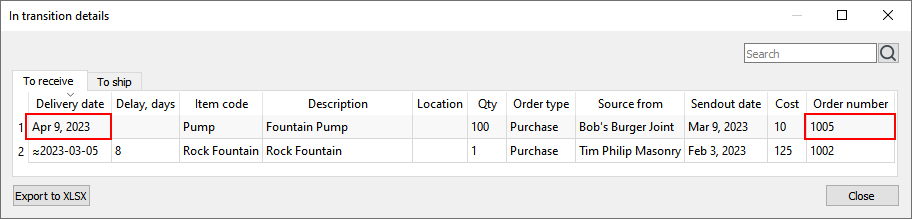
9. Now, go to the Inventory tab and click the In-transition button on the toolbar. The delivery date for the imported order should now display the date you have in the QBO order (see figure below).
Disconnecting Streamline from your QBO company means that Streamline projects which were created based on the company's data will not have access to those data anymore. After that, you will not be able to update your Streamline projects unless you go through the authorization process again.
There are two ways to disconnect Streamline from QBO. You can disconnect Streamline either from your QBO company or from your Streamline project.
To disconnect Streamline from QBO, do the following:
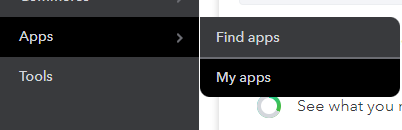
1. Log into your QBO company and go to Apps > My apps (see figure below).
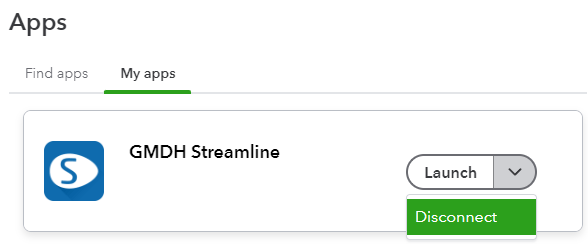
2. Find the Streamline application in the list, click on the down arrow near the button Launch, and choose Disconnect (see figure below).
3. Choose the disconnect reason and click the Disconnect button in the newly appeared window.
4. After that, QBO redirects you to a page saying that you have successfully disconnected your QBO company from the Streamline application (see figure below).

1. Open your Streamline project that you want to disconnect from your QBO company.
2. Go to menu File > Edit connection settings. The QuickBooks Online connection dialog opens.
3. Click the Disconnect button (see figure below).
 Manage book (
 Help
Help