User Guide
1. Streamline Client
2.Streamline Server
3. Starting Up
4. Connecting data
5. Demand and Sales Forecasting
6. Inventory Planning
7. Reference
1. Streamline Client
2.Streamline Server
3. Starting Up
4. Connecting data
5. Demand and Sales Forecasting
6. Inventory Planning
7. Reference
 Add this page to your book
  Remove this page from your book
 In this article we describe:
The key entities which Shopify operates on are products, product variants (variants), locations, and sales channels. Streamline treats products as item categories, variants as items, variant name as item description, locations as locations, and sales channels as channels.
There are several integration limitations between Streamline and Shopify due to the limitations of the Shopify API. These are:
Data imported into Streamline is described in the Inventory Management Systems article.
To import data from Shopify, Streamline needs to get access to your data based on authorization credentials: API key and API access token. To get those, a custom app should be registered within your Shopify store. To do this:
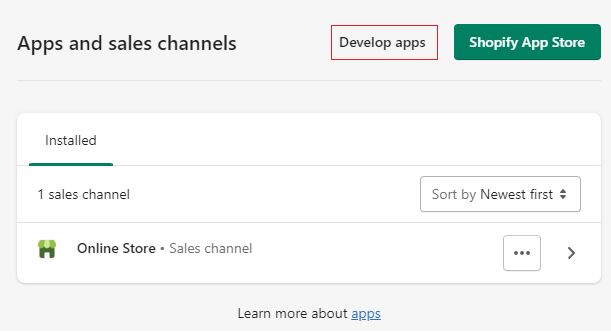
1.Go to your store, click on the arrow near the Apps section, and then click on the App and sales channel setting link in the appeared window (see figure below).

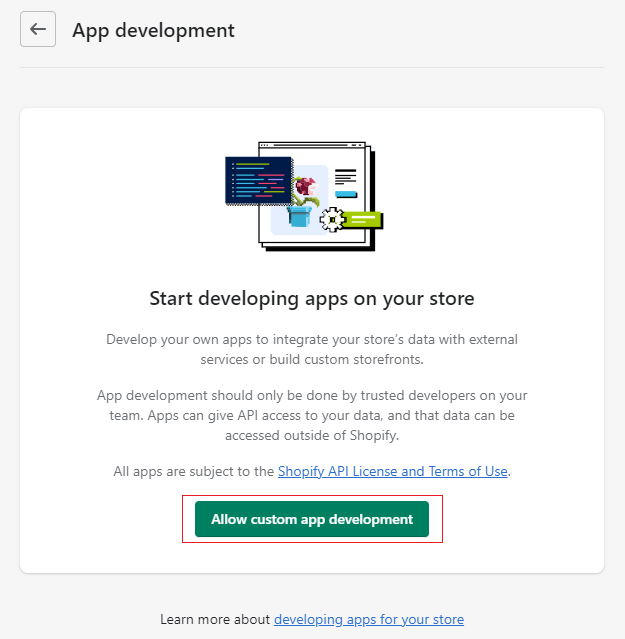
2. Click on the Develop apps button (see figure below).
3. Click on Allow custom app development (see figure below).
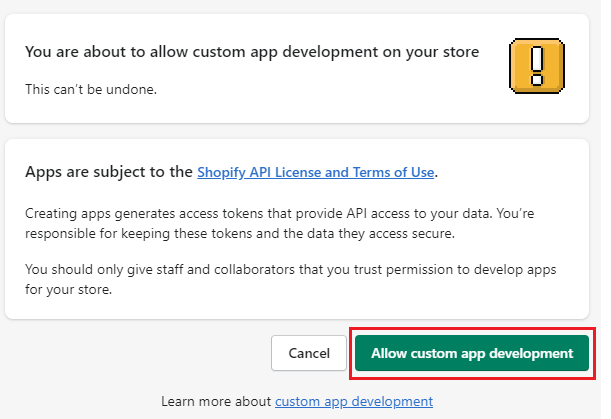
4. Click it the second time (see figure below).
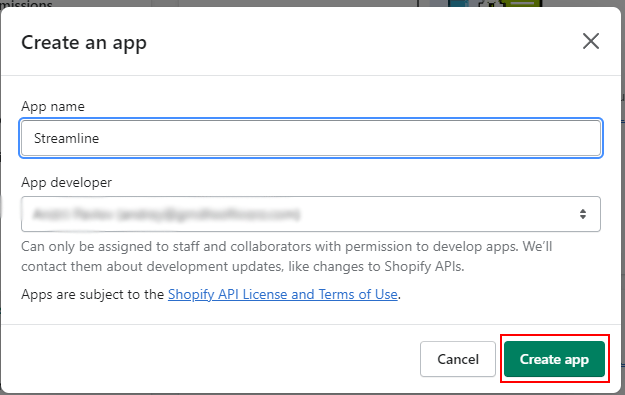
5. Click the Create an app button (see figure below).

6. Give a name for the app, for example, Streamline, and click the Create app button (see figure below).
Now, we need to assign permissions for the created app. To do this:
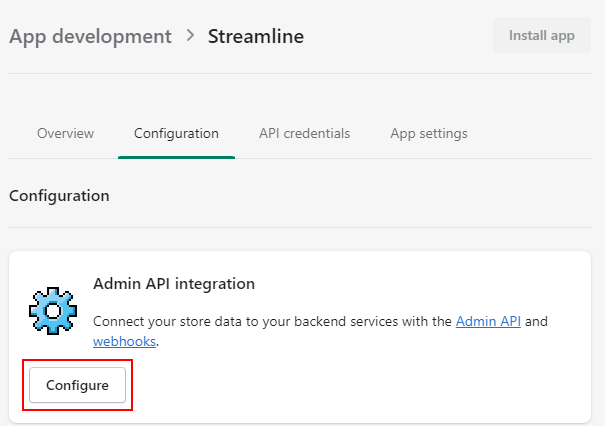
7. Go to the Configuration tab and click the Configure button within the Admin API integration section (see figure below).
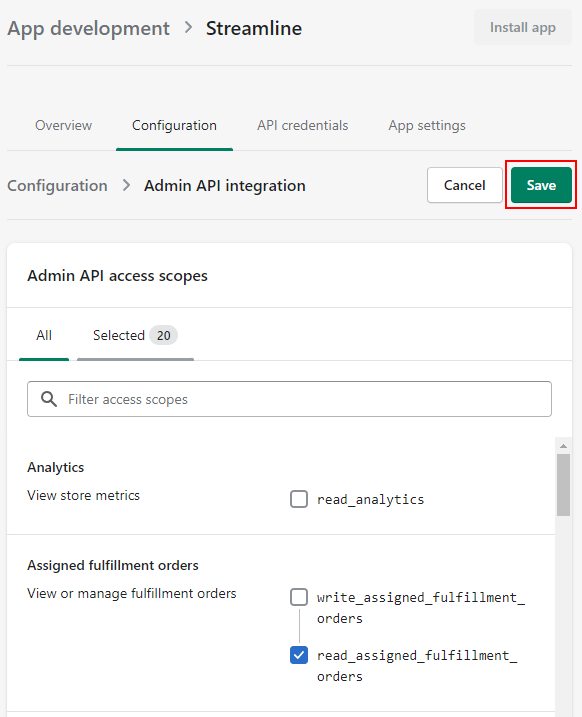
8. On the Admin API access scopes screen select the following permissions:
read_assigned_fulfillment_orders
read_customers
read_discounts
read_draft_orders
read_fulfillments
read_inventory
read_locations
read_merchant_managed_fulfillment_orders
read_metaobject_definitions
read_metaobjects
read_orders
read_product_listings
read_products
read_purchase_options
read_returns
read_channels
read_shipping
read_locales
read_third_party_fulfillment_orders
read_custom_fulfillment_services
After that, click the Save button (see figure below).
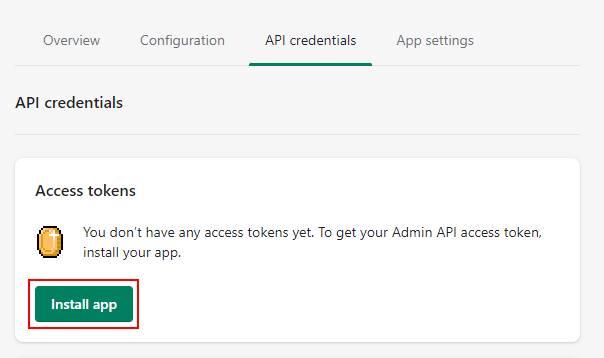
9. Now, go to the API credentials tab and click the Install app button in the Access tokens section (see figure below). In the pop-up window click the Install button.
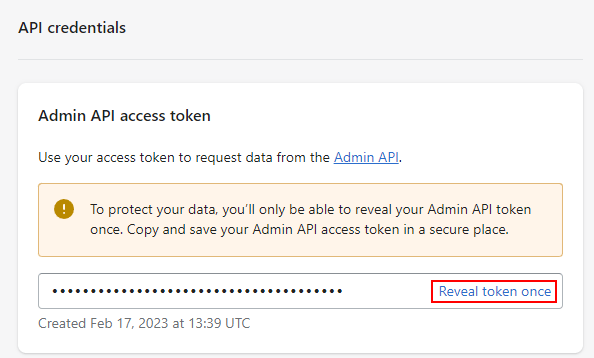
10. After that, click the Reveal token once link in the Admin API access token section (see figure below). As the Shopify message says, you can view it only once, thus, save it to some safe place, where only proper people from your company have access. This access token will be used to import data to Streamline.
10. Go to the API key and secret key section and copy the API key (see figure below). This is the second parameter that is required for authorization.
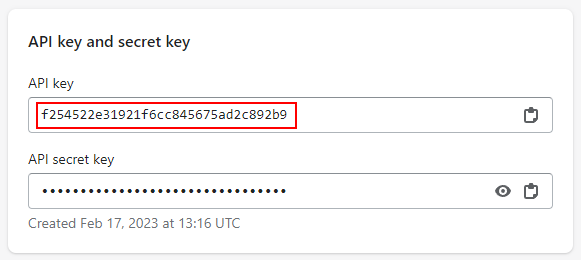
Now, having the API access token and API key, let's proceed to the next step.
To create a new Streamline project from Shopify data, do the following:
1. Go to the File > New > Shopify connection. The Shopify connection dialog appears (see figure below).
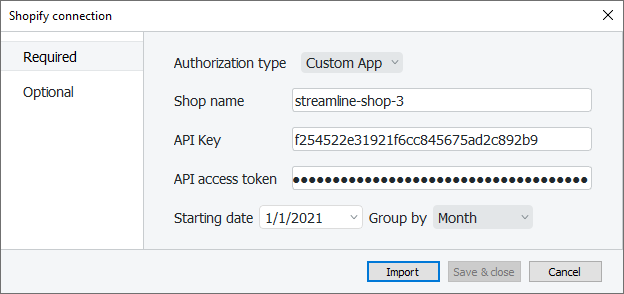
2. Enter the name of your shop at Shopify into the Shop name field. This one you can extract from the URL you use to login into your shop: https://<your-shop-name>.myshopify.com.
3. Enter the API key and API access token got from the previous step into the API key and API access token fields.
4. Enter or choose the date to start the import from in the Starting date control.
5. Choose the data aggregation period in the Group by control. Streamline automatically aggregates your data in the given periods (days, weeks, or months). For example, if you want to see the forecasts, purchase/replenishment plans, and other reports in months, group the data by month.
6. Click the Import button.
 Manage book (
 Help
Help