User Guide
1. Streamline Client
2.Streamline Server
3. Starting Up
4. Connecting data
5. Demand and Sales Forecasting
6. Inventory Planning
7. Reference
1. Streamline Client
2.Streamline Server
3. Starting Up
4. Connecting data
5. Demand and Sales Forecasting
6. Inventory Planning
7. Reference
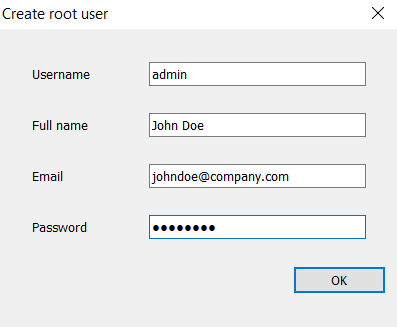
First time clicking on Start Streamline Server, the program will ask you to set up a root user. Fill in the Create root user dialog and make sure to memorize a created password.
Root user is a user with full access to a company catalog, user list, and roles.
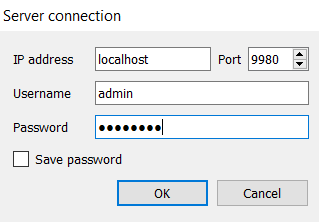
When the first user is created open Streamline and click on Connect to Server in the Start Tab. The program will ask you to fill up User credentials, IP address, and Port. Press OK and you’ll be successfully connected.
After connecting to Server, you’ll notice two more tabs appeared which are Changes and Users. When you click on Users Tab you’ll see a Root user, which was created when you were activating a server for the first time. By default, this user has an Administrator Role and Full access to catalogs of the project.
To create another user, click on User Tab > New User and fill up all required information.
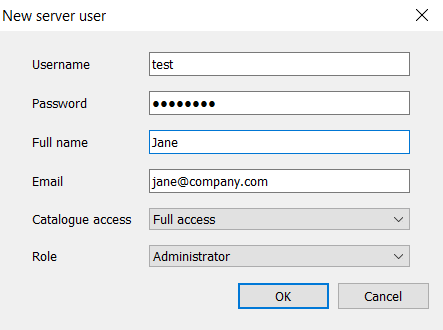
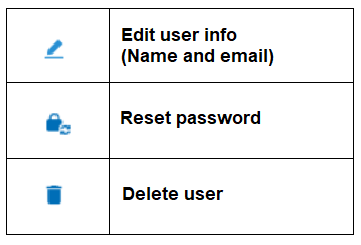
Next to a new user, you’ll see additional settings available:
Also, you’re able to assign a Role and a Catalogue Access to each created user.
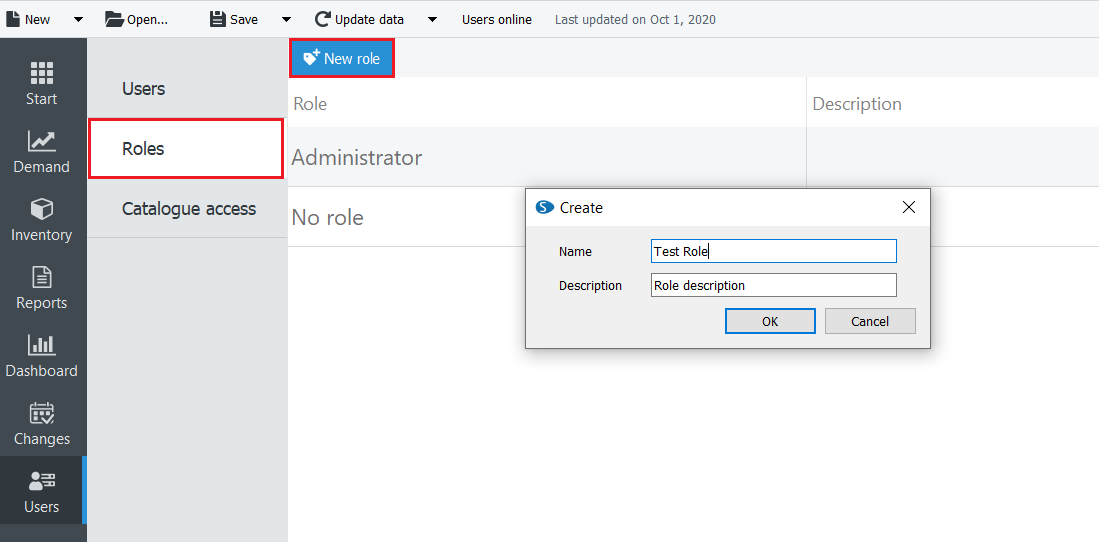
To create a new role for a user, click on Roles > New Role. Give it a name and description.
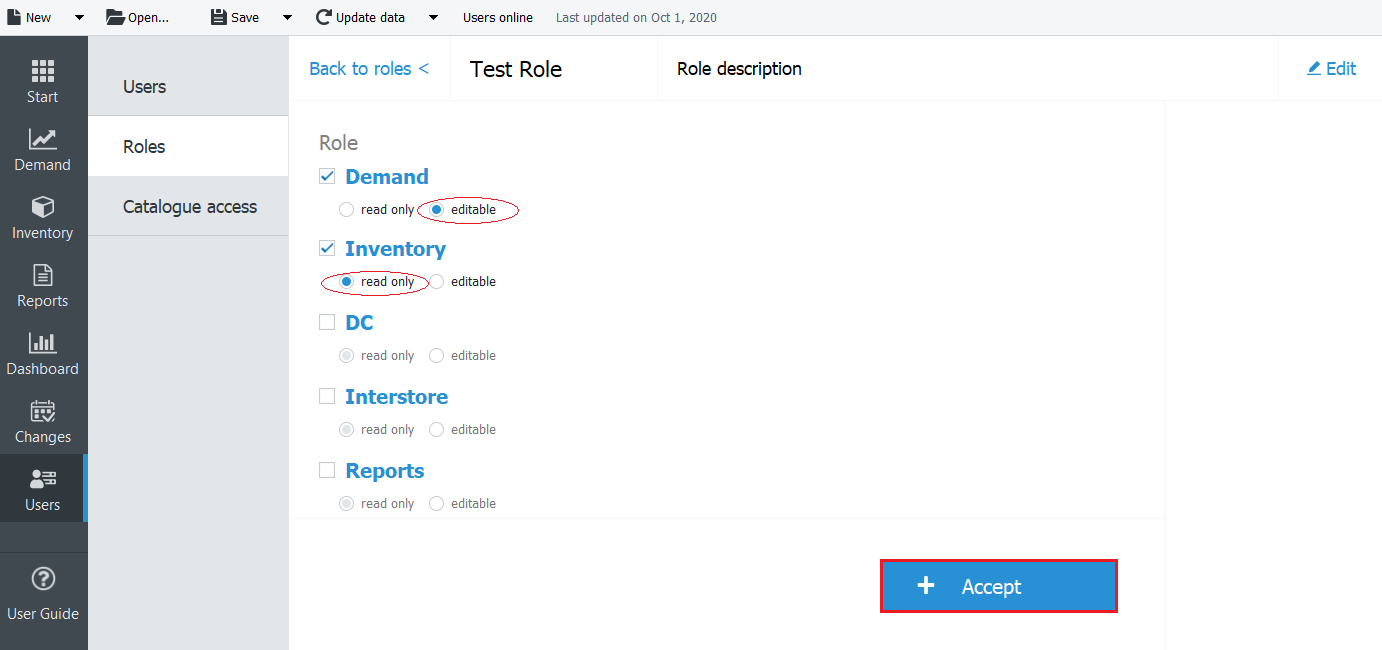
After you click OK, you’ll be able to set which Tabs are available for the Role as well as set whether it’s available for editing or viewing only. After all settings are done, click Accept.
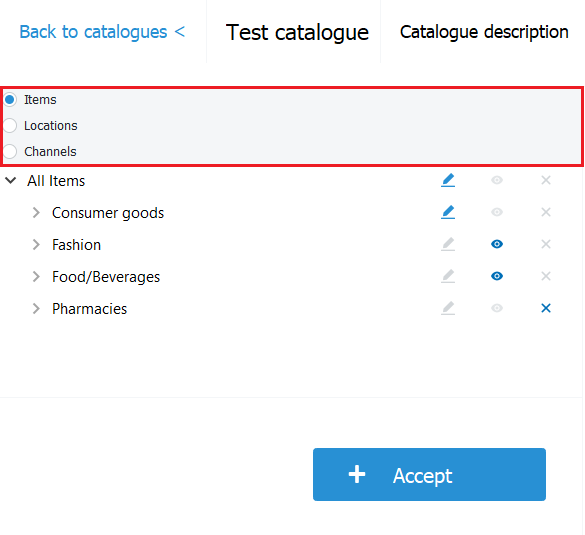
Catalogue gives you an option to allow access to particular items/locations/channels inside of your project.
To create one, click Catalogue access > New catalogue. Give it a name and description.

After you click OK, set which categories/locations/channels are available, and similar to creating a Role, choose what is available for editing and what is for viewing only. Press Accept after.
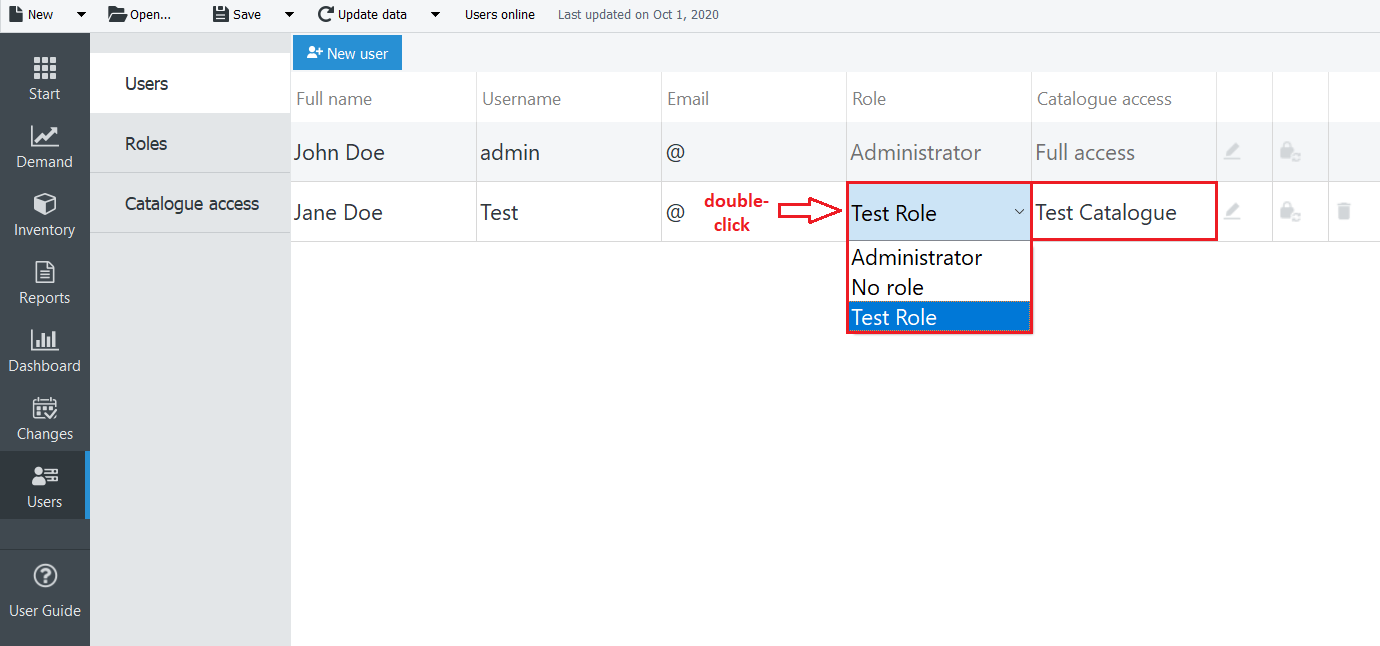
To assign Role and Catalogue Access to the Users tab, simply double-click a needed slot lined up with a needed user.
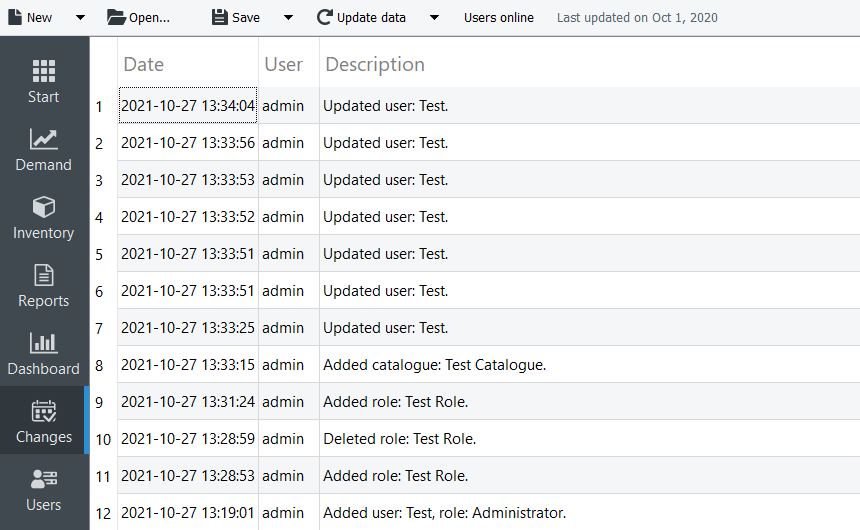
Changes Tab is designed for tracking all users actions in a project. Date and time, Username and Description of each operation is listed in this Tab.