User Guide
1. Streamline Client
2.Streamline Server
3. Starting Up
4. Connecting data
5. Demand and Sales Forecasting
6. Inventory Planning
7. Reference
1. Streamline Client
2.Streamline Server
3. Starting Up
4. Connecting data
5. Demand and Sales Forecasting
6. Inventory Planning
7. Reference
 Add this page to your book
  Remove this page from your book
 Dynamics NAV connection is bi-directional: on one hand, it uses the functionality of the Database connector to import data from the NAV database, on the other hand, it can export purchase orders through NAV web-services created beforehand.
Below, we describe:
This connector utilizes several predefined SQL-queries which you can customize to meet your needs. Data that is imported by the SQL-queries is described on the Inventory management systems page.
1. Go to the menu File > New > Dynamics NAV connection. The Dynamics NAV connection dialog appears (see figure below).
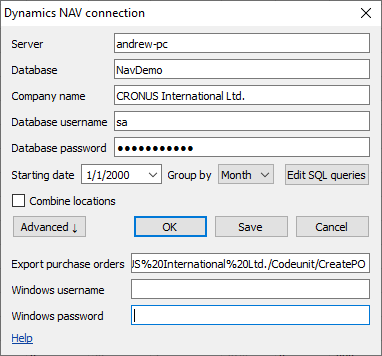
2. Enter the LAN name or IP-address of the computer running Dynamics NAV Server in the Server field.
3. Enter the name of your company database into the Database field.
4. Enter the name of your company into the Company name field.
To find out the name of your company:
4.1 Open NAV client.
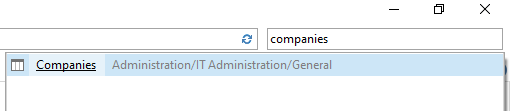
4.2 Enter 'companies' into the search bar and click on the appeared link (see figure below).
4.3 Double click on the company name in the list of companies. The Edit - Companies dialog appears.
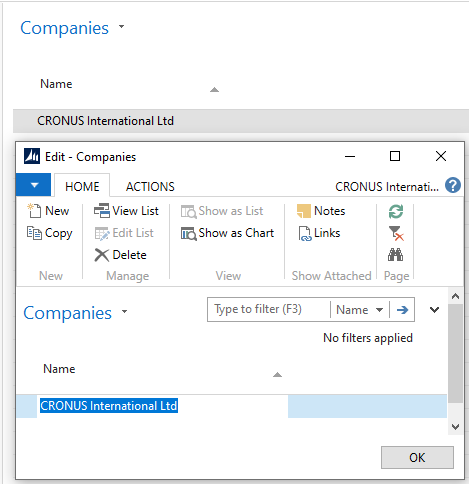
4.4 Copy the name and paste it into the field in the Streamline dialog.
5. Enter the credentials of a SQL Server login having permissions to read data from your database into the Username and Password fields. Streamline requires using only SQL Server logins (not Windows logins). If you don't know how to create one, please learn this guide.
6. Enter or choose the date to start the import from in the Starting date control.
7. Choose the data aggregation period in the Group by control. Streamline automatically aggregates your data in the given periods (days, weeks, or months). For example, if you want to see the forecasts, replenishment plans, and other reports in months, group the data by month.
8. Click OK to start the import.
Advanced options of the dialog allow you to configure exporting capabilities of this connection. To do this:
1. Click the Advanced button of the dialog.
2. Insert the web-service SOAP URL that is used to create purchase orders into the Export purchase orders field. Below, we describe how to create such a web-service and generate this URL.
3. Enter credentials of the Windows account that has permissions to start NAV into the Windows username and Windows password fields.
To complete the steps in this section, you will need a NAV developer license and Microsoft Dynamics NAV 2013 or higher.
This web-service will be used to create purchase and transfer orders in NAV and will be based on a NAV codeunit. First, open NAV Development Environment. To create the web-service, you should accomplish the following steps:
To open your database:
1. Go to File > Database > Open. Open Database window appears (see figure below).
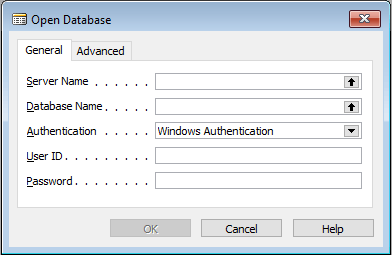
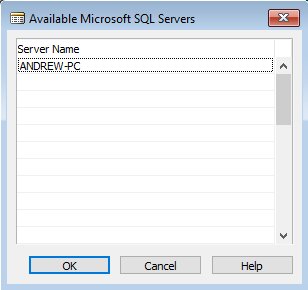
2. Click the black arrow next to the Server Name field, select your SQL Server from the list and click OK (see figure below).
3. Click the black arrow next to the Database Name field, select your database from the list and click OK (see figure below).

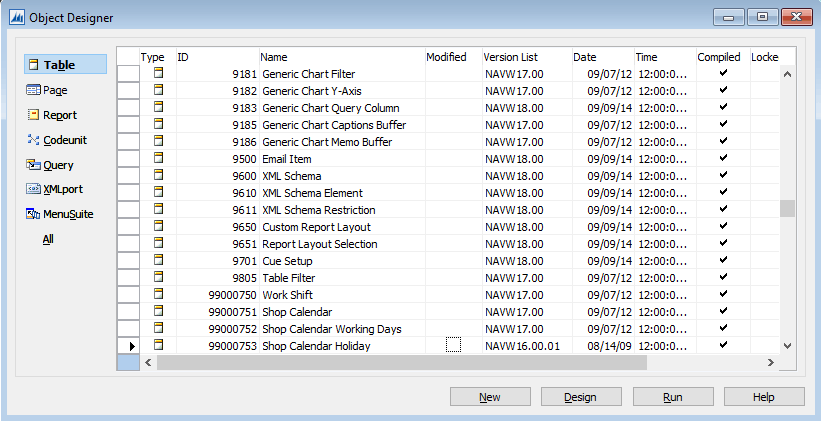
4. Click OK in the Open Database window. The Object Designer window appears (see figure below)
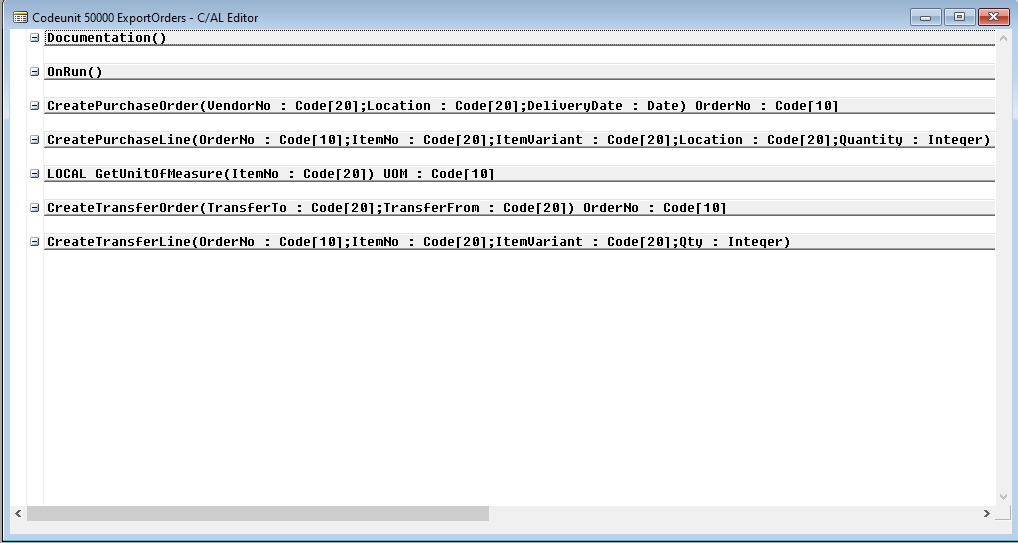
Codeunit is a container for a programmer's code written in special NAV language called C/AL. In our case, a codeunit will contain five functions:
To create a codeunit:
1. Click on the Codeunit button on the left side of the Object Designer window, and then click the New button. C/AL Editor window appears.
2. The next step is to declare these functions. To do this, click the menu View > C/AL Globals. C/AL Globals window appears. Now, go to the Functions tab of the window and put the functions' names in the list (see figure below).
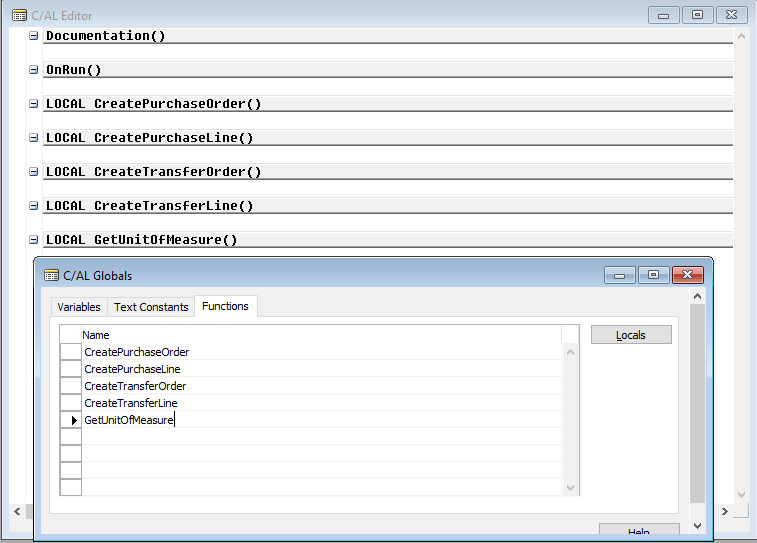
By default, all created functions are local. You can see that by the “LOCAL” prefix before each function name in the C/AL Editor window. A web-service that is based on a codeunit doesn't expose local functions, thus they can't be called by an external application, like Streamline.
To make these functions exposable, we need to set them as global. To do this:
3.Set the cursor on the line with the function name, click menu View > Properties, and set Local property to No (see figure below).

Do this for all the functions except for GetUnitOfMeasure
Now, let's specify the declaration of the functions by adding their input and output parameters, and local variables. To do this:
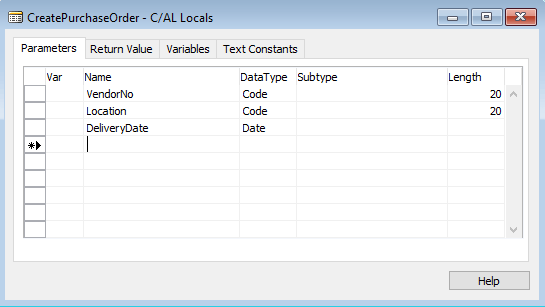
3. Set the cursor on the line with the CreatePurchaseOrder function, and click on the Locals button found on the right of the C/AL Globals window. The C/AL Locals window appears (see figure below).
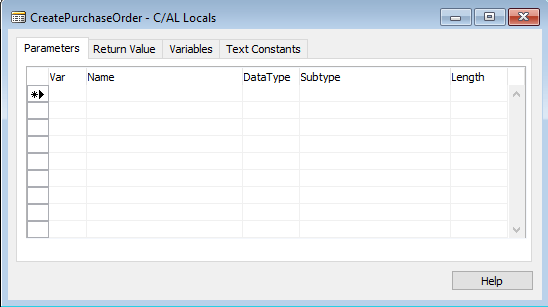
3.1. Our CreatePurchaseOrder function will accept three parameters, VendorNo, Location and Delivery Date. To declare them, populate the Parameters tab using the information from the table below.
| Name | DataType | Length |
|---|---|---|
| VendorNo | Code | 20 |
| Location | Code | 20 |
| DeliveryDate | Date |
See the result in the figure below.
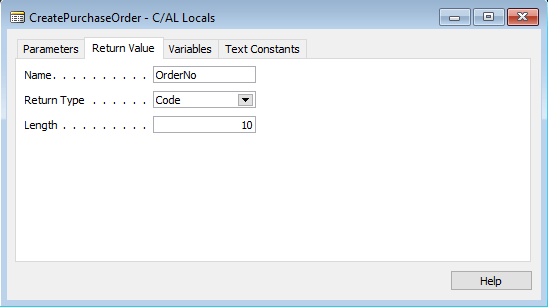
3.2. Now, let's proceed to the Return value tab. As we said above, our function should return the automatically generated PO number. Let's name this variable as OrderNo. Set its return type to Code. (see figure below).
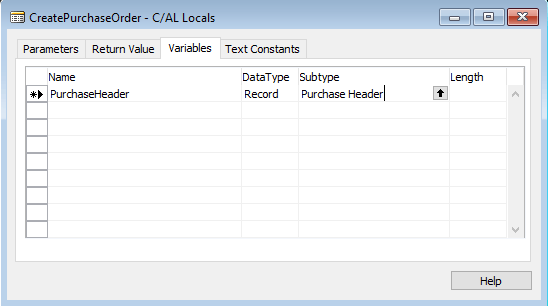
In the body of the function, we will use a local variable that is linked to the record of the NAV PurchaseHeader table. To declare this variable:
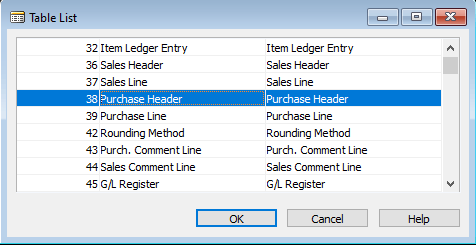
3.3. Go to the Variables tab. Add a variable named PurchaseHeader with DataType of Record. To set the Subtype, click on the black arrow next to the field and choose 38th line which is Purchase Header (see figures below).
Do the same actions for the rest of the functions using data from the table below.
| Name | DataType | Subtype | Length |
|---|---|---|---|
| CreatePurchaseLine | |||
| Parameters | |||
| OrderNo | Code | 10 | |
| ItemNo | Code | 20 | |
| ItemVariant | Code | 20 | |
| Location | Code | 20 | |
| Quantity | Integer | ||
| Variables | |||
| PurchaseLine | Record | Purchase Line | |
| PurchaseHeader | Record | Purchase Header | |
| NextLineNo | Integer | ||
| CreateTransferOrder | |||
| Parameters | |||
| TransferTo | Code | 20 | |
| TransferFrom | Code | 20 | |
| Return value | |||
| OrderNo | Code | 10 | |
| Variables | |||
| TransferHeader | Record | Transfer Header | |
| CreateTransferLine | |||
| Parameters | |||
| OrderNo | Code | 10 | |
| ItemNo | Code | 20 | |
| ItemVariant | Code | 20 | |
| Quantity | Integer | ||
| Variables | |||
| TransferLine | Record | Transfer Line | |
| NextLineNo | Integer | ||
| GetUnitOfMeasure | |||
| Parameters | |||
| ItemNo | Code | 20 | |
| Return Value | |||
| UOM | Code | 10 | |
| Variables | |||
| Item | Record | Item | |
After completing all of this, you should have the functions declarations shown in the figure below.
Now, let’s write the functions' bodies.
4. Set the cursor on the next empty line after the declaration of the CreatePurchaseOrder function and copy-paste the following code:
PurchaseHeader.INIT;
PurchaseHeader.VALIDATE("Document Type",PurchaseHeader."Document Type"::Order);
PurchaseHeader.VALIDATE("Buy-from Vendor No.",VendorNo);
PurchaseHeader.VALIDATE("Location Code", Location);
PurchaseHeader.VALIDATE("Expected Receipt Date", DeliveryDate);
PurchaseHeader.INSERT(TRUE);
EXIT(PurchaseHeader."No.");
5. Add the following body for the CreatePurchaseLine function:
PurchaseLine.RESET;
PurchaseLine.SETRANGE("Document Type",PurchaseHeader."Document Type"::Order);
PurchaseLine.SETRANGE("Document No.",OrderNo);

IF PurchaseLine.FIND('+') THEN
  NextLineNo := PurchaseLine."Line No." + 10000
ELSE
  NextLineNo := 10000;
IF NextLineNo = 10000 THEN

CLEAR(PurchaseLine);
PurchaseLine.INIT;
PurchaseLine."Document Type" := PurchaseHeader."Document Type"::Order;
PurchaseLine."Document No." := OrderNo;
PurchaseLine."Line No." := NextLineNo;
PurchaseLine.INSERT(TRUE);
PurchaseLine.VALIDATE(Type,PurchaseLine.Type::Item);
PurchaseLine.VALIDATE("No.", ItemNo);
PurchaseLine.VALIDATE("Unit of Measure Code", GetUnitOfMeasure(ItemNo) );

IF ItemVariant <> '' THEN
  PurchaseLine.VALIDATE("Variant Code", ItemVariant);
PurchaseLine.VALIDATE("Location Code", Location);
PurchaseLine.VALIDATE(Quantity,Quantity);
PurchaseLine.MODIFY(TRUE);
6. Add the following body for the CreateTransferOrder function:
TransferHeader.INIT;
TransferHeader.INSERT(TRUE);
TransferHeader.VALIDATE("Transfer-from Code", TransferFrom);
TransferHeader.VALIDATE("Transfer-to Code", TransferTo);
TransferHeader."In-Transit Code" := 'OUT. LOG.';
TransferHeader.MODIFY(TRUE);
EXIT(TransferHeader."No.");
7. Add the following body for the CreateTransferLine function:
TransferLine.RESET;
TransferLine.SETRANGE("Document No.",OrderNo);

IF TransferLine.FIND('+') THEN
  NextLineNo := TransferLine."Line No." + 10000
ELSE
  NextLineNo := 10000;
IF NextLineNo = 10000 THEN

CLEAR(TransferLine);
TransferLine.INIT;
TransferLine."Document No." := OrderNo;
TransferLine."Line No." := NextLineNo;
TransferLine.INSERT(TRUE);
TransferLine.VALIDATE("Item No.", ItemNo);
IF ItemVariant <> '' THEN
  TransferLine.VALIDATE("Variant Code", ItemVariant);
TransferLine.VALIDATE(Quantity,Quantity);
TransferLine.VALIDATE("Unit of Measure Code", GetUnitOfMeasure(ItemNo) );
TransferLine.MODIFY(TRUE);
8. Add the following body for the GetUnitOfMeasure function:
Item.RESET;
IF (Item.GET(ItemNo)) THEN BEGIN
   EXIT( Item."Base Unit of Measure" );
END
Close the C/AL Editor window. Click Yes when it asks to save the changes.
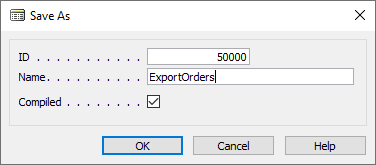
7. Save your codeunit using the Save As dialog appeared.
7.1 Choose the ID for the codeunit from the range 50,000-99,999. This ID range is reserved for customer-specific objects according to the NAV Developer and IT Help.
7.2. Give the codeunit a name. For example, 'CreatePO'. Ensure that Compiled option is checked (see figure below).
After that, your newly created codeunit will appear in the list (see figure below).

The last step is to publish a web-service based on the created codeunit. To do this:
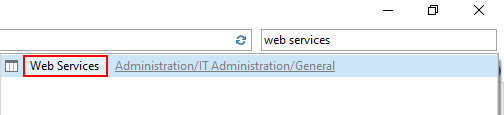
1. Open NAV Client and type into the search bar 'web services'. Click on the Web services link (see figure below)
2. Click the New button of the Home toolbar. Edit- Web Services window appears (see figure below).
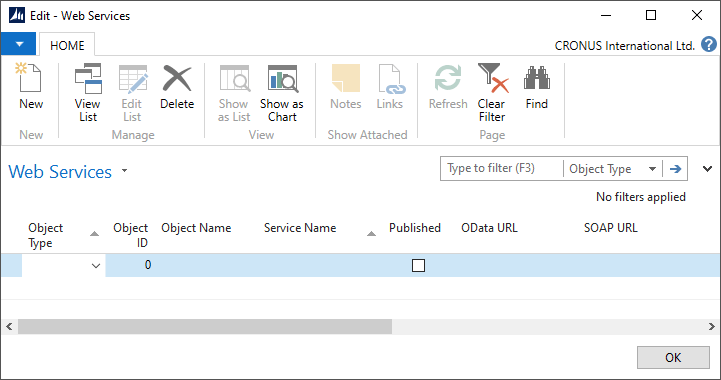
3. Select the Codeunit option for the Object Type column.
4. Enter the ID of the created codeunit or choose it from the list for the Object ID column.
5. Give the web-service a name. It is a good practice to set this name as the codeunit Object Name.
6. Set the checkbox checked in the Published column (see figure below).
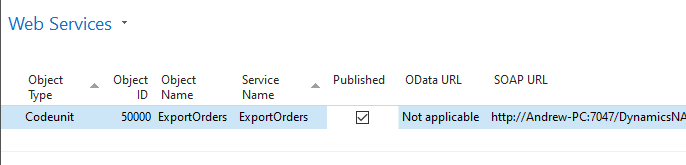
After that, NAV will automatically generate an URL for the web-service in the SOAP URL column. This URL is used to call the service by other applications like Streamline.
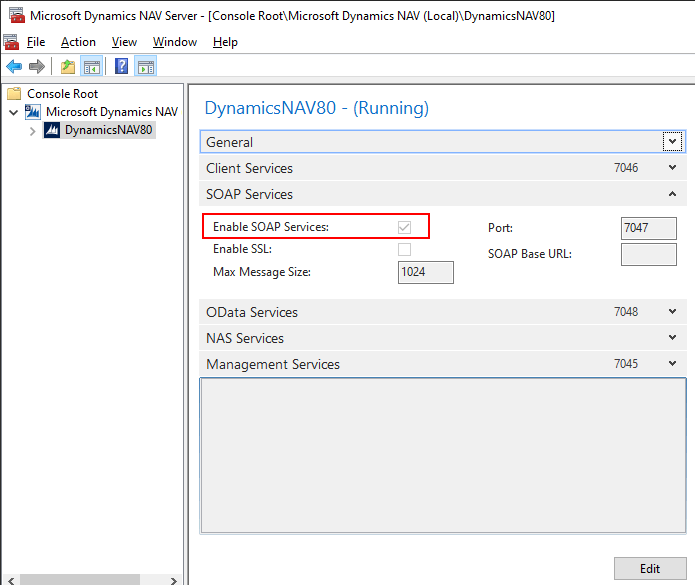
1. Open Dynamics NAV Administration.
2. Click on your Dynamics NAV Server instance in the tree on the left.
3. Expand the Soap Services section.
4. Ensure that Enable SOAP Services option is checked (see figure below). If it's not:
4.1. Click the Edit button at the bottom.
4.2. Check the option.
4.3. Click the Save button.
4.4. Restart the server.
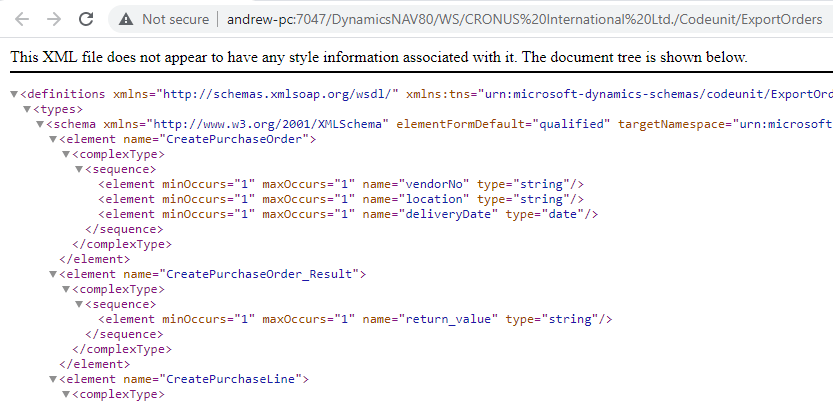
Now, let's test our web-service. To do this, click on the cell with the URL and then click on the little icon with a globe (see figure below).

NAV opens the URL in your default browser. A top part of the server response is shown in the figure below.
 Manage book (
 Help
Help