User Guide
1. Streamline Client
2.Streamline Server
3. Starting Up
4. Connecting data
5. Demand and Sales Forecasting
6. Inventory Planning
7. Reference
1. Streamline Client
2.Streamline Server
3. Starting Up
4. Connecting data
5. Demand and Sales Forecasting
6. Inventory Planning
7. Reference
 Add this page to your book
  Remove this page from your book
 In this article we describe:
The key entities that Cin7 handles are products (Style codes), product options (Codes or SKUs), and branches. Streamline treats product options as items, product name as item description, and branches as locations.
Cin7 products can have size options that are only relevant to 'fashion products'. Let's call these as sized items and distinguish them from regular items. The table below shows the data that Streamline imports for regular and sized items.
| Data | Regular item | Sized item |
|---|---|---|
| Sales history |  |  |
| On-hand history |  |
The Cin7 API does not currently expose the on-hand history for sized items. Thus, Streamline is not able to:
for sized items.
Data imported into Streamline is described in the Inventory Management Systems article.
Streamline uses Cin7 API to import the data. To authorize Streamline, Cin7 requires providing an API username and API key. The API username can be retrieved from Cin7 Integrations settings, whereas the API key is generated when creating a Cin7 API connection. Below we describe how to get these credentials.
The data import includes two steps:
To retrieve the API username:
1. Log in to your Cin7 account.
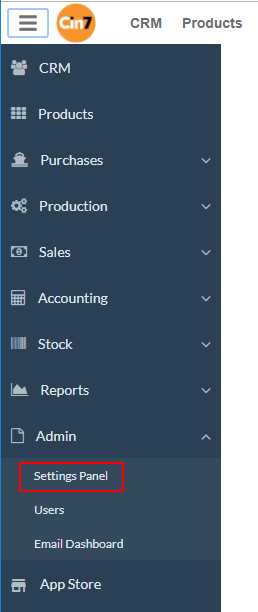
2. Go to the menu Admin > Settings Panel (see figure below).
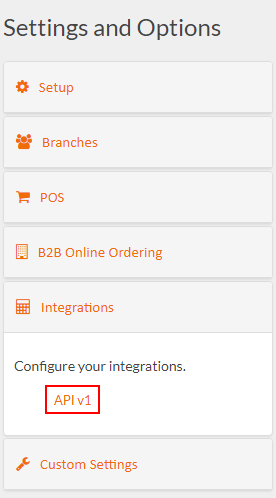
3. Expand the Integrations section and click the API v1 link (see figure below).
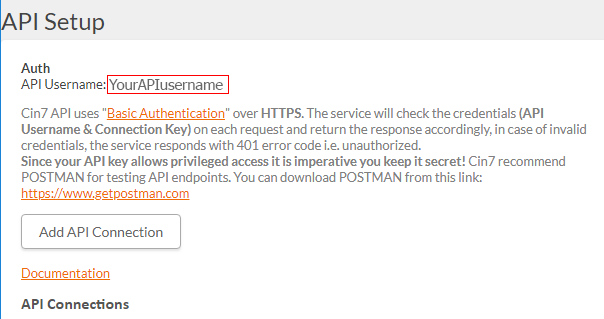
4. The API username is shown in the Auth section on the API Setup page (see figure below).
To get the API key, we need to create an API connection in Cin7. To do this:
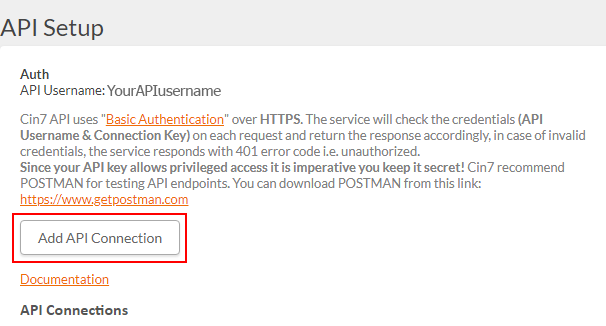
1. Click the Add API Connection button (see figure below).
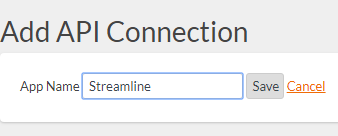
2. Enter a name for the connection and click the Save button (see figure below).
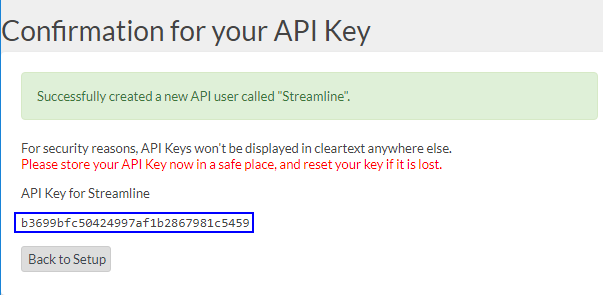
3. Now, the API key is generated (see figure below).
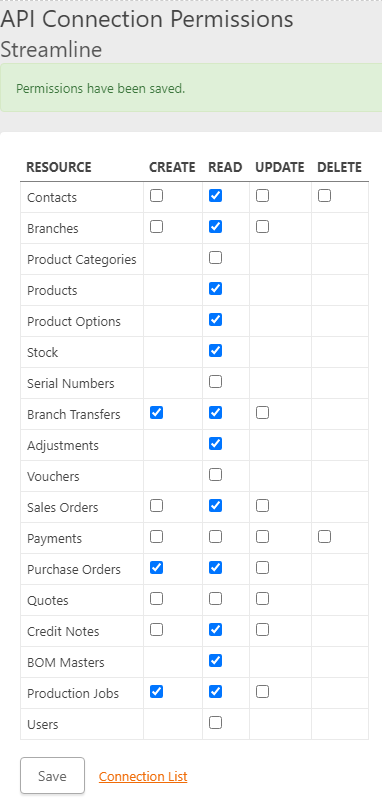
The next step is to configure permissions for our API connection. This will ensure that Streamline has access only to the necessary data. To do this:
1. Go back to the API setup page by clicking the Back to Setup button.
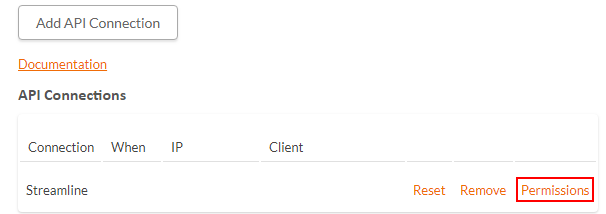
2. Find your newly created connection in the API connections list and click the corresponding Permissions link (see figure below).
3. Set the permissions as shown in the figure below and click the Save button.
To create a new Streamline project based on Cin7 data:
1. Go to the menu File > New > Cin7 connection. The Cin7 connection dialog appears (see figure below).
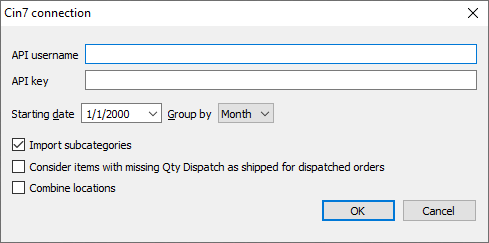
2. Enter your API username and API key.
3. Enter or choose the date to start the import from in the Starting date control.
4. Choose the data aggregation period in the Group by control. Streamline automatically aggregates your data in the given periods (days, weeks, or months). For example, if you want to see the forecasts, replenishment plans, and other reports in months, group the data by month.
5. Click OK to start the import.
