User Guide
1. Streamline Client
2.Streamline Server
3. Starting Up
4. Connecting data
5. Demand and Sales Forecasting
6. Inventory Planning
7. Reference
1. Streamline Client
2.Streamline Server
3. Starting Up
4. Connecting data
5. Demand and Sales Forecasting
6. Inventory Planning
7. Reference
 Add this page to your book
  Remove this page from your book
 In this article, we describe:
Currently, Streamline does not import the on-hand history of products from NetSuite, however, this can be accounted for by customizing the default SQL scripts. This limitation makes Streamline unable to:
Data imported into Streamline is described in the Inventory Management Systems article.
Streamline imports data from NetSuite by executing SuiteQL queries through REST Web Services. SuiteQL is a query language based on the SQL-92 revision of the SQL database query language. SuiteQL supports the syntax for both SQL-92 and Oracle SQL. However, you cannot use both syntaxes in the same query.
As NetSuite is a highly customizable system, Streamline pulls data that is commonly used by most customers, however, it can be easily adjusted to the needs of a particular customer by changing the default SQL queries.
Streamline uses Token-based Athentication (TBA) to pull NetSuite data. It needs you to provide client credentials (Consumer key and Consumer secret) and access token credentials (Token ID and Token secret). The next section of this page explains how to obtain those credentials.
To set up TBA for your NetSuite account and get credentials metioned earlier, do the following:
1. Enable REST Web Services and TBA in your NetSuite account.
1.1. Log in to your NetSuite account as Administrator and go to the menu Setup > Company > Enable Features.
1.2. Click on the SuiteCloud subtab (see figure below).
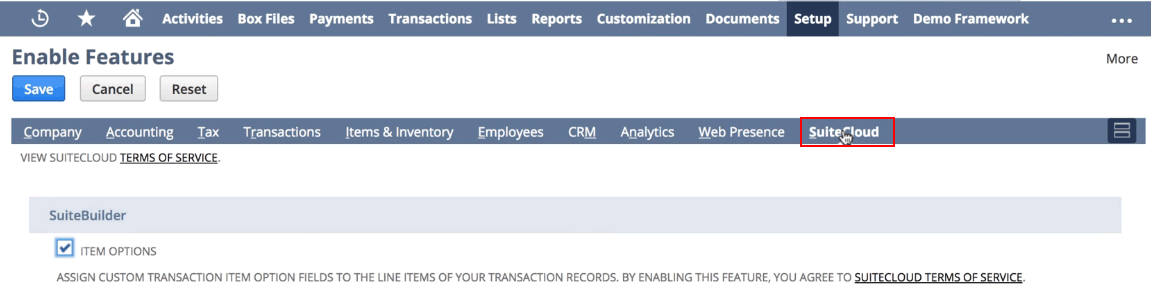
1.3. Scroll down to the SuiteTalk (Web Services) section and check the REST WEB SERVICES option (see figures below). Agree to the NetSuite terms and conditions.

1.4. Scroll down to the Manage Authentication section and check TOKEN-BASED AUTHENTICATION (see figures below). Agree to the NetSuite terms and conditions.

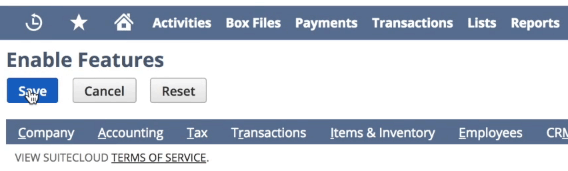
1.5. After that, click the Save button at the top of the page (see figure below).
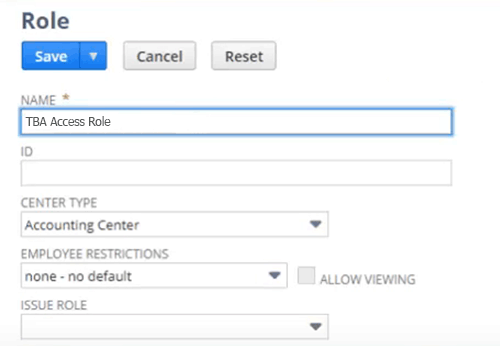
2. Create a role that will use TBA.
2.1. Go to the menu Setup > Users & Roles > Manage Roles > New.
2.2. Give it a name, for example, TBA Access Role (see figure below).
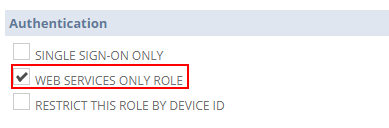
2.3. Set the option Web services only role checked in the Authentication section (see figure below).
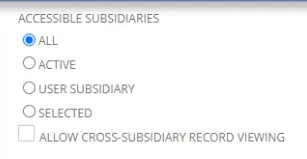
2.4. Set this role as having access to all your subsidiaries by selecting the ALL option (see figure below).
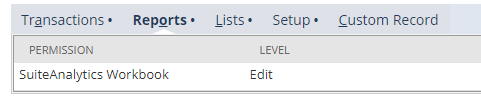
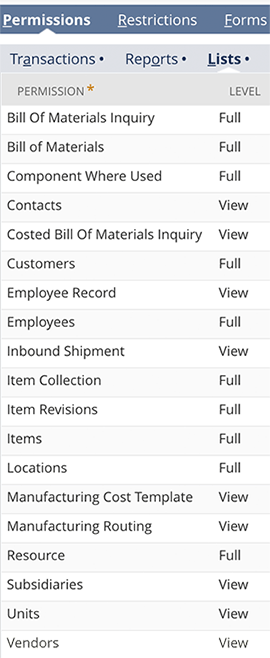
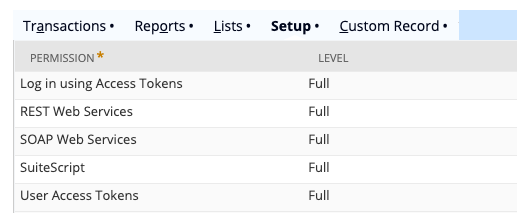
2.5. Click on the Permissions tab, and add permissions shown in the figures below.
![]()
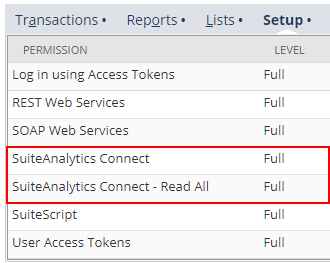
2.6. Then, click the Save button.
3. Create a login (emploee) that will use the created role.
3.1. Go to the menu Lists > Employees > New.
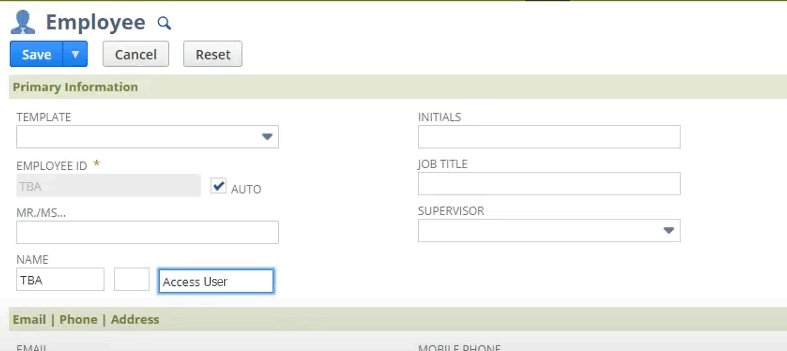
3.2. Give the login a name, for example, TBA Access User (see figure below).
3.3. Click on the Access tab and: 1) check the Give access checkbox; 2) set a password for the login; 3) add the newly created role to the login (see figure below).
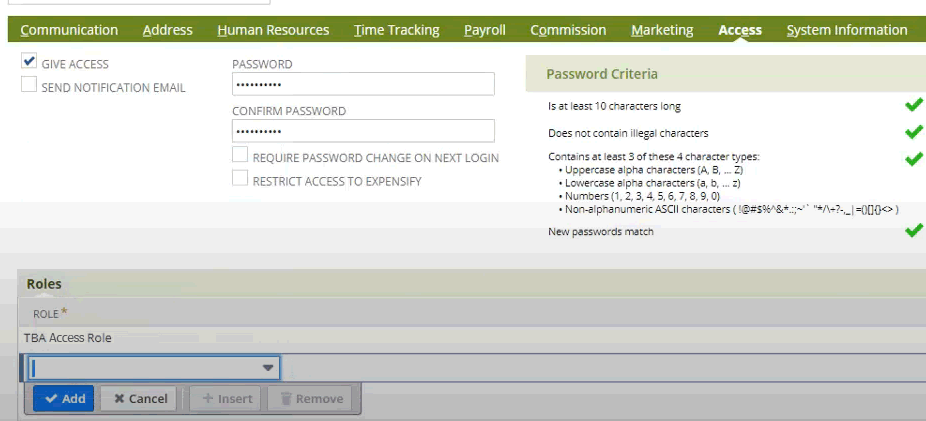
3.4. Сlick the Save button.
4. Create an integration record to use TBA. Integration record is an entity that represents a 3rd party system that wants to have access to the NetSuite data. In our case, that will be Streamline.
4.1. Go to the menu Setup > Integration > Manage integrations > New .
4.2. Give the application a name, for example, GMDH Streamline.
4.3. Under the Authentication tab, uncheck the User credentials option and check the Token-based authentication option (see figure below).
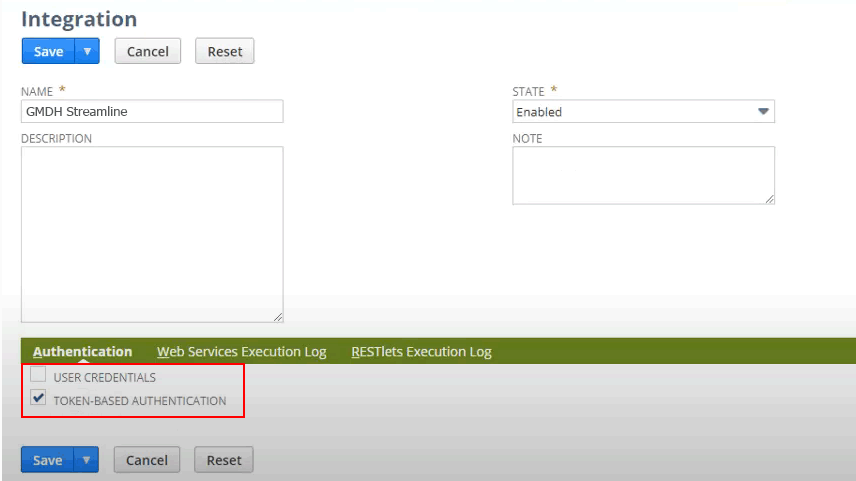
4.4. Click the Save button. The confirmation page displays the client credentials (Consumer Key and Consumer Secret) for our application (see fugure below).
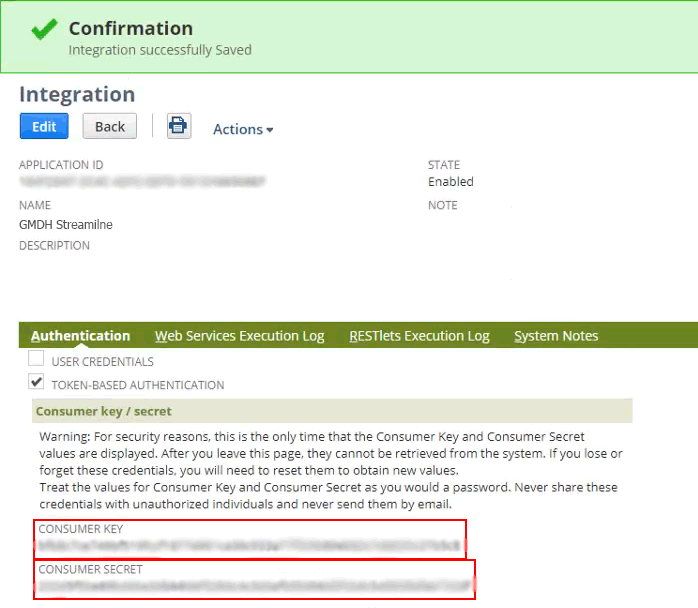
4.5. NetSuite displays the Consumer Key and Consumer Secret only the first time you save the integration record. Thus, copy and paste these credentials into a text file. We will use them when will be connecting from Streamline to NetSuite further.
5. Issue an access token for the created integrated application and employee.
5.1. Go to the menu Setup > Users/Roles > Access Tokens > New.
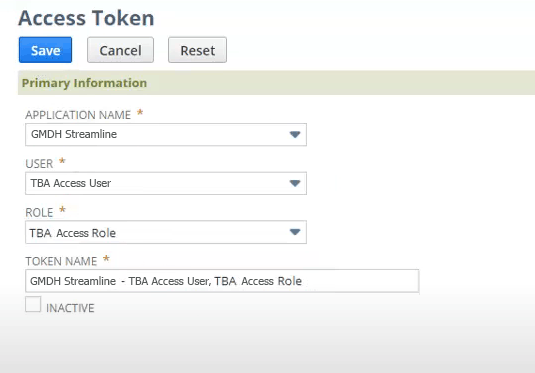
5.2. Select our integrated application in the Application name selector. In our case it is GMDH Streamline.
5.3. Choose the user, we created for TBA in the User selector. In our case it is TBA Access User.
5.4. Select the role, we created for TBA in the Role selector. In our case it is TBA Access Role. (see figure below).
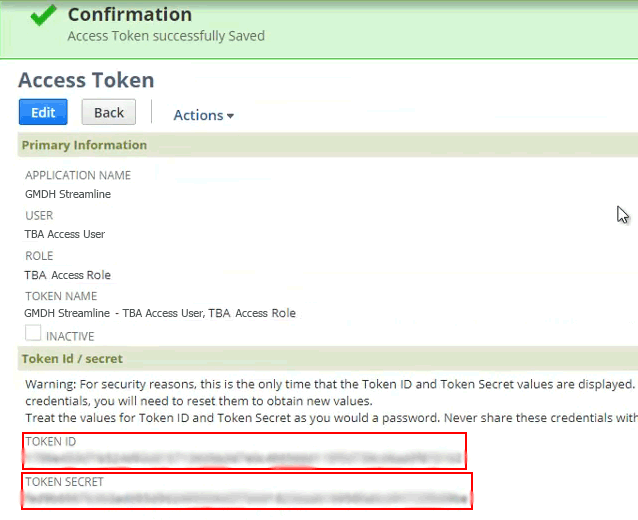
5.5. Click the Save button. The confirmation page displays the Token ID and Token Secret (see figure below). This information is only presented once. Let's also copy and paste these into the text file we used before. These credentials are also needed when connecting to NetSuite from Streamline.
To create a new Streamline project from NetSuite data:
1. Go to the menu File > New > NetSuite connection. The NetSuite connection dialog appears (see figure below).
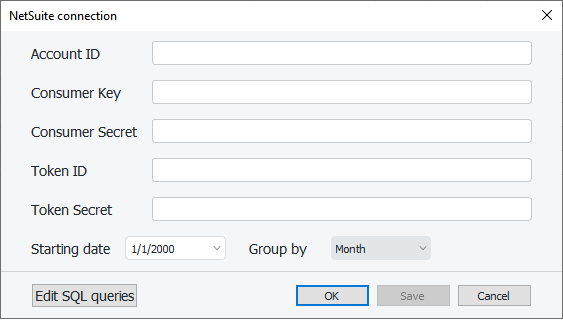
2. Enter your NetSuite account ID into the Account ID field.
3. Enter the authentication credentials that we got earlier into the Consumer Key, Consumer Secret, Token ID, Token Secret accordingly.
4. Enter or choose the date to start the import from in the Starting date control.
5. Choose the data aggregation period in the Group by control. Streamline automatically aggregates your data in the given periods (days, weeks, or months). For example, if you want to see the forecasts, replenishment plans, and other reports in months, group the data by month.
6. Click OK to start the import.
The Edit SQL queries button opens the Database connection dialog where you can customize default SQL-queries to meet your requirements.
 Manage book (
 Help
Help