User Guide
1. Streamline Client
2.Streamline Server
3. Starting Up
4. Connecting data
5. Demand and Sales Forecasting
6. Inventory Planning
7. Reference
1. Streamline Client
2.Streamline Server
3. Starting Up
4. Connecting data
5. Demand and Sales Forecasting
6. Inventory Planning
7. Reference
 Add this page to your book
  Remove this page from your book
 In this article we describe:
The key entities which Odoo operates on are product variants and warehouses. The table below shows how these terms match terms used in Streamline.
This connector utilizes several predefined SQL-queries which you can customize to your needs. The data, imported into Streamline, is described in the Inventory Management Systems article.
Streamline's Odoo connection comes with predefined SQL queries that read data from the Odoo database. In particular, they read data from the database tables that belong to the following Odoo modules:
Please, make sure that all of them are installed before using this connection.
To import data from Odoo, Streamline uses ODBC connection to its database. Thus, make sure that you have installed the PostgreSQL ODBC x64 driver before proceeding to the next steps.
To create a new Streamline project based on Odoo data:
1. Go to the menu File > New > Odoo connection. The Odoo connection dialog appears (see figure below).
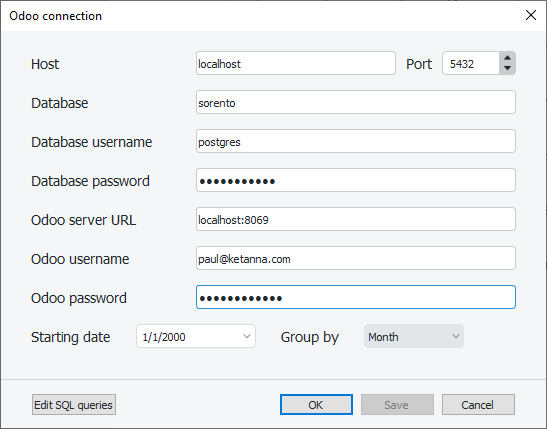
2. Enter the machine LAN name (or IP) running the Odoo's PostgreSQL Server into the Host field. The localhost option is set by default meaning that the PostgreSQL Server is installed on the same computer where you open Streamline.
3. Enter the port that is listened to by Odoo's PostgreSQL Server into the Port field. By default, it is 5432 - the default value used in the Odoo installation process.
4. Enter the name of the Odoo database into the Database field.
5. Enter credentials of a PostgreSQL Server account having rights to read data from your database into the Username and Password fields.
6. Enter the URL where the Odoo Server is running into the Odoo Server URL field.
If the Odoo Server is deployed in LAN you can enter <IP>:<port>, where <IP> is the IP of the machine running the server; <port> is the port which is listened to by the server (this port is set in the Odoo installation process). The localhost:8069 option is set by default meaning that the Odoo Server is installed on the same computer where we open Streamline.
If the Odoo Server is deployed in the cloud, the URL is the base URL of the service. For example, if you host Odoo Server in Odoo Online, the URL looks like https://yourdatabase.odoo.com
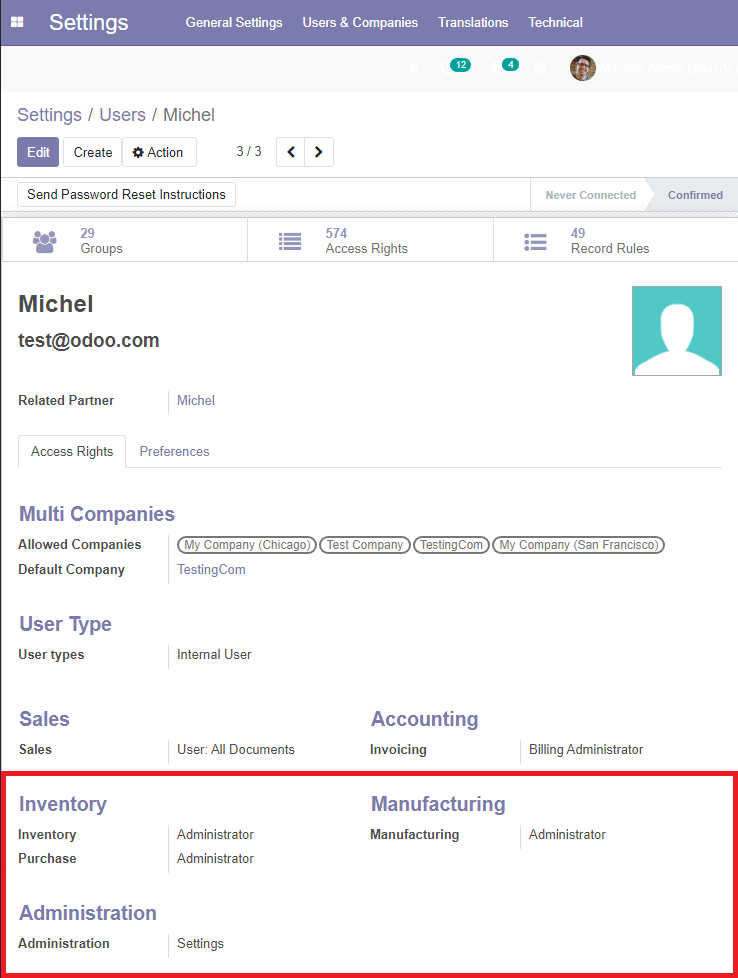
7. Enter credentials of an Odoo account into the Odoo username and Odoo password fields. This account must have administrator rights for the purchasing, manufacturing, and inventory activities and administration rights to change Odoo settings (see figure below). Moreover, in order to Streamline can create(export) planned orders for particular companies, this account must have rights to work with those companies (see Allowed Companies setting in the figure below).
8. Enter or choose the date to start the import from in the Starting date control.
9. Choose the data aggregation period in the Group by control. Streamline automatically aggregates your data in the given periods (days, weeks, or months). For example, if you want to see the forecasts, replenishment plans, and other reports in months, group the data by month.
10. Click OK to start the import.
The Edit SQL queries opens the Database connection dialog where you can customize default SQL-queries to meet your requirements.
 Manage book (
 Help
Help