User Guide
1. Streamline Client
2.Streamline Server
3. Starting Up
4. Connecting data
5. Demand and Sales Forecasting
6. Inventory Planning
7. Reference
1. Streamline Client
2.Streamline Server
3. Starting Up
4. Connecting data
5. Demand and Sales Forecasting
6. Inventory Planning
7. Reference
 Add this page to your book
  Remove this page from your book
 The program window consists of the menu, toolbar, and tabs (see figure below).
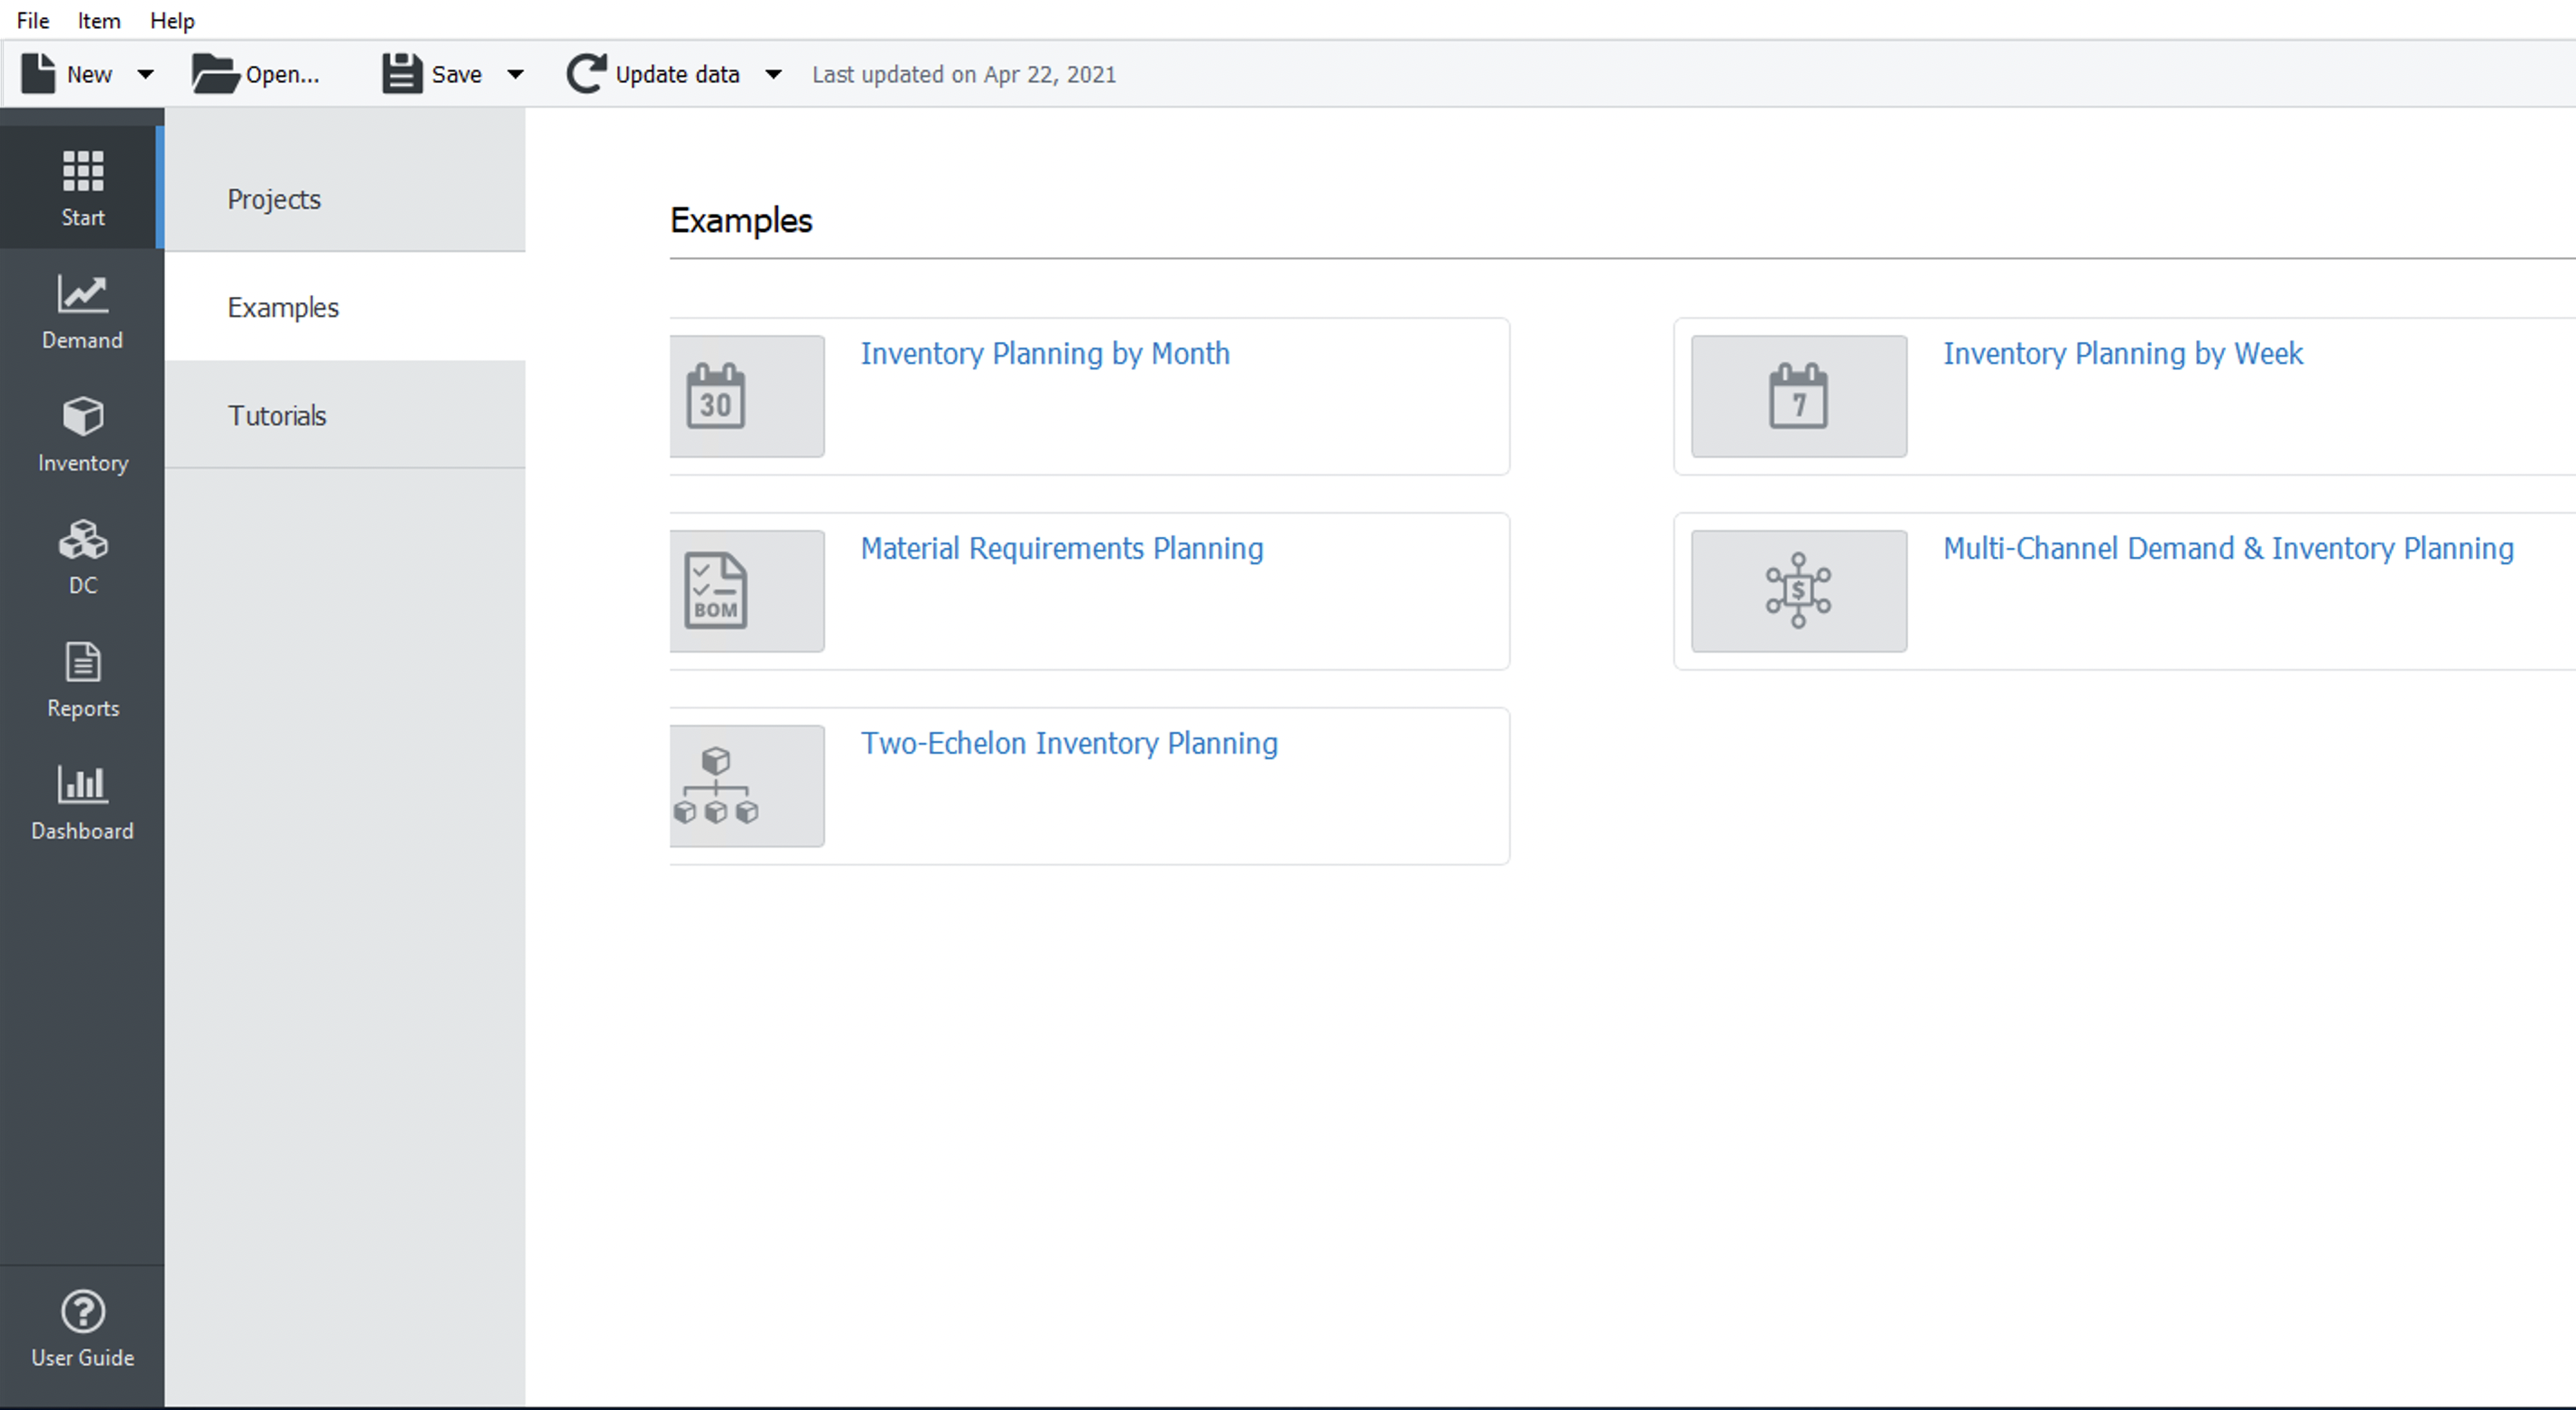
The menu provides access to all the Streamline commands. The toolbar contains the most used commands. Tabs are the major elements of the program window and correspond to the main activities Streamline is designed to implement. They are logically divided into:
File menu is used to manipulate Streamline project files, create new projects using different data sources, open existing or recent projects, update and configure the current project, change the data source of the current project, and show its statistical information.
Item menu is used to manipulate items in the Tree View, Reports, Inventory planning, and Distribution center. The manipulations include removing item code from import, setting item substitutions, making item removals, adding/editing notes of the tree view leaf nodes, and explaining calculations.
Help menu provides access to Streamline’s documentation and video tutorials, and allows users to change the language, check for updates, enter a license key, and to move the software to another computer.
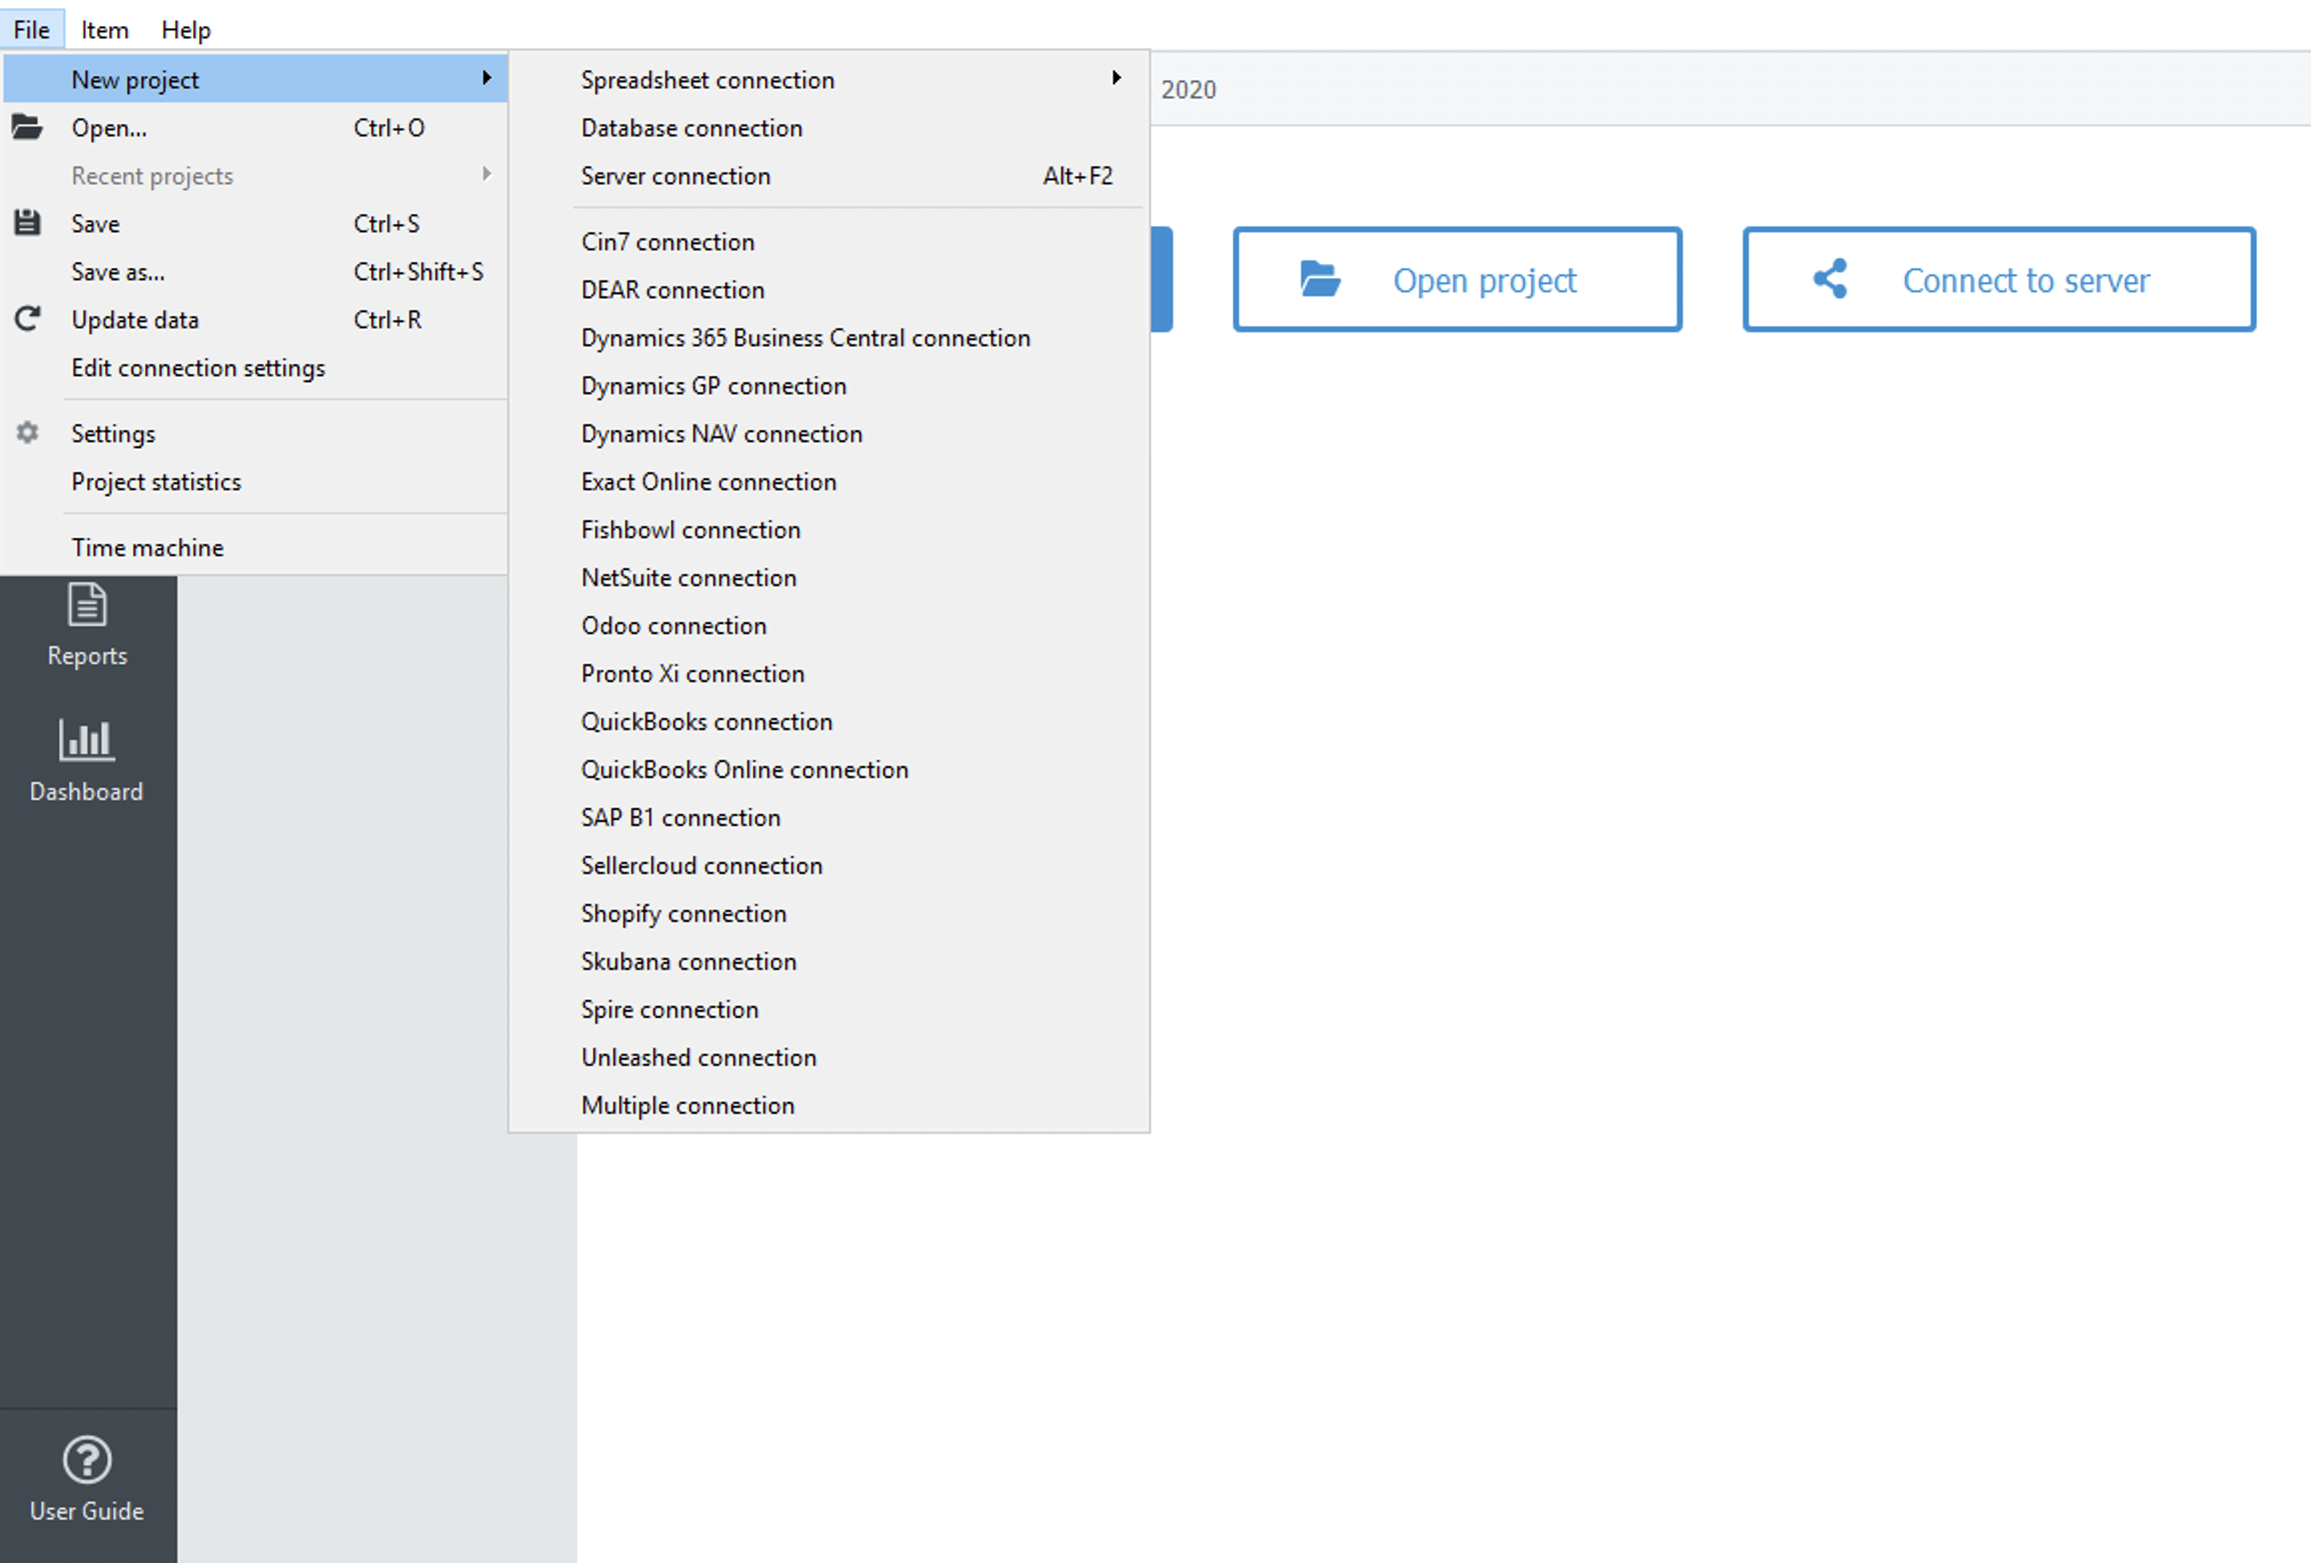
File > New is used to create a new Streamline project from several data sources.
File > New > Spreadsheet connection > Aggregated data is used to create a new project from an Excel spreadsheet or CSV file having your sales data aggregated into particular periods (e.g. days, months, quarters,…).
File > New > Spreadsheet connection > Transactional data is used to create a new project from an Excel or CSV file containing a list of sales transactions. Such a list is usually an extract from a database or ERP, accounting, or inventory management system.
File > New > Database connection is used to create a new project via direct SQL requests to a database using ODBC or MySQL driver.
File > New > Cin7 connection is used to create a new project from Cin7 software file.
File > New > DEAR connection is used to create a new project from DEAR software.
File > New > QuickBooks connection/QuickBooks Online connection is used to create a new project from QuickBooks software file.
File > New > Dynamics NAV connection is used to create a new project from Dynamics NAV software.
File > New > Dynamics 365 Business central connection is used to create a new project from Microsoft Dynamics 365 Business central software.
File > New > Dynamics GP connection is used to create a new project from Dynamics GP software.
File > New > Exact Online connection is used to create a new project from Exact Online software.
File > New > Fishbowl connection is used to create a new project from Fishbowl software.
File > New > NetSuite connection is used to create a new project from NetSuite software.
File > New > Odoo connection is used to create a new project from Odoo software.
File > New > Pronto XI connection is used to create a new project from Pronto Xi ERP system.
File > New > SAP B1 connection is used to create a new project from SAP Business One system.
File > New > Sellercloud connection is used to create a new project from Sellercloud system.
File > New > Shopify connection is used to create a new project from Shopify system.
File > New > Skubana connection is used to create a new project from Skubana system.
File > New > Spire connection is used to create a new project from Spire system database.
File > New > Unleashed connection is used to create a new project from Unleashed system.
File > New > Multiple connection is used to create a new project from multiple data source connections.
File > Open allows users to open existing projects in Streamline.
File > Recent projects allow users to open recent projects.
File > Save saves a new project or saves changes to an already created project.
File > Save as… is used to save the current project under a new name.
File > Update data loads new data from the data source into the current project, for example, a new sales period.
File > Edit connection settings are used to change the data source of the current project.
File > Settings opens the Program settings dialog which allows customizing the program, current project, and the main Streamline tabs.
File > Project statistics shows the statistics of the current projects.
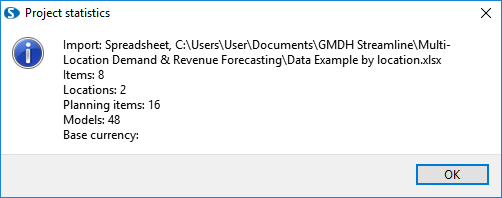
The statistics includes:
File > Time Machine starts a simulation tool that executes future purchasing recommendations in a simulated ERP system.

Item > Remove from Import bans selected item from import. After the command has been executed, the item will be removed from the current project and added to the list of removals and substitutions. To return the item to the project, you should first remove the corresponding rule in the Removal/substitution rules dialog, and re-import the data using the Update Data button then. In this situation, the Update data command makes a full re-import of the data.
Item > Substitute makes a substitution for the currently selected item code by a new item code, entered by a user in the newly appeared Substitute an item dialog shown below. This command merges sales history and inventory information of the items and entitles the result with the item code typed in the dialog. If you enter an item code that is not in the project, the command will rename the source item code.
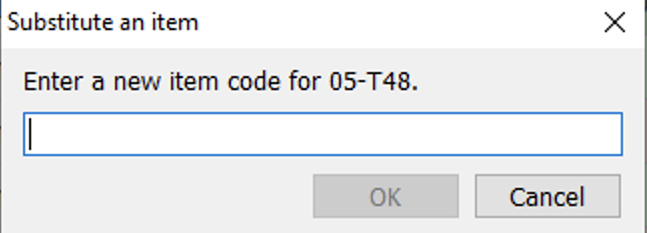
If the item to be removed or substituted is referenced by any other item (for example, the reference is built via the ‘Use model from’ option), Streamline removes the reference and notifies the user about that.
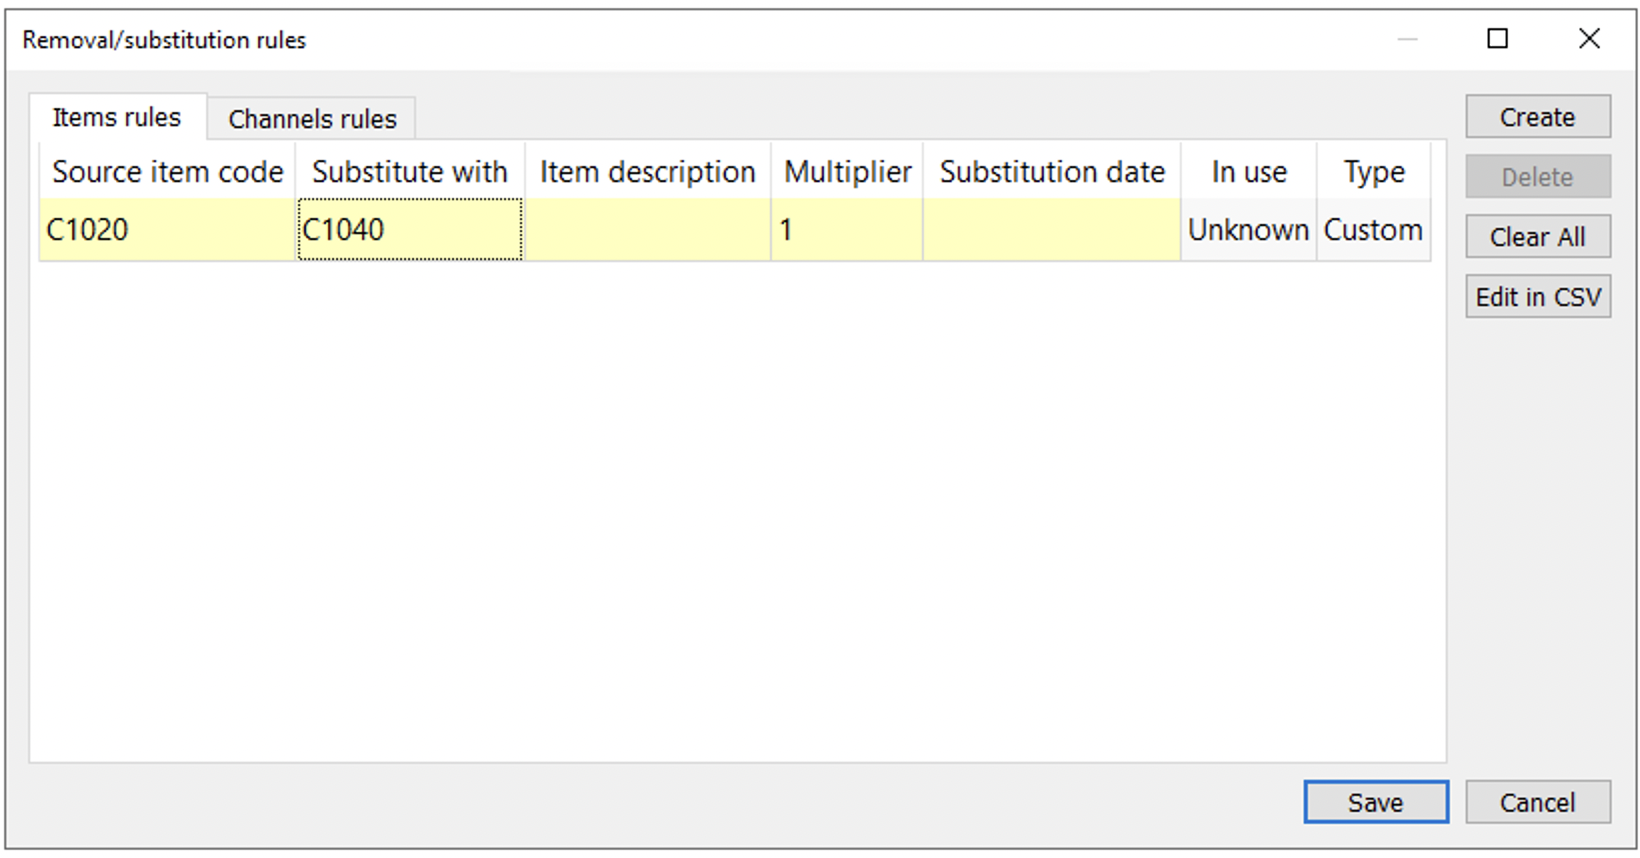
Item > Removal substitution rules… is used to manage item code removals and substitutions made in the current project. The command opens the Removal/substitution rules dialog.
Bill of materials > Entire bill opens the Bill of materials dialog (see figure below).
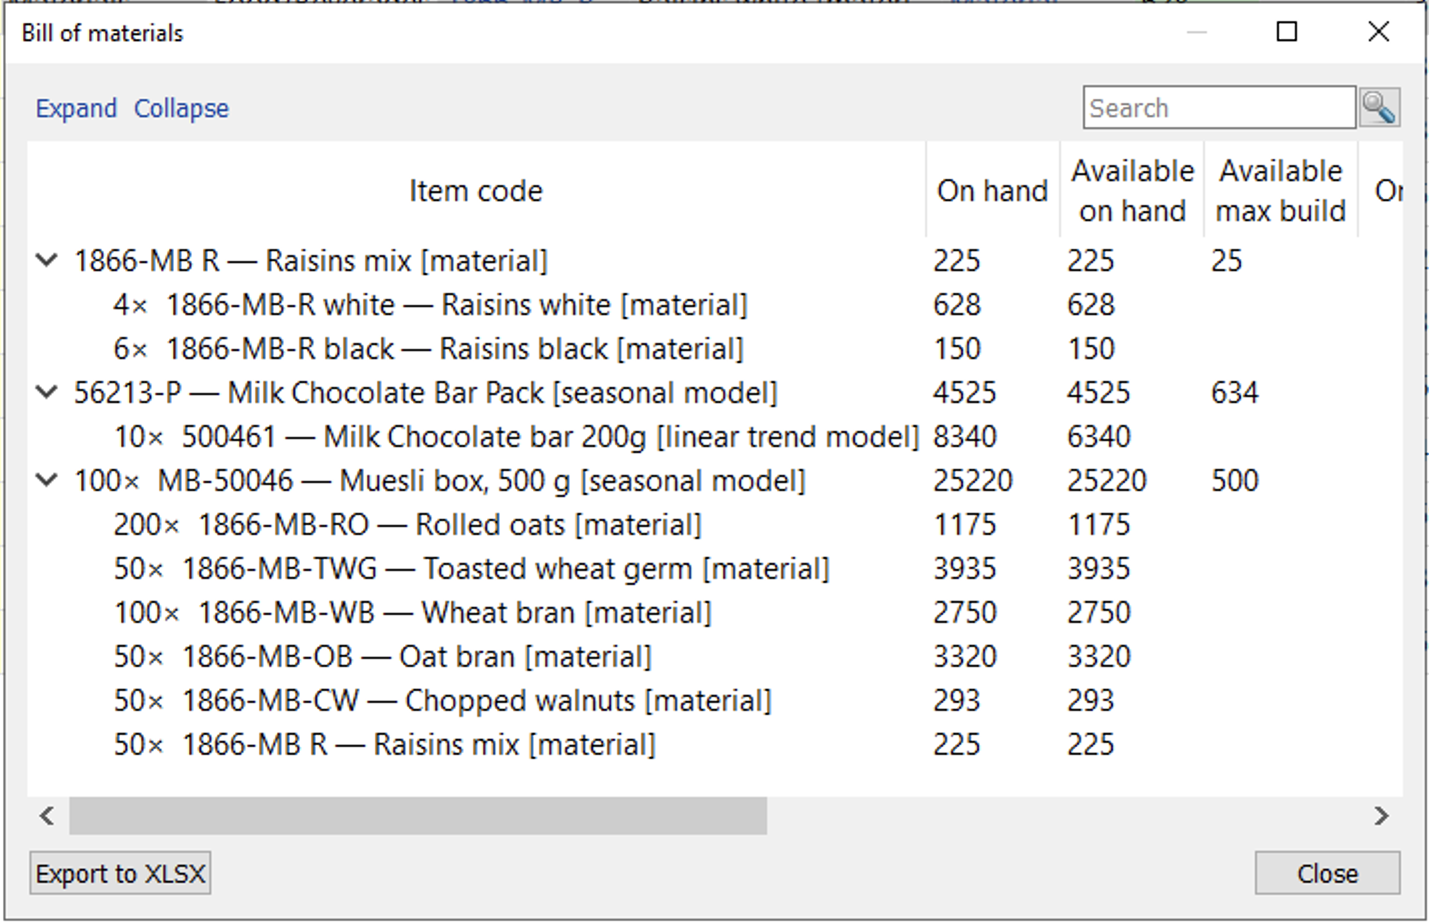
The dialog shows an imported bill of materials expressed in materials only using a tree view. The tree doesn't contain intermediate items. Streamline automatically converts them into materials. The top level of the tree indicates finished items, and the bottom, the materials the finished items are made of. The number before the × sign indicates the quantity of the item required to create the given number of the finished item.
Bill of materials > Material/product tree opens the Material/product tree dialog. Depending on the type of the item selected in the Tree view the dialog changes as follows:
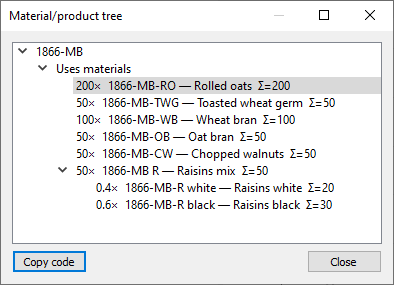
The Copy code button copies the code of the selected item of this dialog to the clipboard.
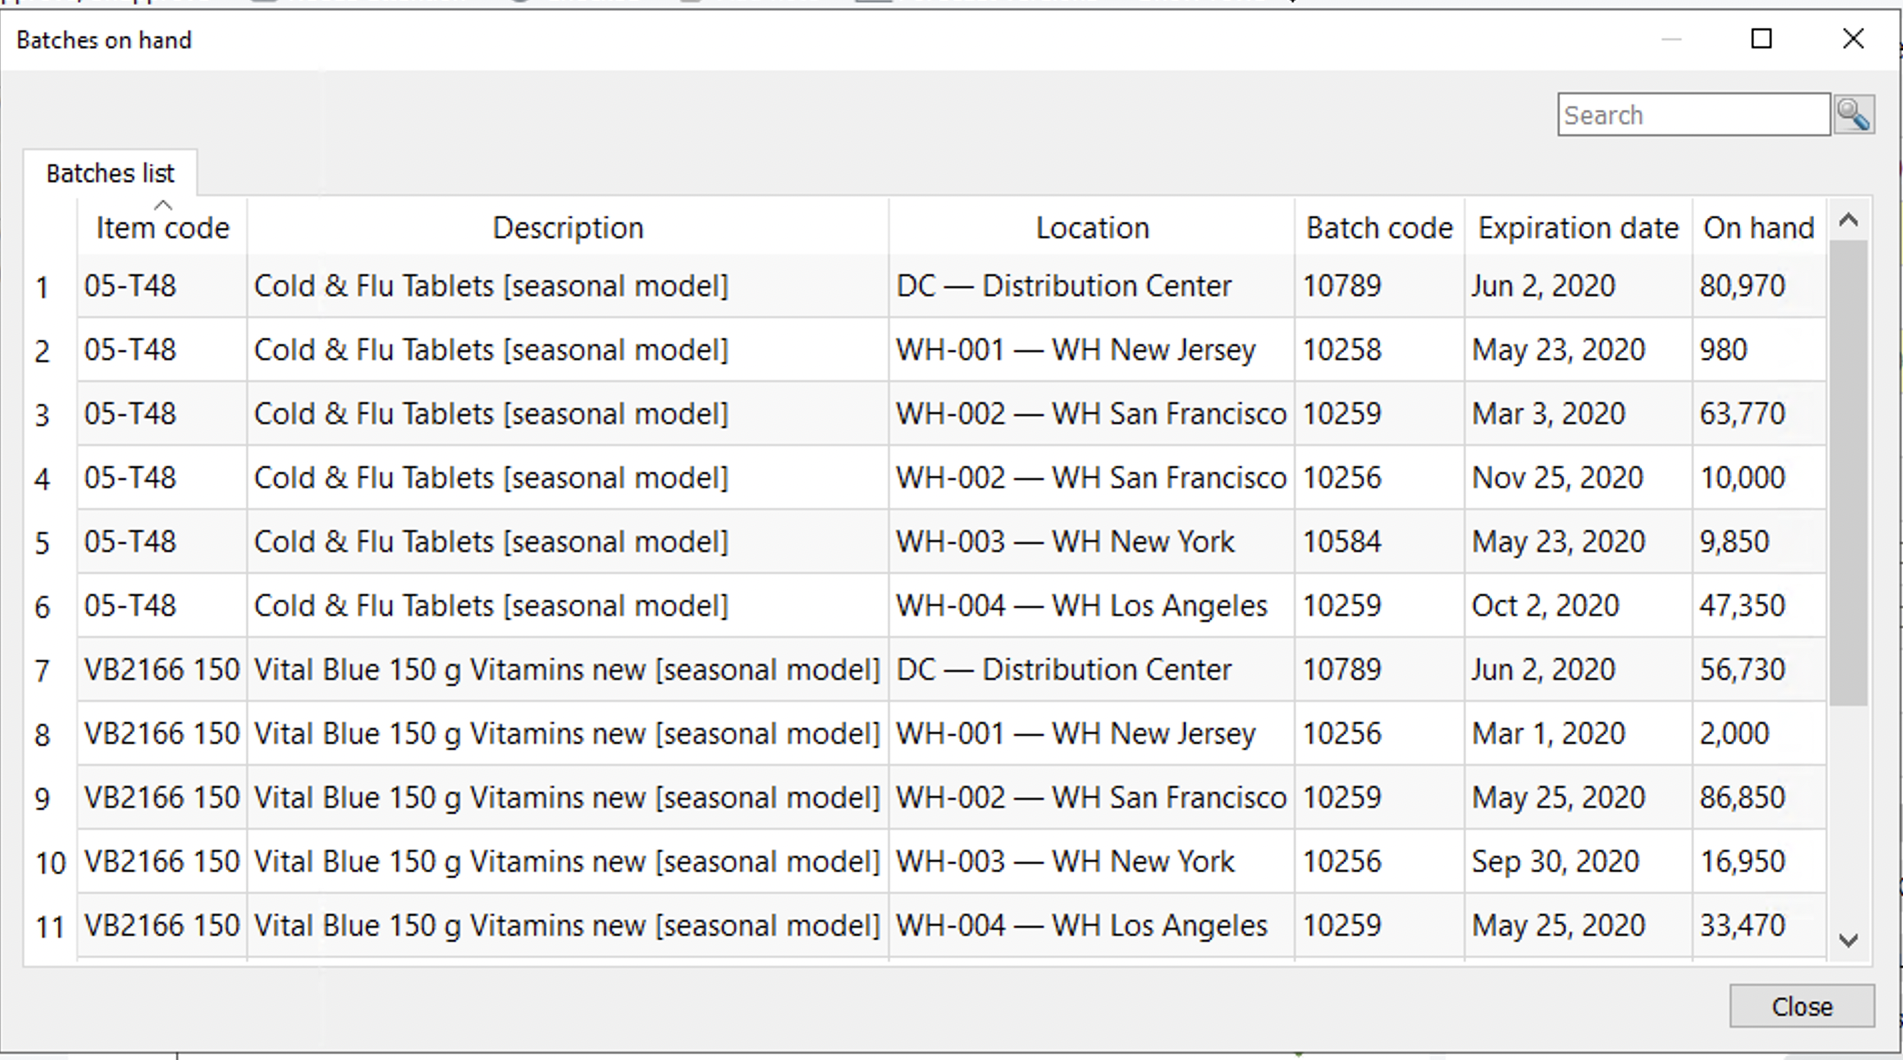
Item > Batches on hand command opens the Batches on hand dialog (see figure below). This dialog displays items and the corresponding batches information that are under the selected node in the Tree view.
Item > Add note… and Item > Edit note are used to add and edit an annotation to item code (if no locations imported), or to planning item (if locations are imported). If selected item code has a note, the Add note command is changed to the Edit note command in the menu.
Item > Add note… opens the Edit note dialog shown below.
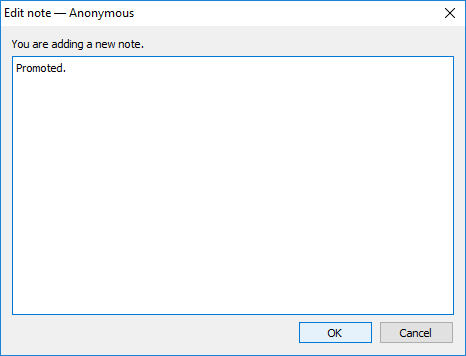
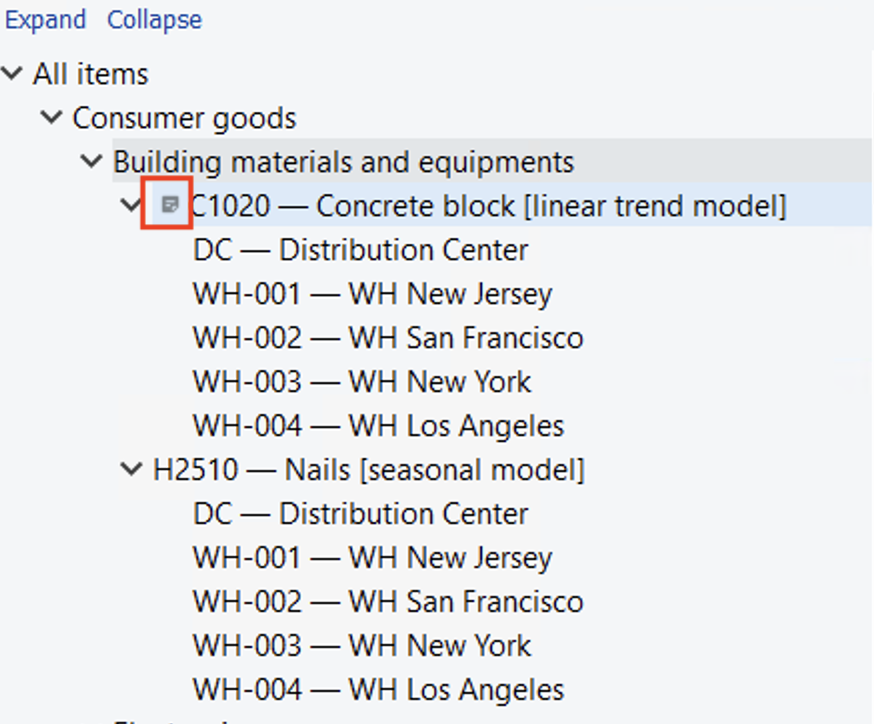
The title of the dialog contains the username specified in the General settings. If the name is empty, the name Anonymous is used. The icon is added to the items with notes in the Reports, Inventory, and Distribution Center. In the Tree view, such items are prefixed as shown below.
If you hover over the cell with the triangle, Streamline pops up a little tooltip, showing the content of the note, its date, and the user who wrote it.
Item > Edit note opens the Edit note dialog allowing to change the note. It also shows, who last edited the note, and when that was.
Item > Explain calculation is designed to show and explain Streamline’s planning process for each planning item.
Help > Documentation opens the Streamline’s online documentation in the default browser.
Help > Language allows changing the language of Streamline's user interface.
Help > Move to another computer… is used to deactivate Streamline on the current machine. You can activate the software on another computer later using the same license key.
Help > Check for updates is used to check whether the new version of Streamline is available.
The toolbar contains the most commonly used operations and options.

New button is used to create a new project from different data sources.
Open… is used to open an existing project.
Save saves a new project or save changes to the already created project. Update data loads new data from the data source into the current project, for example, a new sales period.
 Manage book (
 Help
Help