User Guide
1. Streamline Client
2.Streamline Server
3. Starting Up
4. Connecting data
5. Demand and Sales Forecasting
6. Inventory Planning
7. Reference
1. Streamline Client
2.Streamline Server
3. Starting Up
4. Connecting data
5. Demand and Sales Forecasting
6. Inventory Planning
7. Reference
 Add this page to your book
  Remove this page from your book
 Streamline is able to optimize your inventory by releasing frozen capital internally, and replenish your locations using your own overstocks instead of making any more replenishment orders from your suppliers or distribution centers.
If your business is spread out over several separate regions so that each of them contains a set of locations where inventory transfers are allowed, Streamline can account for these constraints and generate transfers within the given areas.
In this article you will learn:
To demonstrate all of these, we use a little project based on a database source. We have only two products here, t-shirt and dress that are sold in three stores, east, north and west (see figure below).
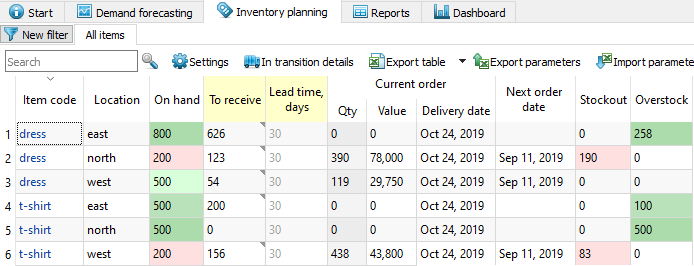
There are overstocks for three planning items, and, at the same time, two items have stockouts. Let's see, if Streamline can restock the required quantities using intersite transfers. By default, the intersite optimization feature is disabled. Let's enable it.
To enable intersite optimization:
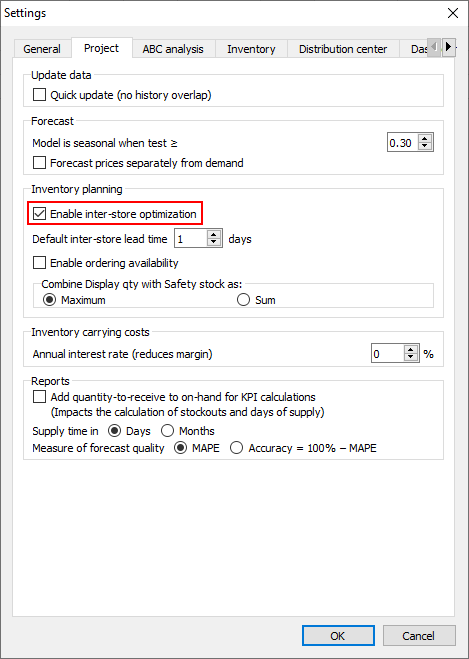
There is also a control for setting the default lead time for a transfer, in case the destination location is not supplied from a DC normally – Default intersite lead time. By default, it is 1 day.
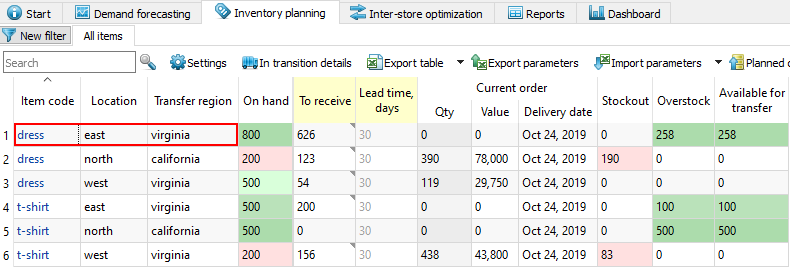
After we click OK, a new column Available for transfer has been added into the Inventory planning tab, and a new tab called Intersite optimization has been added into the set of application tabs (see figure below).
![]()
The Available for transfer column shows an overstock quantity that can be used to replenish other locations through intersite transfers. It indicates the minimal expected overstock amount during the Lead time (in our case, 30 days).
As you see from the figure below, the available quantity is enough to cover both stockouts.
![]()
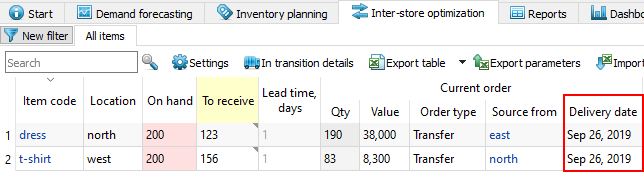
Let's proceed to the Intersite optimization tab and see the suggested transfers (see figure below).
![]()
We have two transfers here, each covers the required stockout at a particular location completely. Streamline uses a special method to generate intersite transfers. The quantity to transfer not always equals to the Stockout amount. It is found as a minimum between replenishment quantity recalculated for the Default intersite lead time (or lead time from DC) and Stockout. In our example, the minimum drop to the Stockout for both transfers. Let's check this out.
To do this, we go to the Inventory planning tab and set Lead time to 1 day for items with stockouts (see figure below).
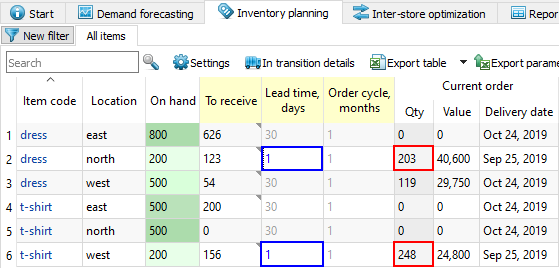
As you see, suggested quantities 203 and 248 are bigger than the corresponding stockouts 190 and 83.
Now, let's explain how Streamline calculates the delivery date for transfer orders.
Streamline determines the delivery date for a transfer following the logic:
Delivery date = Today date + Lead time,
where:
Let's demonstrate both situations.
Our example doesn't have a distribution center configured, it contains stores only. The today date is Sep 25, 2019, thus, Streamline determines the delivery date as Sep 26, 2019 and shows it in the Delivery date column (see figure below).
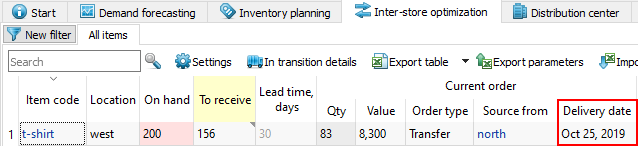
To illustrate the second case, we have enabled distribution center and set it to the east location. The Lead time is 30 days. Now, the delivery date is Oct 25, 2019 (see figure below).
Now, let us show how to introduce region constraint in the optimization.
To enable Streamline to put a region constraint on the generated transfers, the Transfer region data type should be configured and imported along with other information about your inventory. To do this, we will reconfigure our connection setting to the database by completing the following steps:
![]()
3. Now we match this column to the Transfer region meaning selected from the dropdown (see figure below).
![]()
4. To import the column, we click OK.
After application the transfer region constraint, the transfer of 190 units for dress has disappeared (see figure below).
![]()
That has happened because the location with the overstock is located in a different region (see figure below).
To export intersite transfer orders:
![]()
There are several exporting options:
3. We click the Create button to export our orders right to the database.
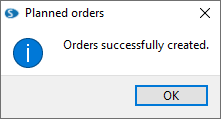
As soon as orders have been exported, Streamline:
Let's check this. We click the In transition details button found on the toolbar to open the In transition details dialog (see figure below).
![]()
Now, along with other orders which are to be received, Streamline shows the just now exported orders. These orders got an Export mark in the Order number column.
 Manage book (
 Help
Help