User Guide
1. Streamline Client
2.Streamline Server
3. Starting Up
4. Connecting data
5. Demand and Sales Forecasting
6. Inventory Planning
7. Reference
1. Streamline Client
2.Streamline Server
3. Starting Up
4. Connecting data
5. Demand and Sales Forecasting
6. Inventory Planning
7. Reference
 Add this page to your book
  Remove this page from your book
 In order to import data using this guide, you need a NAV developer license and Microsoft Dynamics NAV 2013 or higher. If you do not have such a license or have an older NAV version, you can create a new project using the Dynamics NAV connection.
Streamline establishes a web connection in order to import data from NAV.
Open the Dynamics NAV connection dialog by clicking menu File > New > Dynamics NAV connection.
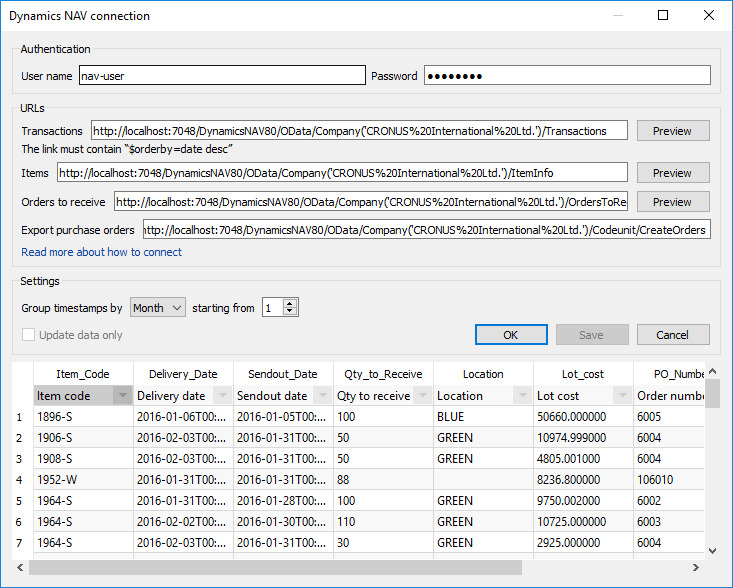
In the Authentication section, fill in the credentials of your Windows account that has permissions to start NAV.
In the URLs section you should set up four NAV web-services’ URLs. The first three of them should return information about:
And the last one is purposed to create purchase orders in NAV (Create Purchase Orders service). A guide on how to create the web-services is given below.
The Settings section allows you to aggregate imported data by a given period and limit the import by using the starting from parameter.
The first three services read data from NAV and the last one (Creating Purchase Orders) – writes them into NAV. Each read-service returns a result of SQL-queries of which data are read by the application. To import data into Streamline, the connector uses the Database connection functionality. Thus, the data that can be imported using these services are limited by the Database connection capabilities.
Let’s consider creating a read-service.
To create a read-service we need to:
Let’s consider creating the Orders to receive service. Other services can be created using the same actions. To demonstrate it, we will use the CRONUS Company demo database, shipped with NAV.
First, we need to create a SQL view that returns a table having Item code, Location, Arrival Date and Quantity columns. To do this, open SQL Server Management Studio and create a new query by clicking menu File > New > Query with Current Connection. Paste the following code in the newly created query-file:
USE [NAVDEMO]
GO

CREATE VIEW [dbo].[CRONUS International Ltd_$Orders TO receive] AS
SELECT
	i.No_ AS [Item Code],
	l.[Expected Receipt DATE] AS [Delivery DATE],
	l.[ORDER DATE] AS [Sendout DATE],
	l.[Outstanding Qty_ (Base)] - l.[RETURN Qty_ TO Ship (Base)] AS [Qty TO Receive],
	l.[Location Code] AS Location,
	l.[Unit Cost (LCY)] * (l.[Outstanding Qty_ (Base)] - l.[RETURN Qty_ TO Ship (Base)]) AS [Lot cost],
	l.[Document No_] AS [PO NUMBER]
FROM dbo.[CRONUS International Ltd_$Purchase Line] l
INNER JOIN dbo.[CRONUS International Ltd_$Item] i
  ON l.No_ = i.No_
WHERE l.[Outstanding Qty_ (Base)] - l.[RETURN Qty_ TO Ship (Base)] > 0
  AND l.Type = 2
  AND l.[Document TYPE] = 1
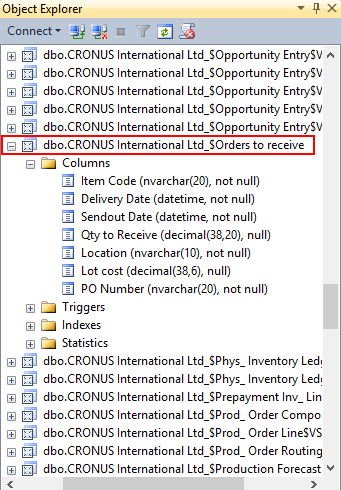
After clicking the menu Query > Execute, you should see the newly created view under the Views in the Object Explorer tree (see fig. below). If it does not appear, select the Views and click menu View > Refresh.
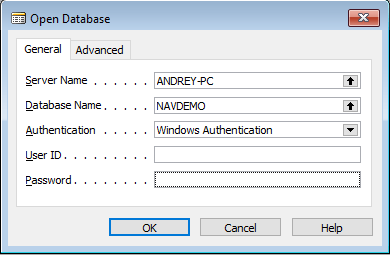
Now, we need to create a NAV table that will be attached to the Orders to receive view. Open Dynamics Development Environment and click File > Database > Open. In the Open Database dialog, enter the server and database name, and set authentication to Windows Authentication. Click OK.
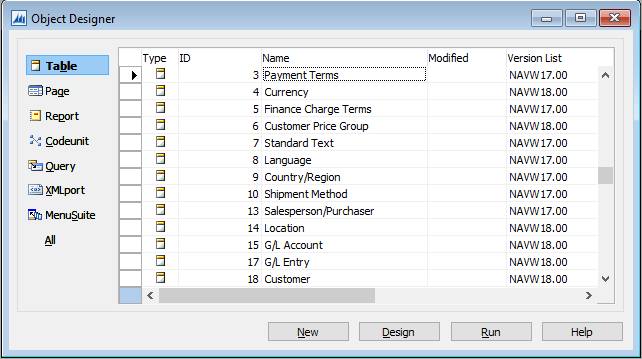
Click menu Tools > Object Designer. On the left side of the window, select the Table category and click the New button.
Now, we need to declare columns of the new table with exactly the same names and compatible datatypes as the fields in the Orders to receive view.
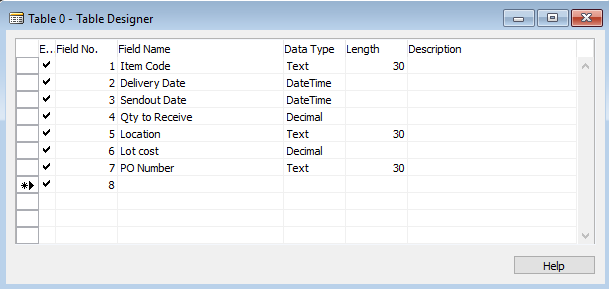
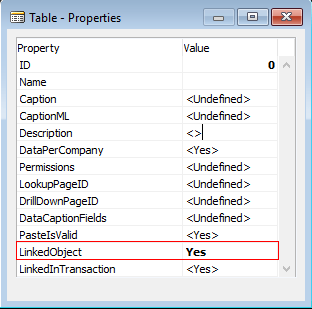
After that set the cursor on the next empty field and click menu View > Properties. In the Table Properties window set the LinkedObject property to Yes. This will link our Orders to receive view to this table.
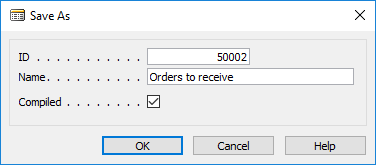
Close the window and close the Table Designer window. NAV will prompt you to save the changes, click Yes. The Save As dialog asks you to enter table ID and Name. According to the NAV documentation, the user-defined ID range is [50,000-99,999], so we can choose any unused value. The Name must be the same as the Orders to receive view name, in our case, “Orders to receive”.
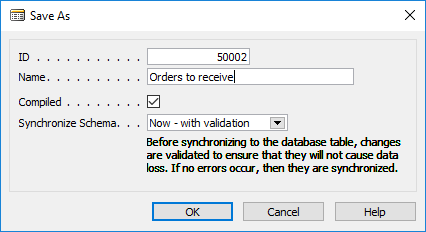
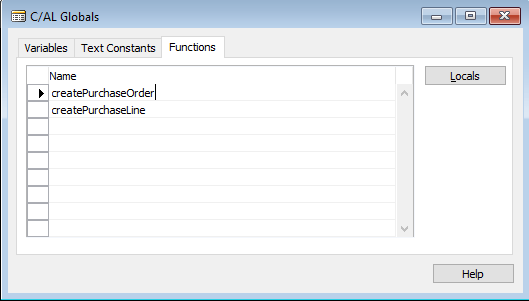
Click OK. Now the Orders to receive table will appear in the list.
![]()
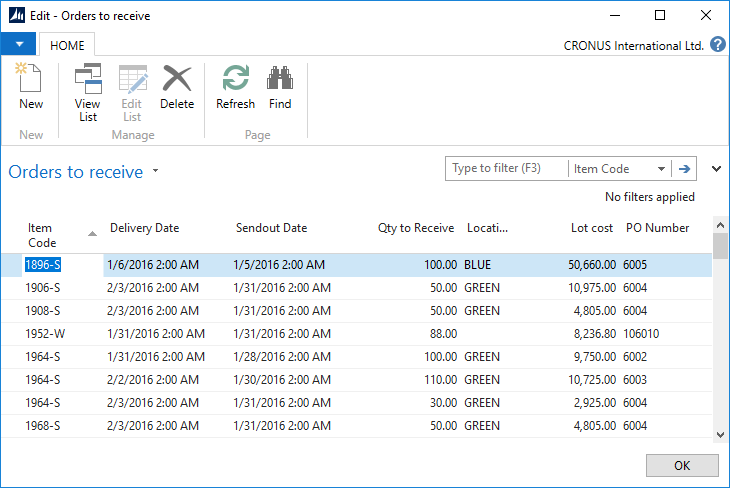
To test it, click the Run button. This will launch the Dynamics NAV Client and shows the result in a separate window.
NAV allows publishing a Page, Query or CodeUnit object as a web-service. . In our case Pages will be used to expose the Orders to receive and Item Info read-services and a Query – to expose the Transactions service. So let’s create a page that will display the Orders to receive table.
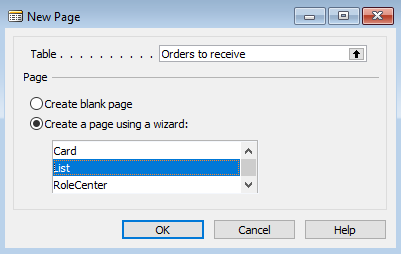
Select the Page category in the Object Designer window and click the New button. In the Table field enter the table name you want to show on the new page. In our case, this is the Orders to receive table. Click Create a page using a wizard option and select List from the choices. Click OK.
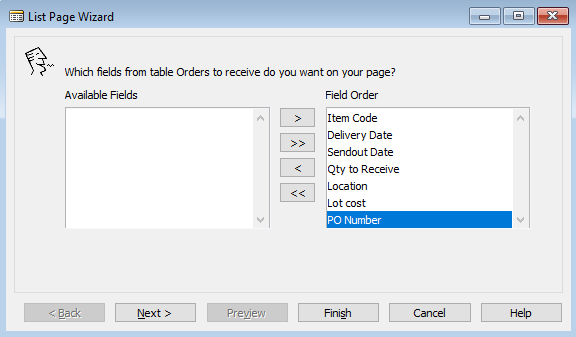
Add all the fields on the page and click the Finish button. Close the Page Designer dialog, and click Yes to save the changes. Enter page ID (choose any unused id from the range described above). Type a name for the page and click OK in the Save As dialog.
After that, the Orders to receive page will appear in the list.
Finally, let’s publish the created page as a web-service.
Run the NAV Client, go to Departments > Administration > IT Administration > General. Click on the Web Services link in the Lists section.

Click the New button in the toolbar. In the New – Web Services window, set the cursor on the first empty line. Choose Page in the Object Type column, type the page ID in the Object ID column (in our case ‘50002’). Enter the service name in the Service Name column (this name will be a part of the web-service URL). Publish the service by selecting the Published checkbox.
![]()
To test the web-service, select it and its link in the OData URL column. The URL will be opened in the default browser. The result should be similar to:
<?xml version="1.0" encoding="utf-8"?> <feed xml:base="http://localhost:7048/DynamicsNAV80/OData/" xmlns="http://www.w3.org/2005/Atom" xmlns:d="http://schemas.microsoft.com/ado/2007/08/dataservices" xmlns:m="http://schemas.microsoft.com/ado/2007/08/dataservices/metadata"> <id>http://localhost:7048/DynamicsNAV80/OData/Company('CRONUS%20International%20Ltd.')/OrdersToReceive</id> <title type="text">OrdersToReceive</title><updated>2019-06-26T14:34:41Z</updated><link rel="self" title="OrdersToReceive" href="OrdersToReceive" /> <entry m:etag="W/"'32%3BUsMAAAF7MQA4ADkANgAtAFMAAAAAAA%3D%3D1%3B00%3B'""> <id>http://localhost:7048/DynamicsNAV80/OData/Company('CRONUS%20International%20Ltd.')/OrdersToReceive('1896-S')</id> <category term="NAV.OrdersToReceive" scheme="http://schemas.microsoft.com/ado/2007/08/dataservices/scheme" /> <link rel="edit" title="OrdersToReceive" href="Company('CRONUS%20International%20Ltd.')/OrdersToReceive('1896-S')" /> <title /> <updated>2019-06-26T14:34:41Z</updated> <author><name /></author> <content type="application/xml"><m:properties> <d:Item_Code>1896-S</d:Item_Code> <d:Delivery_Date m:type="Edm.DateTime">2016-01-06T00:00:00Z</d:Delivery_Date> <d:Sendout_Date m:type="Edm.DateTime">2016-01-05T00:00:00Z</d:Sendout_Date> <d:Qty_to_Receive m:type="Edm.Decimal">100</d:Qty_to_Receive> <d:Location>BLUE</d:Location> <d:Lot_cost m:type="Edm.Decimal">50660.000000</d:Lot_cost> <d:PO_Number>6005</d:PO_Number> <d:ETag>32;UsMAAAF7MQA4ADkANgAtAFMAAAAAAA==1;00;</d:ETag> </m:properties> </content> </entry> <entry m:etag="W/"'32%3BUsMAAAF7MQA5ADAANgAtAFMAAAAAAA%3D%3D1%3B00%3B'""> <id>http://localhost:7048/DynamicsNAV80/OData/Company('CRONUS%20International%20Ltd.')/OrdersToReceive('1906-S')</id> <category term="NAV.OrdersToReceive" scheme="http://schemas.microsoft.com/ado/2007/08/dataservices/scheme" /> <link rel="edit" title="OrdersToReceive" href="Company('CRONUS%20International%20Ltd.')/OrdersToReceive('1906-S')" /><title /> <updated>2019-06-26T14:34:41Z</updated> <author><name /></author> <content type="application/xml"><m:properties> <d:Item_Code>1906-S</d:Item_Code> <d:Delivery_Date m:type="Edm.DateTime">2016-02-03T00:00:00Z</d:Delivery_Date> <d:Sendout_Date m:type="Edm.DateTime">2016-01-31T00:00:00Z</d:Sendout_Date> <d:Qty_to_Receive m:type="Edm.Decimal">50</d:Qty_to_Receive> <d:Location>GREEN</d:Location> <d:Lot_cost m:type="Edm.Decimal">10974.999000</d:Lot_cost> <d:PO_Number>6004</d:PO_Number><d:ETag>32;UsMAAAF7MQA5ADAANgAtAFMAAAAAAA==1;00;</d:ETag> </m:properties> </content> </entry> …
Click OK to close the New – Web Services window.
The URL for the Orders to receive field of the Dynamics NAV connection dialog in our example is: http://localhost:7048/DynamicsNAV80/OData/Company('CRONUS%20International%20Ltd.')/OrdersToReceive
Generally, you will need to replace localhost with the IP of the machine running the NAV Server.
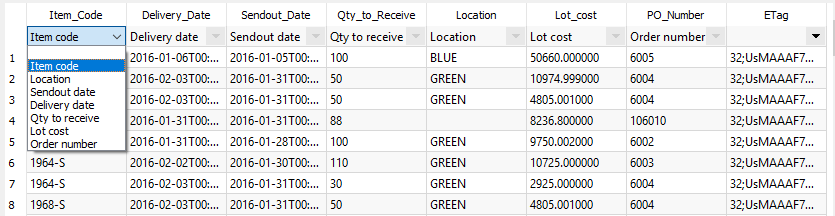
In order to understand read-service data correctly by Streamline, we need to set up the proper column type for each of the table columns returned by a service. To do this, click on the Preview button near the read-service link of the NAV connection dialog. The result of the query will appear in the table below.
Click on the combo-box under each column header and choose the most appropriate type in the drop-down list.
Repeat steps 1-5 for the Item info, and Orders to receive services. You can download SQL queries for all the read-services: items.sql, transactions.sql, orders-to-receive.sql.
For the Transactions service the third step is creating a Query instead of creating a Page (explained below).
Streamline requires that Transactions service returns records ordered by date. Therefore we will create a query that orders the Transactions table by date and then publish it as a web-service.
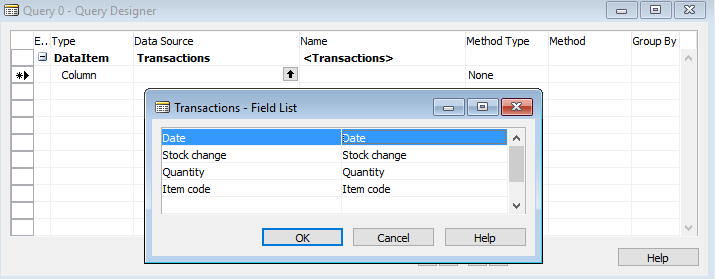
Go to the Query category in the Object Designer window and click the New button. Leave the Type as it is by default (DataItem). In the Data source column click on the arrow and choose the Transactions table in the appeared list. Now, let’s add all the columns of the table in the query. To do this, set the cursor on the next line (the Type will be set to ‘Column’ automatically) and click the arrow in Data Source column. Choose one of the table fields. Repeat this procedure until all the fields are added to the query.
To open the query properties, set the cursor on the last line of the Query dialog and go to menu View > Properties. We need here to set the OrderBy property. Click on the button on the right of the Value column. Set the Direction to the descending order of the Order by dialog. Then click on the arrow in the Column. Choose the Date field in the list.
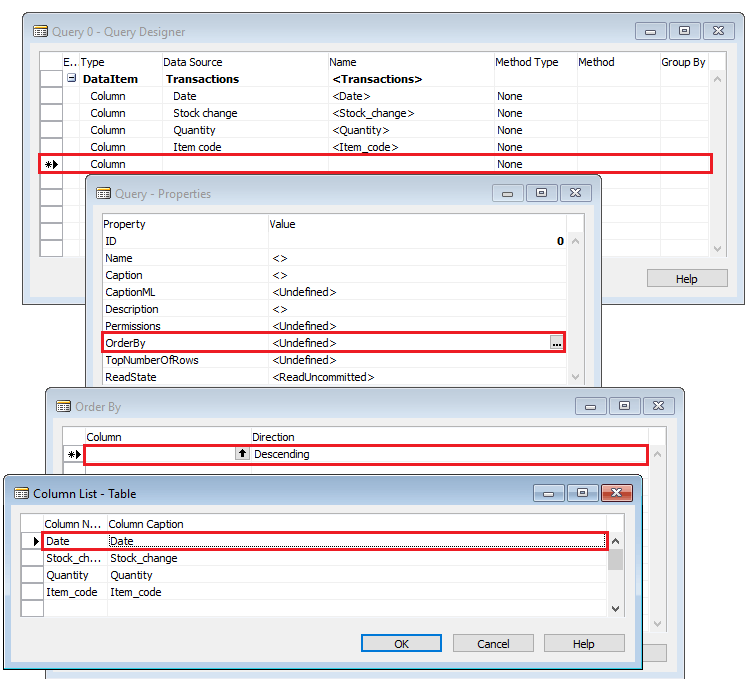
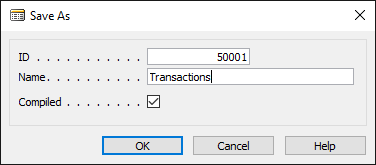
Click OK to close the Order By dialog. Close the Query Properties dialog. Close the New Query dialog. Enter an ID from the user range and a name, for example, ‘Transactions’ and save the query.
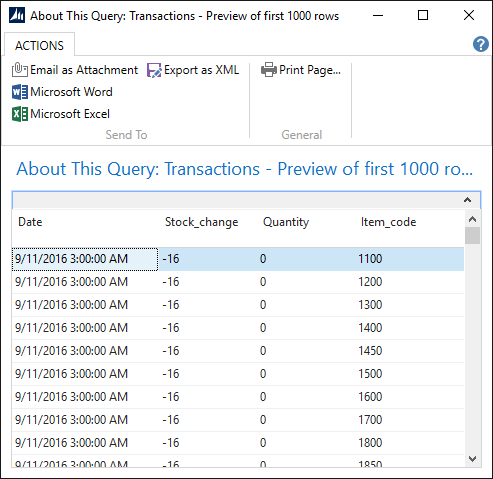
Now this query will appear on the list. To test it, select it and press the Run button. The Transactions table ordered by date will be opened in a separate window.
The link for the Transactions service in the Dynamics NAV connection dialog must also contain the orderby parameter: "http://localhost:7048/DynamicsNAV80/OData/Company('CRONUS%20International%20Ltd.')/SalesHistory?&$orderby=Date desc"
Now, let’s make up a web-service that creates purchase orders in NAV. We need to create two functions: the first creates an order by the given vendor code and returns its number, the second adds a purchase line into the purchase order using the given order number. A purchase line is described by item code and item quantity.
To do this, we will use NAV Codeunits. So, open NAV Development Environment, select Codeunit in the left menu and click the New button.
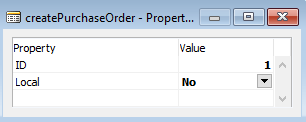
First, we need to declare these functions in the codeunit. To do this, click the menu View > C/AL Globals. Click on the Functions tab of the C/AL Globals window. Let’s name them createPurchaseOrder and createPurchaseLine. Enter these names into the list.
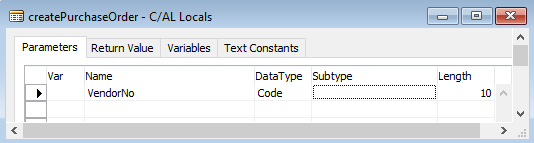
Set the cursor on the line with the function name, click menu View > Properties and set Local property to No.
Now, let’s specify the declaration of the functions by adding their input and output parameters. Set the cursor on the line with the createPurchaseOrder function, and click on the Locals button.
The input parameters are declared on the Parameters tab. Let’s add a parameter named VendorNo. Its DataType is Code.
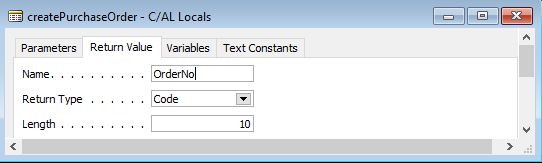
The return value of the function will be OrderNo with data type Code also.
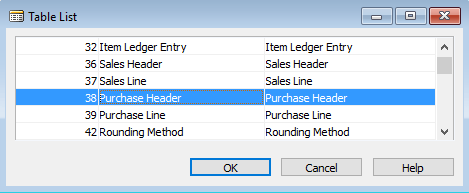
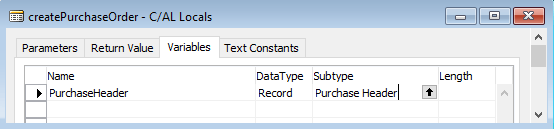
In the body of the function, we will use a local variable that is linked to the record of the NAV PurchaseHeader table. Function’s local variables are declared on the Variables tab. Add a variable named PurchaseHeader with DataType of Record. To set the Subtype, click on the arrow in the right corner of the field and choose the 38th line which is Purchase Header.
Do the same actions for the createPurchaseLine using the information from the table below.
| Name | DataType | Subtype | Length |
|---|---|---|---|
| Input variables | |||
| OrderNo | Code | 10 | |
| ItemNo | Code | 20 | |
| Quantity | Integer | ||
| Local variables | |||
| PurchaseLine | Record | Purchase Line | |
| PurchaseHeader | Record | Purchase Header | |
| NextLineNo | Integer | ||
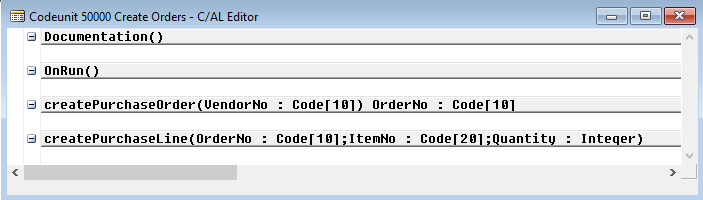
After completing all of this, you should have the following functions’ declarations in the C/AL Editor window:
Now, let’s write the functions’ bodies. Set the cursor on the next empty line after the declaration of the createPurchaseOrder function and copy-paste the following code:
PurchaseHeader.INIT;
PurchaseHeader.VALIDATE("Document Type",PurchaseHeader."Document Type"::Order);
PurchaseHeader.VALIDATE("Buy-from Vendor No.",VendorNo);
PurchaseHeader.INSERT(TRUE);
EXIT(PurchaseHeader."No.");
Add the following body for the createPurchaseLine function:
PurchaseLine.RESET;
PurchaseLine.SETRANGE("Document Type",PurchaseHeader."Document Type"::Order);
PurchaseLine.SETRANGE("Document No.",OrderNo);
IF PurchaseLine.FIND('+') THEN
  NextLineNo := PurchaseLine."Line No." + 10000
ELSE
  NextLineNo := 10000;
IF NextLineNo = 10000 THEN

CLEAR(PurchaseLine);
PurchaseLine.INIT;
PurchaseLine."Document Type" := PurchaseHeader."Document Type"::Order;
PurchaseLine."Document No." := OrderNo;
PurchaseLine."Line No." := NextLineNo;
PurchaseLine.INSERT(TRUE);
PurchaseLine.VALIDATE(Type,PurchaseLine.Type::Item);
PurchaseLine.VALIDATE("No.", ItemNo);
PurchaseLine.VALIDATE(Quantity,Quantity);
PurchaseLine.MODIFY(TRUE);
Close the codeunit, click OK with the checked Compiled option.

 Manage book (
 Help
Help