User Guide
1. Streamline Client
2.Streamline Server
3. Starting Up
4. Connecting data
5. Demand and Sales Forecasting
6. Inventory Planning
7. Reference
1. Streamline Client
2.Streamline Server
3. Starting Up
4. Connecting data
5. Demand and Sales Forecasting
6. Inventory Planning
7. Reference
 Add this page to your book
  Remove this page from your book
 The goal of inventory planning is to place the right purchase orders at the right time. Streamline enables you to create purchase orders based on the generated purchase recommendations. These recommendations are considered as a starting point for deciding what to order currently from your suppliers.
Streamline allows you to review and adjust the ordered quantity before you send out the purchase order to the supplier. It also offers a range of factors that you can use to determine which items to include in the order. Among them:
Streamline automatically calculates all the listed factors if necessary data is imported. The Excess order and Days of supply are always calculated. Required data for the other factors are shown in the table below.
| Factors | Required data |
|---|---|
| ABC analysis based on revenue. | Item selling price |
| Turn-earn index, Gross-margin. | Item balance value or item purchase price |
| Purchase line value. | Item purchase price |
There are two ways to create purchase orders in Streamline:
Let us show you how to create purchase orders using these methods.
To create purchase orders in Streamline:
1. Go to the Inventory planning tab and click the Purchase orders button in the tab toolbar. Then, Streamline opens the Purchase orders preview dialog (see figure below).
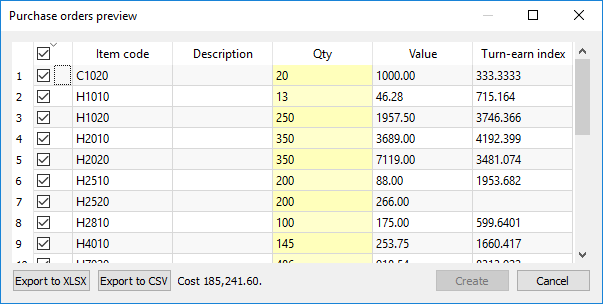
In the dialog, you can:
The Export to CSV button is specially designed to export very large tables.
In our example, the data source is a spreadsheet, that’s why the Create button is greyed out. However, if you create a project using
Streamline is able to create purchase orders in the system which is the project's data source. For example, if you create a project from a QuickBooks company file, the Create button automatically sends the selected purchase order lines into QuickBooks and creates corresponding purchase orders there. We will show how that works later in this article.
2. Let’s sort the table by the Turn-earn index column to find out the most profitable items (see figure below).

3. Now, as an example, let’s select several items and adjust the ordered quantity for some of them (see figure below).
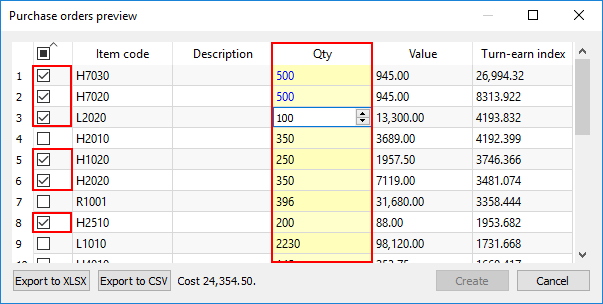
Streamline automatically marks the adjusted quantities with blue.
4. Finally, let’s export the selected lines into Excel by clicking the Export to XLSX button (see figure below).

In the next section, we show how you can create and send purchase orders in a 3-rd party system.
In order to send purchase orders into your ERP system, you should create a Streamline project using a connection to your system. Streamline has build-in bi-directional connections to:
Moreover, if your system is not on the list, you can establish a similar connection to it by using the Database connection.
Further, we show how to create and send purchase orders in QuickBooks.
First, we created a project from a QuickBooks sample company file.
To create and send purchase orders to QuickBooks, do the following:
1. Go to the Inventory planning tab and click the Purchase orders button in the tab toolbar (see figure below).

2. Select the items you want to include in the purchase orders in the Purchase orders preview dialog opened. Adjust the quantities if necessary (see figure below).
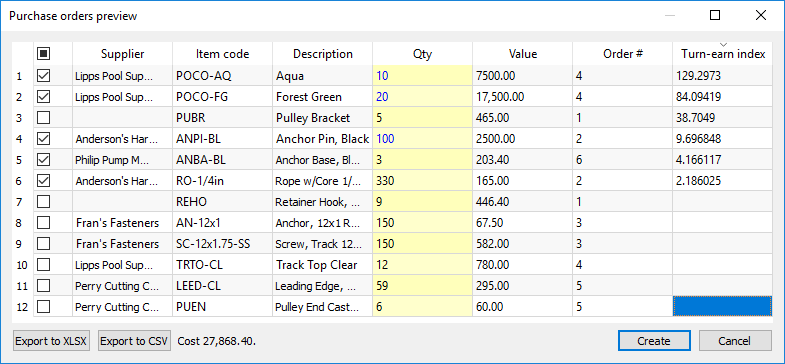
As you see, we sorted the table by the Turn-earn index column, selected top 5 items having suppliers set, and adjusted the quantities for some of them.
Empty cells in the Supplier column mean that those items don’t have preferred supplier set in QuickBooks.
3. Click the Create button to send and create purchase orders in QuickBooks. If everything is okay, Streamline notifies you that the orders have been created successfully (see figure below).
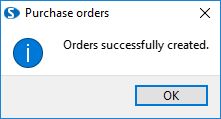
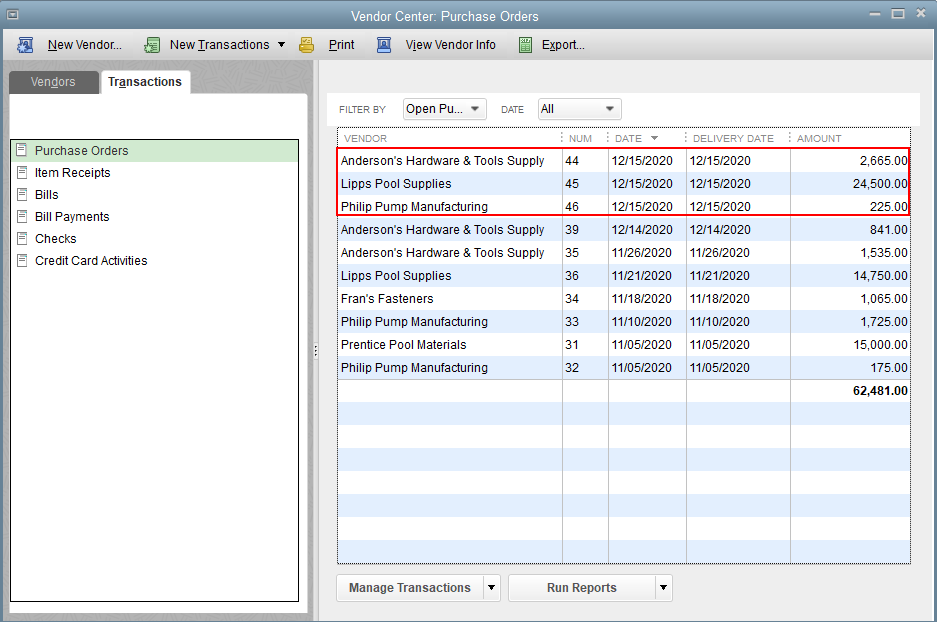
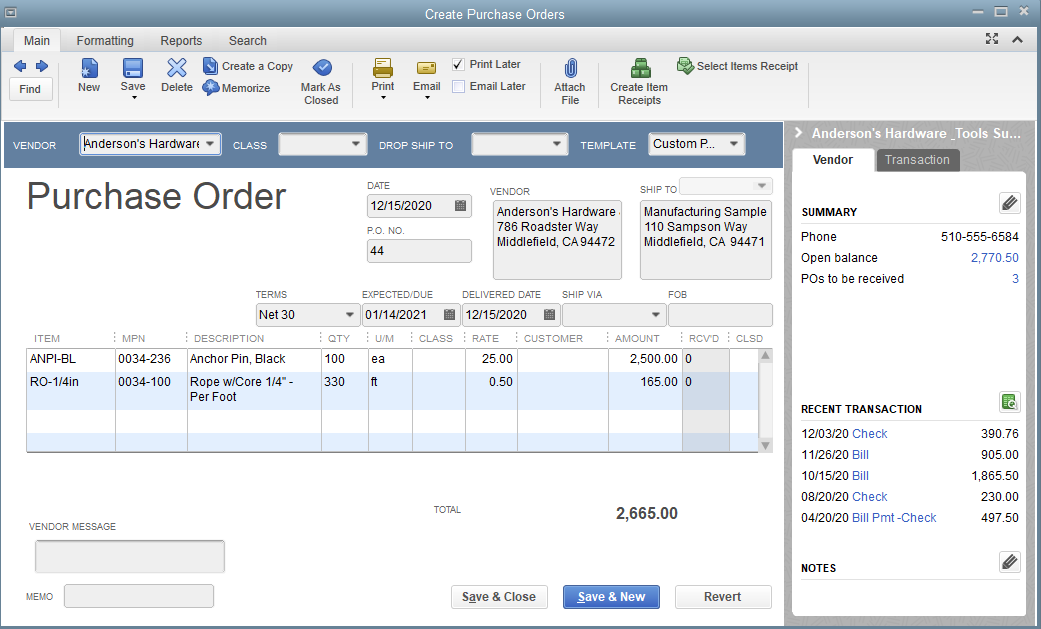
As you see, Streamline has created three new orders (#44, #45, and #46) in QuickBooks (see figure below).
This way can be used as an alternative to the standard workflow that exploits the Purchase order preview dialog. This method is designed to cover the situations when the way you create purchase orders differs from the standard. The idea is to offer the planner a range of KPIs that he can use to decide which items to include in the orders. These KPIs include:
Further, we give you a basic idea of how you can use any of these KPIs to create purchase orders. As an example, we use ABC analysis as the KPI.
Here are the steps to follow:
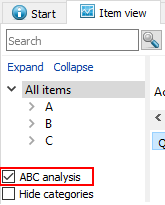
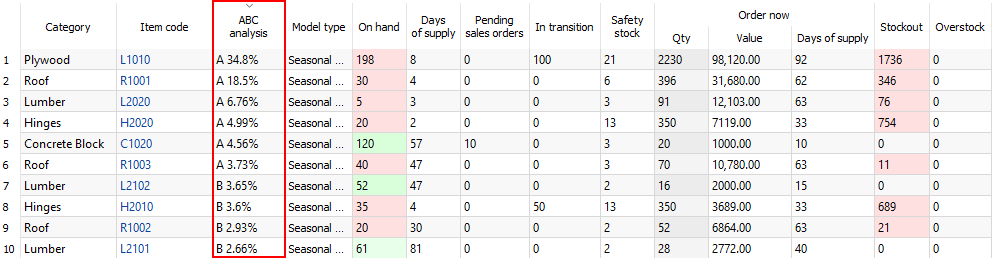
1. Add the necessary KPIs to the inventory report table. In our case, this is the ABC analysis column. To do this, go to the Demand forecasting tab and check the ABC analysis option below the tree in the Tree view (see figure below).
To add any other KPI (from the listed above) in the inventory report:
1. Go to the Inventory planning tab.
2. Click the Settings button in the tab toolbar.
3. Check the necessary option in the Show columns group (see figure below).
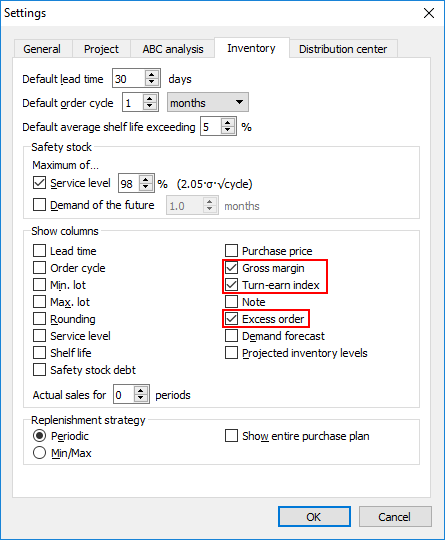
2. Sort the report by the key column by clicking its header. In our case, this is the ABC analysis column (see figure above).
3. Export the report to Excel by clicking the Export report button in the tab toolbar. Streamline automatically creates, opens, and saves an Excel file containing the report table (see figure below).
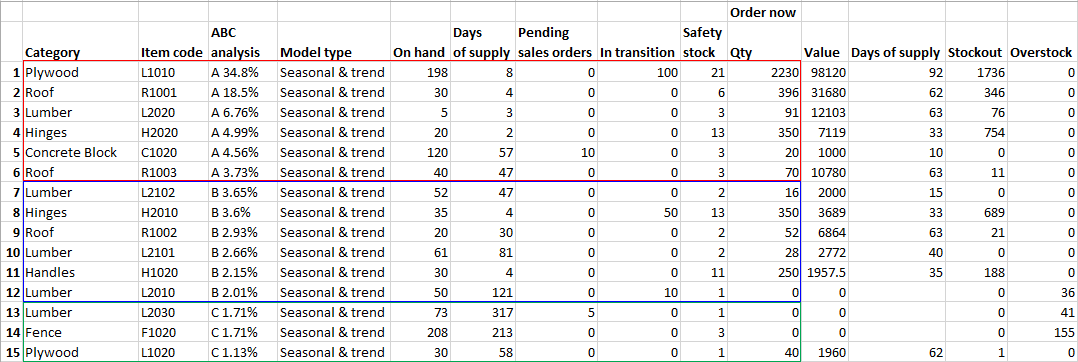
Now, you can continue creating your purchase orders based on the exported table.
 Manage book (
 Help
Help